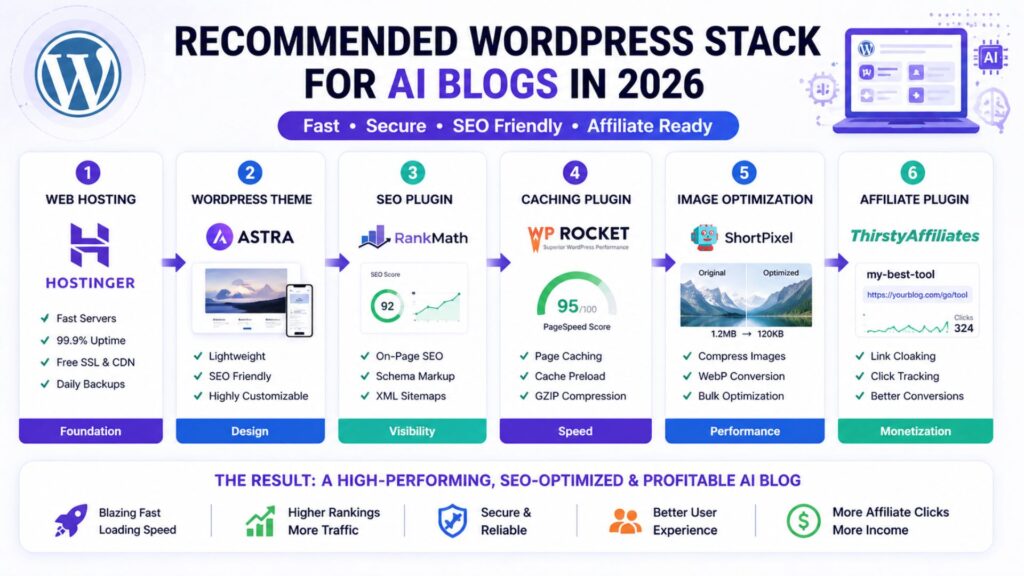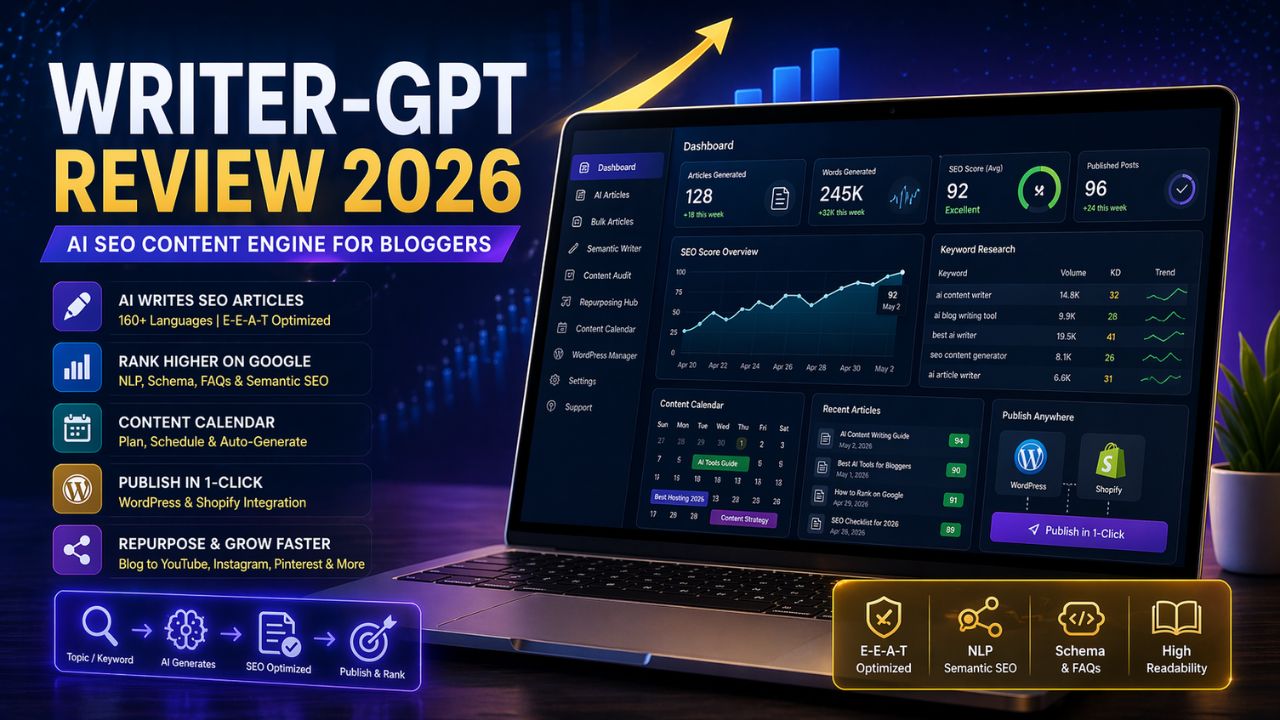
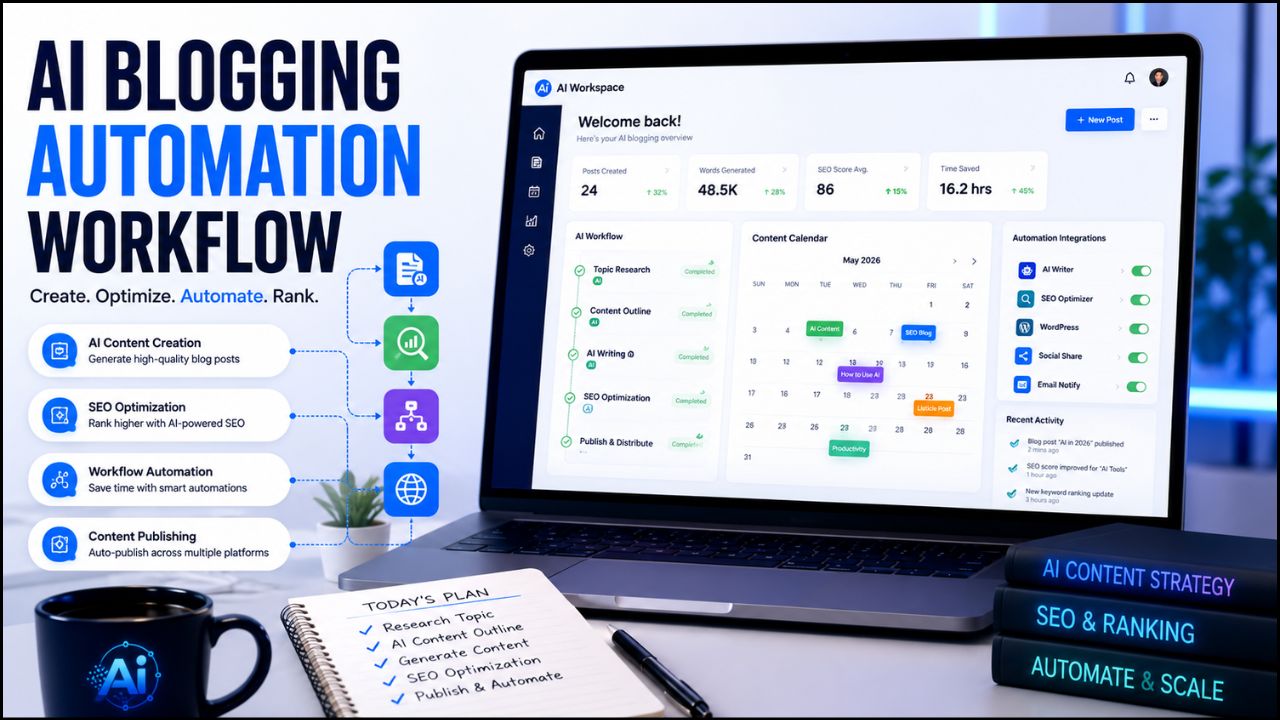
Upgrade Your AI Tools in 2026: 7 Smart Ways to Build a Better AI Workflow

Upgrade Your AI Tools

Your AI tools should make your work easier, not add more confusion to your day.

But that is exactly what happens to many bloggers and creators in 2026. They start with one writing tool, then add a design tool, then try an automation platform, then test a video tool, then subscribe to something else because everyone online says it is “essential.” After a few weeks, their browser is full of bookmarks, their budget is stretched, and their workflow is still messy.

That is why it is important to upgrade your AI tools with a clear strategy instead of chasing every new launch.

Upgrading does not always mean buying more expensive software. Sometimes it means removing tools you do not use. Sometimes it means replacing three average tools with one better platform. Sometimes it means building a simple workflow where writing, visuals, SEO, publishing, and promotion finally connect properly.
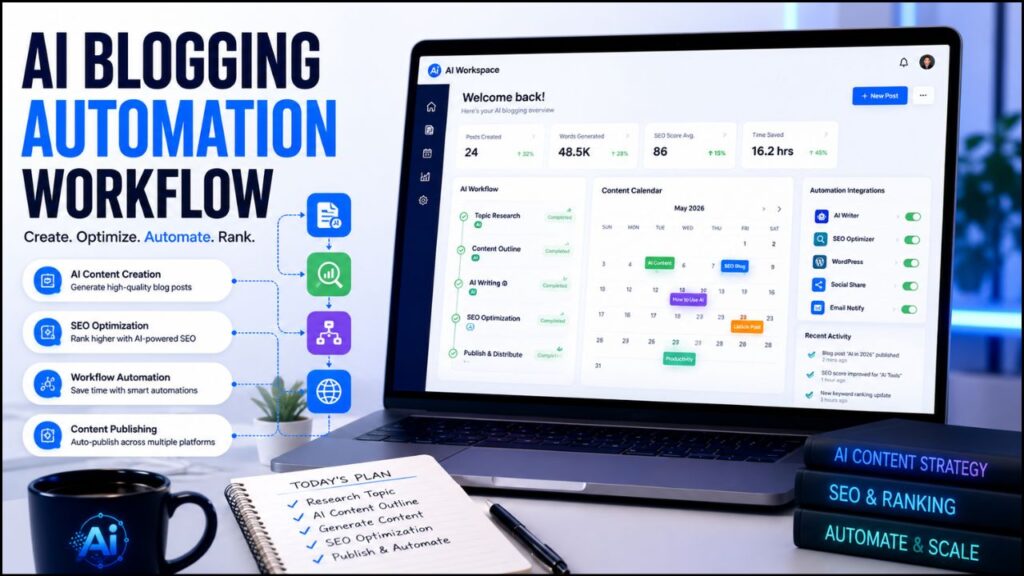
 

Upgrade Your AI Tools


In this guide, you will learn how to upgrade your AI tools in a practical way, especially if you are a blogger, affiliate marketer, creator, freelancer, or small business owner. We will cover what upgrading really means, when your current AI stack is outdated, which tools to improve first, common mistakes, and how to build a cleaner workflow that saves time without making your content feel robotic.

Upgrade Your AI Tools in 2026: What It Really Means

To upgrade your AI tools means improving the way you use AI to complete real work. It is not only about switching from a free plan to a paid plan. It is about making your workflow faster, cleaner, more reliable, and easier to repeat.

A real upgrade can include:

  • Choosing better tools for writing, research, design, video, SEO, or automation
  • Removing duplicate tools that do the same job
  • Creating reusable prompts and templates
  • Connecting tools so tasks move smoothly from one step to another
  • Adding quality checks before publishing AI-assisted content
  • Tracking which tools actually help you save time or earn money

For example, a beginner blogger may start with ChatGPT for writing ideas and Canva for images. That is enough at the beginning. But once the blog grows, the same person may need a better content calendar, a workflow automation tool, a stronger SEO process, and a consistent system for updating old posts.

That is when upgrading makes sense.

The goal is not to look advanced. The goal is to reduce friction. If your tools help you publish better content more consistently, they are doing their job.

Why Upgrading AI Tools Matters for Bloggers and Creators

AI is now part of almost every content workflow. Bloggers use it for outlines, research, draft writing, image ideas, social captions, email sequences, video scripts, and automation. But the quality of your results depends heavily on the quality of your system.

A weak system creates weak output.

If your AI workflow is random, you may publish content that sounds generic, misses search intent, uses outdated facts, or repeats the same phrases across multiple posts. That can hurt trust with readers and make your site feel less useful.

A stronger workflow does the opposite. It helps you create content that is structured, edited, fact-checked, visually consistent, and easier for readers to understand.

Google’s own guidance focuses on helpful, reliable, people-first content. That means your AI tools should support real usefulness, not just produce more words. You can read Google’s official guidance on creating helpful, reliable, people-first content if you want to understand how search quality is framed from Google’s side.

For AI Sage Labs, this matters because the audience is not only looking for tool names. They want practical systems. They want to know which tools are worth using, how to use them, and how those tools can help with blogging, affiliate marketing, content creation, or online income.

That is why a smarter AI setup can become a real advantage.

Signs Your Current AI Tool Stack Is Outdated

You do not need to change your AI stack every time a new product launches. But there are clear signs that your current setup is slowing you down.

1. You Use Too Many Tools for the Same Task

If you have three writing tools, two image tools, three SEO tools, and four automation accounts, your workflow may be heavier than it needs to be.

Too many tools create decision fatigue. You spend more time choosing where to work than actually finishing the work.

A better approach is to pick one main tool for each job. One writing assistant. One design platform. One SEO process. One automation platform. You can test alternatives, but your daily workflow should stay simple.

2. Your AI Content Sounds Generic

If every post starts the same way, uses the same phrases, and gives the same basic advice, your AI workflow needs improvement.

This often happens when you rely too much on basic prompts like “write a blog post about this topic.” The AI produces a clean draft, but it does not know your audience, your site structure, your monetization strategy, or your personal judgment.

Instead, use prompts that include audience, search intent, tone, examples, internal links, CTA rules, and fact-checking requirements. This single change can make a big difference.

3. You Still Do Repetitive Tasks Manually

If you manually copy every new post into a tracker, manually create social captions, manually format every outline, and manually repeat the same publishing checklist, you may be ready for automation.

Automation does not need to be complicated. Even a simple workflow can save hours each month.

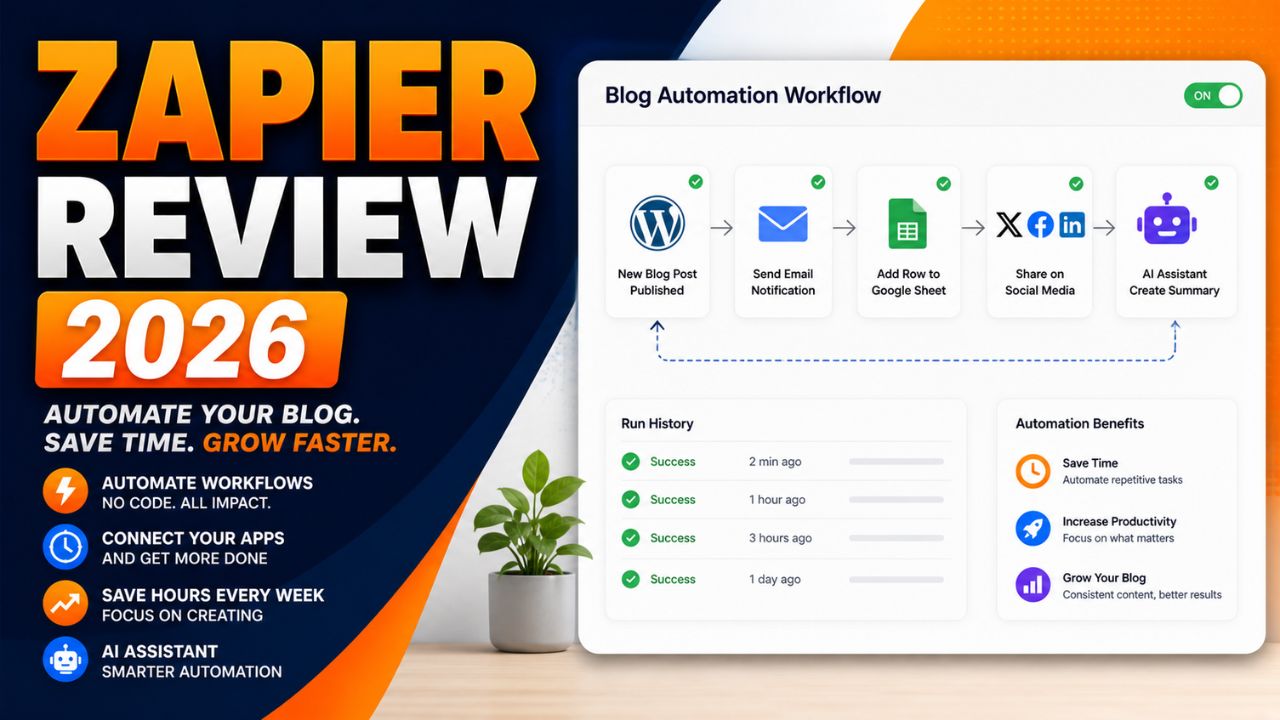
For example, after publishing a WordPress post, you can create a task to design Pinterest pins, add the URL to a spreadsheet, and prepare a social media draft. Tools like Zapier, Make, or n8n can help with this kind of workflow.

4. Your Visuals Do Not Match Your Brand

AI tools can create images quickly, but fast visuals are not always good visuals. If every featured image looks different, your blog may feel less professional.

A better setup uses brand colors, repeatable layouts, consistent image sizes, and a clear thumbnail style. Canva, Leonardo AI, and Stable Diffusion can all help, but the real upgrade is having a visual system.

5. You Do Not Track Results

If you do not know which tools save time, which posts get clicks, which CTAs convert, or which workflow steps create bottlenecks, your tool decisions become guesses.

Before buying more software, track your process for a few weeks. Note how long research takes, how long writing takes, how long editing takes, and which tools you actually open every week.

Data makes upgrading easier.

7 Smart Ways to Upgrade Your AI Tools

The best way to upgrade your AI tools is to improve one part of your workflow at a time. Do not rebuild everything in one weekend. Start with the area that creates the most friction.

1. Start With a Workflow Audit

Before upgrading anything, write down your current workflow.

For a blogger, the workflow may look like this:

  • Choose a topic
  • Research the keyword
  • Create an outline
  • Write the draft
  • Edit the article
  • Add images
  • Add internal links
  • Add affiliate CTAs
  • Publish in WordPress
  • Promote the post
  • Track performance

Now mark the slowest steps. Maybe research takes too long. Maybe images delay publishing. Maybe internal linking is always forgotten. Maybe social promotion never happens.

Upgrade the bottleneck first.

If writing is slow, improve your writing assistant and prompt system. If visuals are slow, improve your Canva templates or AI image workflow. If promotion is slow, add automation. This keeps your upgrades practical instead of random.

2. Build a Smaller, Cleaner AI Stack

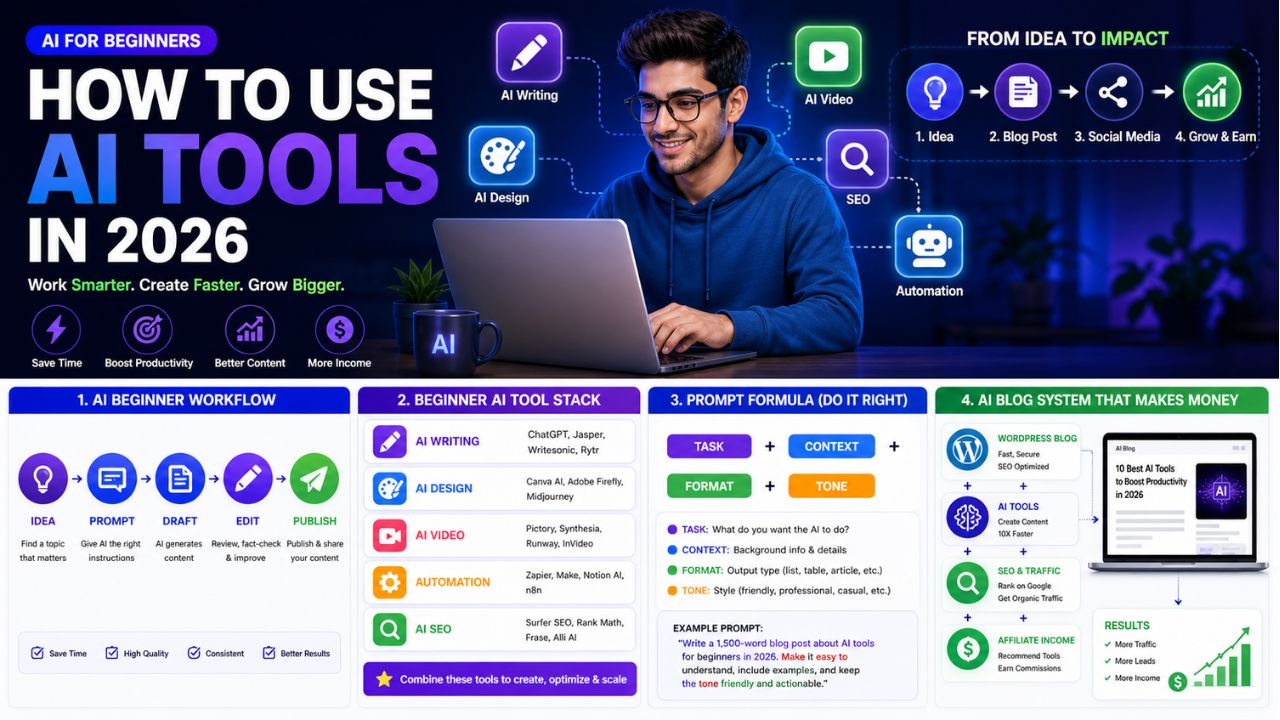
A beginner does not need twenty AI tools. Most bloggers can start with a simple stack:

Workflow Area Tool Type Example Tools
Writing and planning AI writing assistant ChatGPT, Claude, Writesonic
Design AI design tool Canva, Leonardo AI
Video AI video tool Pictory, InVideo AI, Synthesia
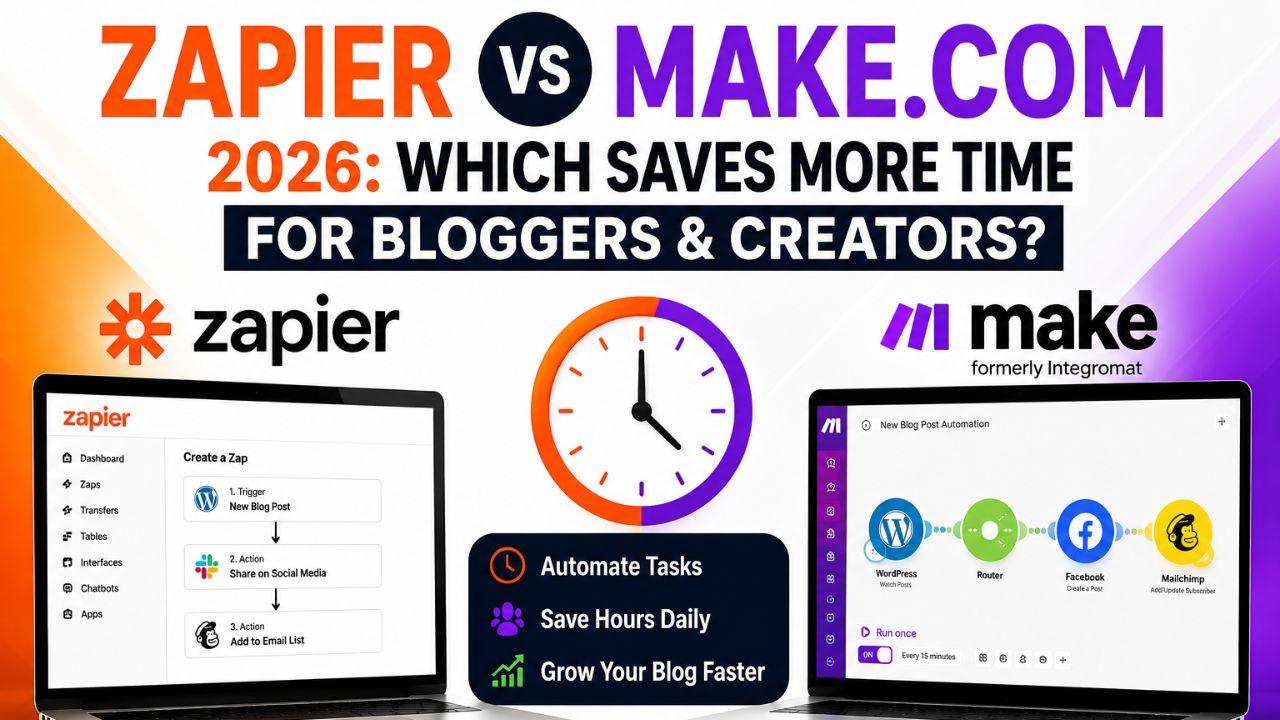
Automation No-code automation tool Zapier, Make, n8n
SEO and publishing SEO plugin or content tool Rank Math, Google Search Console


You can add advanced tools later, but the foundation should stay clean. The best stack is the one you actually use every week.

If you are still building your beginner setup, this internal guide can help: how to use AI tools for beginners in 2026.

3. Upgrade Your Prompt System Before Buying New Tools

Many people think their AI tool is weak when the real problem is their prompt.

A weak prompt gives weak direction. A strong prompt gives the AI a clear task, audience, format, tone, and rules.

Instead of writing:

“Write a blog post about AI tools.”

Use:

“Create a beginner-friendly outline for a 3000-word blog post about upgrading AI tools in 2026. The audience is bloggers and affiliate marketers. Use simple US English, practical examples, RankMath-friendly H2/H3 structure, two internal link opportunities, one trusted external source, and natural CTA placements. Do not use hype.”

That is a much better instruction.

Before paying for another tool, build prompt templates for your common tasks:

  • Blog outline prompt
  • Product review prompt
  • FAQ prompt
  • Meta description prompt
  • Internal linking prompt
  • CTA placement prompt
  • Human editing prompt

Good prompts make almost every AI tool more useful.

4. Add a Real Internal Linking Process

Internal links should not be an afterthought. They help readers discover related content and help search engines understand how your site is connected.

The problem is that many bloggers publish posts first and think about internal links later. That creates broken anchors, missing related posts, and weak content clusters.

A better process is simple:

  • Before writing, choose two related posts to link inside the article
  • Use natural anchor text, not random “click here” text
  • Link to posts that actually help the reader continue the journey
  • Keep a spreadsheet of post titles, slugs, focus keywords, and categories
  • Update old posts when you publish a strong new pillar post

For example, this post naturally connects with 7 trending AI tools in 2026 because readers who want to upgrade their stack also need tool ideas that are useful for bloggers.

This kind of internal linking is cleaner than forcing unrelated posts into the article.

5. Upgrade Your Visual Workflow

Visual content is no longer optional for bloggers. Your post needs a featured image, and your content can often be repurposed into Pinterest pins, YouTube thumbnails, LinkedIn graphics, and short video visuals.

The simplest upgrade is to create reusable templates.

For example, create a template for:

  • Blog featured images
  • Tool review thumbnails
  • Comparison graphics
  • Pinterest pins
  • YouTube thumbnails

Then use AI to support the design process instead of starting from scratch each time.

Canva can help with templates and quick editing. Leonardo AI can help with creative images. Stable Diffusion can help advanced users who want more control. The tool matters, but the system matters more.

If your blog visuals look consistent, readers start recognizing your brand. That builds trust.

6. Add Automation Only After the Workflow Is Clear

Automation is powerful, but it can also create confusion if you use it too early.

Do not automate a messy workflow. First, repeat the task manually a few times. Once the steps are clear, automate the boring parts.

Good beginner automations include:

  • Adding new post URLs to a Google Sheet
  • Creating social media tasks after publishing
  • Sending yourself a reminder to update old posts
  • Saving form submissions into a CRM or spreadsheet
  • Creating draft email newsletters from new blog posts

If you want a deeper beginner explanation, read this guide on what AI automation tools are.

Automation should support your content system. It should not become another complicated project that distracts you from publishing useful content.

7. Create a Quality Control Checklist

The final way to upgrade your AI tools is to add a review process before publishing.

AI can help you move faster, but it can also create mistakes. It may repeat phrases, miss context, use outdated information, or sound too generic. A simple checklist protects your content quality.

Before publishing, check:

  • Does the article answer the reader’s main question?
  • Is the focus keyword used naturally?
  • Does the post include helpful examples?
  • Are internal links connected to real posts?
  • Is there at least one trusted external source?
  • Are affiliate links relevant and not spammy?
  • Does the intro sound different from your other posts?
  • Did you remove hype and generic AI phrases?
  • Is the final verdict clear?
  • Is the affiliate disclosure included at the end?

This checklist is simple, but it makes your AI-assisted content feel more human and more useful.

Best AI Tools to Upgrade First

If you cannot upgrade everything at once, start with the tool category that affects your output most directly.

Writing and Research Tools

Writing tools usually create the biggest time savings for bloggers. They help with topics, outlines, drafts, FAQs, meta descriptions, and content repurposing.

But do not treat them as automatic article machines. Use them for structure and speed, then add your own research, examples, judgment, and editing.

Good writing upgrades include better prompts, saved templates, brand voice instructions, and a consistent editing workflow.

Design and Image Tools

If your blog looks unprofessional, readers may not trust it even if the writing is helpful.

Design tools can help you create better featured images, social graphics, and thumbnails. For most beginners, Canva is the easiest starting point. For AI image generation, Leonardo AI and Stable Diffusion are useful depending on your skill level.

Use these tools to create a recognizable visual style, not random images for every post.

Video Tools

Video tools matter because one blog post can become multiple content assets. A written article can turn into a YouTube script, short video, social clip, or explainer video.

Pictory, InVideo AI, Synthesia, Runway, and Descript all serve different video workflows. The right choice depends on whether you want blog-to-video, avatar videos, advanced editing, or text-based editing.

For bloggers, the first upgrade is usually a blog-to-video tool or a simple editing tool.

Automation Tools

Automation tools help connect apps and reduce manual work. Zapier is beginner-friendly, Make is flexible, and n8n is useful for more technical users who want control.

Start with one simple automation. Do not build a giant system before your content process is stable.

SEO and Tracking Tools

SEO tools help you improve content, but they cannot replace useful writing. Rank Math, Google Search Console, and keyword research tools can help you understand what is working.

For WordPress users, Rank Math is helpful because it turns on-page SEO into a checklist. Just remember that a green score is not the same as a helpful article. Use the score as a guide, not as the final goal.

Recommended AI Workflow for Bloggers

Here is a practical workflow you can use after you upgrade your AI tools:

  1. Choose one topic based on your content plan.
  2. Check the search intent and existing internal link opportunities.
  3. Create an outline with your AI writing assistant.
  4. Add your own examples, notes, and monetization angle.
  5. Draft the article section by section.
  6. Edit manually for clarity and human tone.
  7. Add two internal links to relevant existing posts.
  8. Add one trusted external source where it helps the reader.
  9. Create a 16:9 featured image in your visual tool.
  10. Add natural CTAs for relevant tools, services, books, or hosting.
  11. Publish in WordPress and track performance.
  12. Update the article after 60 to 90 days if needed.

This is simple enough to repeat every week, but strong enough to support long-term growth.

Recommended Setup for AI Bloggers

If you want to turn your AI workflow into a real blog or affiliate site, you need a reliable place to publish your content. Social platforms are useful, but your own website gives you more control over SEO, branding, email capture, and affiliate monetization.

For beginners, WordPress is still one of the best foundations because it is flexible, searchable, and easy to monetize over time.

Build Your AI Blog on a Strong Foundation

If your goal is to publish AI tool reviews, tutorials, and affiliate content, start with a self-hosted WordPress site. Hostinger is a beginner-friendly option for launching a blog without making the setup too complicated.

Start your AI blog with Hostinger

When You Should Hire Help Instead of Doing Everything Yourself

Sometimes the smartest way to upgrade is not another subscription. It is getting help from someone who already knows the workflow.

For example, you may want help with:

  • Setting up WordPress properly
  • Creating a blog design system
  • Building AI automation workflows
  • Designing featured image templates
  • Fixing SEO and internal linking issues
  • Creating video content from blog posts

If you are stuck for weeks trying to set up something technical, hiring help can save time and reduce frustration.

Need Help Building Your AI Workflow?

If you do not want to set up every tool yourself, you can hire freelancers for WordPress setup, AI automation, SEO cleanup, Canva templates, or blog workflow systems.

Find AI and WordPress freelancers on Fiverr

Recommended Book for Thinking Better About AI

Tools change quickly, but good thinking stays useful. If you want to understand how AI fits into real work, decision-making, and creativity, a helpful book to explore is Co-Intelligence: Living and Working with AI by Ethan Mollick.

This book is a good fit for bloggers, creators, and business owners who want to use AI thoughtfully instead of treating it like a magic button.

Recommended Reading

If you want a deeper understanding of how to work with AI in a practical way, this book is a strong next step.

Check Co-Intelligence on Amazon

Common Mistakes to Avoid

Buying Tools Before You Have a Workflow

Do not buy a tool just because it is trending. First, know the task it will solve. If you cannot explain where the tool fits in your workflow, wait before paying.

Using AI to Publish Generic Content

AI can help you write faster, but generic content will not build a strong blog. Add examples, opinions, comparisons, screenshots, and real judgment whenever possible.

Ignoring Internal Links

Internal links should be part of the writing process, not a task you postpone for later. Add them while drafting so your content cluster grows naturally.

Trusting AI Facts Without Checking

AI tools can be wrong. Always check pricing, features, claims, and important facts from official sources before publishing.

Making Every CTA Feel Like a Sales Pitch

Affiliate links should appear where the reader has a clear next step. Hosting makes sense when the reader needs a website. Fiverr makes sense when they need help. Amazon makes sense when they want deeper learning.

Final Verdict

You should upgrade your AI tools when your current setup is slowing you down, creating generic output, wasting money, or making your workflow harder than it needs to be.

But do not confuse upgrading with collecting tools.

The best AI setup is not the biggest stack. It is the cleanest system that helps you create useful content consistently. For bloggers, that usually means one strong writing workflow, one visual workflow, one SEO process, one publishing checklist, and simple automation added only when needed.

If you are a beginner, start small. Improve your prompts. Create reusable templates. Fix your internal linking process. Add a trusted external source where it helps. Build your website on a solid foundation. Then add better tools only when your workflow proves that you need them.

That is how you upgrade your AI tools without wasting money or losing the human quality that makes readers trust your content.

Frequently Asked Questions

What does upgrading AI tools mean?

It means improving your AI workflow so your tools help you work faster, create better content, reduce manual tasks, and publish more consistently. It can include better prompts, better software, automation, templates, or a cleaner tool stack.

Do I need paid AI tools as a beginner?

No. Beginners can start with free or low-cost tools. Upgrade only when you clearly understand the limitation you are trying to solve, such as low AI credits, missing templates, weak automation, or slow content production.

What AI tool should bloggers upgrade first?

Most bloggers should upgrade their writing and planning workflow first because it affects every article they publish. After that, improve visuals, SEO, and automation based on your biggest bottleneck.

Are too many AI tools bad for productivity?

Yes, they can be. Too many tools create confusion, duplicate costs, and scattered workflows. A smaller stack with clear roles is usually better than a large stack you do not use consistently.

How can I make AI content sound more human?

Use specific examples, edit manually, vary your introductions, include real opinions, avoid hype, and write for one clear audience. AI should help with structure and speed, not replace your judgment.

Should I automate my blog workflow?

Yes, but only after the workflow is clear. Start with simple automations like tracking published posts, creating promotion tasks, or preparing newsletter drafts. Do not automate a messy process too early.

How often should I review my AI tool stack?

Review your tools every 60 to 90 days. Check which tools you use regularly, which ones save time, which ones cost money without clear value, and which workflow steps still feel slow.

Conclusion

AI tools are powerful, but they only become valuable when they fit into a real workflow.

If you want to build a better blogging system in 2026, do not chase every new AI launch. Start with your actual problems. Where are you losing time? Where is your content weakest? Where are your links missing? Where does publishing slow down?

Answer those questions first. Then upgrade the tools that solve those problems.

For most bloggers, the smartest path is simple: improve your writing workflow, create better visuals, connect related posts properly, use trusted sources, add automation slowly, and keep your final content useful for real readers.

That is how AI becomes a serious advantage instead of another distraction.

Affiliate Disclosure

As an Amazon Associate, I earn from qualifying purchases. Some links in this article are affiliate links, which means I may earn a commission at no extra cost to you if you buy through them. I only recommend tools, books, and services that may help beginners learn, build, or grow their online work more effectively.
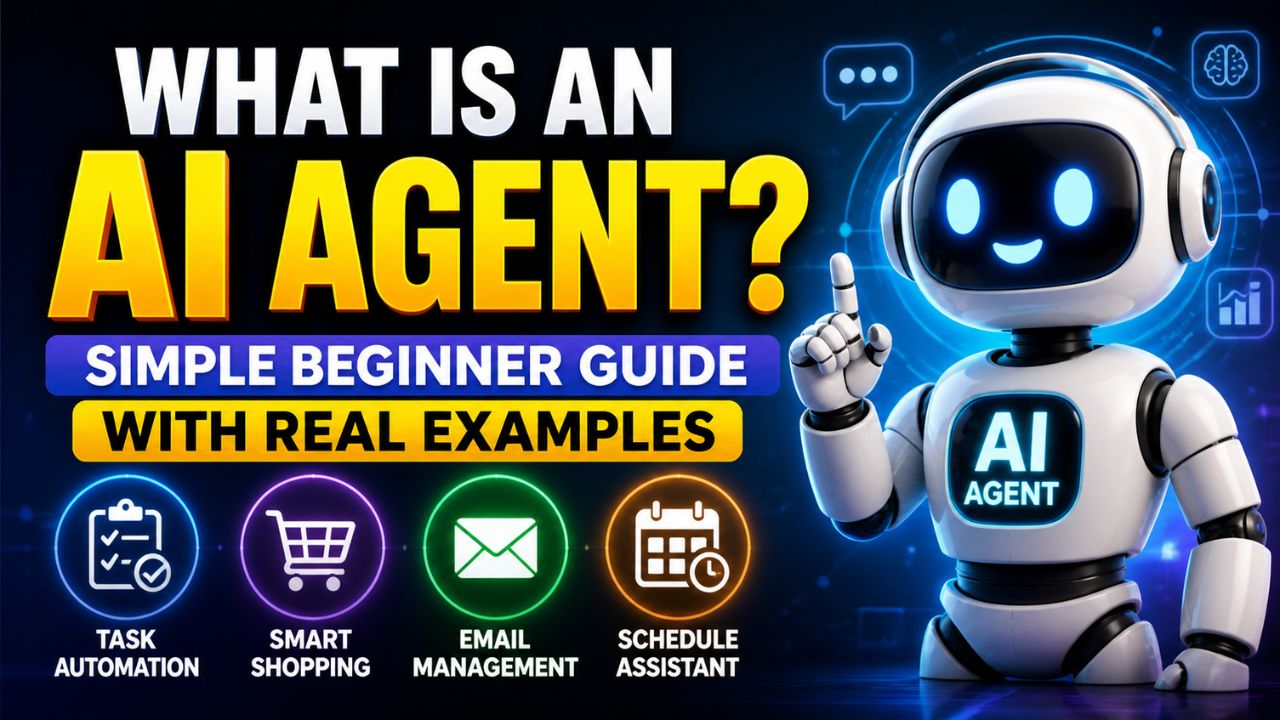
What Is an AI Agent? The Ultimate Beginner’s Guide (2026)

What Is an AI Agent

Imagine opening your laptop in the morning and finding that the boring parts of yesterday’s work are already handled.

Your email inbox is sorted. Your calendar is updated. A blog outline is waiting in Google Docs. Competitor notes are summarized. Pinterest pin ideas are ready. A weekly performance report is sitting in your inbox.

You did not hire a full-time assistant.

You did not stay awake all night.

An AI agent handled the workflow.

That is why so many people are asking the same question in 2026: what is an AI agent, and how is it different from ChatGPT, chatbots and normal AI tools?

The short answer is simple.

An AI agent is AI that can work toward a goal. It can understand a task, make a plan, use tools, take actions, check progress and return a finished result with less step-by-step prompting from you.


What Is an AI Agent


That does not mean AI agents are magic. They still make mistakes. They still need permissions, good instructions, safe data access and human review. But they represent an important shift from AI that only answers questions to AI that can help complete work.

This beginner guide explains what is an AI agent in plain language, how AI agents work, how they compare with chatbots, real-world examples, risks, beginner tools, and how bloggers, affiliate marketers, freelancers, and small businesses can start using them safely.

By the end, you should be able to explain what is an AI agent to a beginner without using technical jargon.

What Is an AI Agent?

An AI agent is a software system that can understand a goal, plan steps, use available tools, and take actions to complete a task or workflow for a user.

In simpler words, an AI agent is like a digital worker that does more than reply to a prompt.

A chatbot answers.

An AI agent works toward an outcome.

For example, if you ask a normal chatbot:

Write a blog post about AI automation.

It may generate a draft and wait for your next instruction.

An AI agent-style workflow could go further:

  • Research the topic
  • Analyze competing articles
  • Create an outline
  • Draft the article
  • Suggest internal links
  • Write SEO metadata
  • Create image prompts
  • Draft social posts
  • Save the output into your workspace

That is the key difference.

The agent is not only generating text. It is trying to complete a larger goal.

IBM describes AI agents as systems that autonomously perform tasks by designing workflows with available tools. AWS describes AI agents as software programs that can interact with an environment, collect data and perform self-directed tasks toward goals. Those definitions are useful, but for beginners the simplest explanation is this:

An AI agent is AI that can plan and act, not just chat.

A Simple Analogy

Imagine you are opening a small coffee shop.

A chatbot is like asking a friend for advice.

You ask:

How should I market my coffee shop?

The friend gives suggestions. Maybe they say to post on Instagram, offer a launch discount and create a loyalty card.

Helpful, but the conversation stops there.

An AI agent is more like assigning the task to a junior operations manager.

You say:

Help me launch the coffee shop marketing plan.

The manager might research competitors, create a launch calendar, draft promotional emails, prepare social posts, organize local partnership ideas, track responses and send you a summary.

That is the mental model.

A chatbot gives answers. An AI agent coordinates work.

Why AI Agents Are Becoming Popular in 2026

AI agents are becoming popular because modern work is full of repetitive digital tasks.

People spend hours every week:

  • Organizing emails
  • Researching information
  • Updating spreadsheets
  • Creating reports
  • Writing first drafts
  • Scheduling content
  • Answering common questions
  • Moving information between apps
  • Checking analytics
  • Creating similar documents again and again

Most of those tasks follow patterns.

AI agents are designed to handle those patterns so humans can spend more time on strategy, creativity, relationships and decisions.

This is especially important for solo creators, bloggers, affiliate marketers, freelancers and small businesses because they usually do not have large teams. A good AI agent workflow can feel like adding a small digital teammate without hiring a full employee.

If you want the practical blogging side of this idea, our guide to AI automation tools for bloggers explains the tools that help connect content, email, social and workflow systems.

How Do AI Agents Work?

AI agents can look complicated, but the basic workflow is easy to understand.

Most AI agents follow six stages.

1. Goal

Everything starts with a goal.

Instead of giving the AI every tiny instruction, you describe the outcome you want.

Examples:

  • Create a weekly content plan.
  • Research the best AI video tools.
  • Summarize customer feedback.
  • Prepare an email newsletter from my latest blog post.
  • Find broken affiliate links and create an update checklist.

The goal tells the agent what success should look like.

2. Context

The agent needs context to do useful work.

Context may include:

  • Your audience
  • Your brand voice
  • Previous documents
  • Project rules
  • Company data
  • Examples of good output
  • Tool permissions

Without context, an agent may still produce something, but it will often feel generic or misaligned.

3. Planning

A good AI agent does not jump straight to the final answer.

It breaks the goal into smaller steps.

For example, if the goal is to publish a blog post, the plan might be:

  1. Review the keyword and search intent.
  2. Collect research from trusted sources.
  3. Create a blog outline.
  4. Draft sections.
  5. Add examples and FAQs.
  6. Suggest internal links.
  7. Create a final publishing checklist.

This planning step is one reason AI agents feel more useful than basic chatbots.

4. Tool Use

Tool use is where agents become powerful.

An AI model alone can mostly generate text. An AI agent connected to tools can do work across software.

Tools may include:

  • Web search
  • Email
  • Calendars
  • Documents
  • Spreadsheets
  • CRMs
  • Databases
  • Automation platforms
  • Design tools
  • Code editors

Google Cloud describes enterprise agent platforms around building, deploying, governing, and optimizing AI agents and model-based solutions. That enterprise framing matters because serious agents need more than clever prompts. They need access control, testing, monitoring, and governance.

5. Action

After planning and choosing tools, the AI agent performs actions.

Examples:

  • Drafting a document
  • Updating a spreadsheet
  • Sending a summary
  • Creating a task
  • Running a search
  • Calling an API
  • Generating a report
  • Creating a workflow step

Action is what separates an agent from a passive assistant.

6. Review and Feedback

AI agents should check progress.

They may ask:

  • Did the output match the goal?
  • Is more information needed?
  • Did a tool fail?
  • Should the plan change?
  • Does this need human approval?

This feedback loop helps agents handle multi-step work. But it does not remove the need for human review.

Important content, customer messages, code, affiliate claims, pricing details, and business decisions should still be checked by a person.

AI Agent vs ChatGPT

Many beginners ask whether ChatGPT is an AI agent.

The answer is: sometimes, depending on how it is used.

ChatGPT is primarily an AI assistant and conversational interface. It can answer questions, generate ideas, explain concepts, write drafts, and help with reasoning.

But a basic chat conversation is not the same as a full AI agent.

The difference is workflow and action.

Feature ChatGPT-style assistant AI agent
Main job Respond to prompts Work toward goals
Workflow User guides each step Can plan multiple steps
Tool use May use tools if enabled Designed around tool use
Autonomy Usually waits for instructions Can continue through a task within limits
Best for Ideas, explanations, drafts Workflows, automation, multi-step tasks


Think of ChatGPT as a powerful conversation engine. Think of an AI agent as a workflow built around an AI model, tools, memory, permissions and a goal.

AI Agent vs Chatbot vs AI Assistant

These terms overlap, which creates confusion.

Here is the simple difference.

Chatbot

A chatbot usually answers questions or follows a conversation. Older chatbots often followed fixed rules. Modern chatbots use large language models and can be much smarter, but many still depend on user prompts.

AI Assistant

An AI assistant helps with individual tasks such as writing, summarizing, brainstorming, scheduling, or answering questions.

AI Agent

An AI agent is more goal-focused. It can plan, use tools, take actions, and continue through a multi-step workflow.

In simple terms:

  • A chatbot talks.
  • An AI assistant helps.
  • An AI agent works through a goal.

That is why the question what is an AI agent is not just a vocabulary question. It is about a shift from conversation to execution.

The Five Core Parts of an AI Agent

Most AI agents include five core parts.

1. Reasoning Engine

This is the “brain” of the agent. It understands the goal, processes information, compares options, and decides what to do next.

2. Memory

Memory helps the agent remember useful information such as your writing style, audience, brand rules, past tasks, or project details.

Memory can be useful, but it also creates privacy considerations. Do not connect sensitive data unless you trust the platform and understand its data policies.

3. Planning

Planning turns one big goal into smaller steps. This is what lets agents handle longer workflows instead of giving one quick answer.

4. Tools

Tools let the agent interact with the digital world. Without tools, the agent mostly writes. With tools, it can search, update, send, retrieve, create, or trigger actions.

5. Guardrails

Guardrails include permissions, approvals, limits, policies, logs, and human review steps.

Beginners often forget this part, but it is critical. The more power an agent has, the more important guardrails become.

Types of AI Agents

Not every AI agent is built for the same job.

Task Automation Agents

These agents handle repetitive work such as updating spreadsheets, moving data between apps, creating tasks or sending routine summaries.

Research Agents

Research agents gather information, summarize sources, compare competitors, monitor trends and organize notes.

Content Agents

Content agents support blog posts, scripts, newsletters, social captions, email sequences and SEO workflows.

Customer Support Agents

Support agents answer common questions, route tickets, summarize conversations and help human support teams respond faster.

Coding Agents

Coding agents can help developers write code, debug errors, review pull requests, generate tests and explain technical problems.

Sales and CRM Agents

These agents help organize leads, summarize calls, draft follow-ups, update CRM records, and prioritize outreach.

Multi-Agent Systems

A multi-agent system uses several agents together. One agent may research, another may write, another may check SEO, another may create social posts, and another may prepare reports.

This is powerful, but beginners should not start here. Multi-agent systems can become confusing quickly if the workflow is not clear.

Real-World AI Agent Examples

AI agents are easiest to understand through examples.

1. Blogging Agent

A blogging agent could help research keywords, analyze competitors, create outlines, draft sections, suggest internal links, write meta descriptions and create promotion ideas.

This does not replace the blogger’s judgment. It reduces repetitive preparation work.

For a practical content system, start with our guide to what AI automation tools are, then build one workflow around your current blogging process.

2. Affiliate Marketing Agent

An affiliate marketing agent could monitor product launches, organize review notes, draft comparison tables, suggest FAQs, check older posts for update opportunities and prepare email promotion drafts.

It should not invent personal experience, fake results or make unsupported income claims.

If you monetize with affiliate content, our AI affiliate review writing guide is the safer starting point.

3. Pinterest Marketing Agent

A Pinterest agent could turn a blog post into pin titles, descriptions, board suggestions, image prompt ideas and a weekly publishing plan.

4. Customer Support Agent

A customer support agent could answer common questions, summarize tickets, route requests and prepare draft replies for human review.

5. Research Agent

A research agent could monitor a niche, collect trusted sources, summarize changes, compare competitors and prepare a weekly briefing.

6. Coding Agent

A coding agent could inspect a codebase, suggest changes, write tests, fix bugs and explain what it changed.

7. Local Business Agent

A local business agent could help prepare appointment reminders, summarize customer messages, draft review responses and update task lists.

How Bloggers and Affiliate Marketers Can Use AI Agents

Blogging and affiliate marketing are strong use cases because they involve repeated workflows.

A blogger may repeat the same process every week:

  • Choose topic
  • Research search intent
  • Create outline
  • Draft article
  • Edit
  • Add images
  • Add internal links
  • Add affiliate disclosure
  • Create pins
  • Write newsletter
  • Update tracker

An AI agent can help coordinate parts of that process.

For example:

Goal: Prepare a complete publishing package for my article about AI video tools.

The agent-style workflow might create:

  • Article outline
  • FAQ ideas
  • Internal link suggestions
  • Featured image prompt
  • Pinterest titles
  • Newsletter draft
  • Social captions
  • Publishing checklist

That is the practical answer to what is an AI agent for bloggers: it is a workflow helper that reduces repeated steps while you keep control over final decisions.

If you are building affiliate income, this guide on AI tools for affiliate marketing shows the broader stack around writing, design, email, automation and conversion.

Benefits of AI Agents

They Save Time

AI agents can handle repetitive research, summarizing, drafting, organizing and reporting tasks faster than doing everything manually.

They Reduce Context Switching

Instead of jumping between many apps, an agent can coordinate several steps in one workflow.

They Help Small Teams Do More

Creators, freelancers and small businesses can use AI agents to reduce administrative load without hiring a full team immediately.

They Make Workflows More Consistent

A repeatable agent workflow can help ensure the same checklist is followed every time.

They Support Better Decisions

Agents can summarize data, compare information and surface patterns. Humans still make the final call.

Risks and Limitations of AI Agents

AI agents are useful, but they are not perfect.

This section is important because the hype around agents can make them sound more reliable than they are.

AI Agents Can Make Mistakes

They can misunderstand instructions, use outdated information, miss context or produce confident but wrong outputs.

Bad Inputs Create Bad Outputs

If your goal is vague, your data is messy or your instructions are unclear, the agent’s work may be weak.

Tool Access Creates Risk

An agent connected to email, files, payments, publishing tools or customer systems can do real damage if configured poorly.

Privacy Matters

Do not connect private documents, customer data, financial information or sensitive business systems without understanding how the platform handles data.

Not Every Task Should Be Automated

Do not fully automate legal advice, medical decisions, financial decisions, final hiring decisions, crisis communication, sensitive customer responses or public publishing without review.

NIST’s AI Risk Management Framework is useful here because it encourages organizations to manage AI risks intentionally rather than treating AI as a harmless toy.

Are AI Agents Safe?

AI agents can be safe when they are used with clear limits.

Use these beginner guardrails:

  • Start with low-risk tasks.
  • Keep human approval for publishing, payments, deletions, and customer messages.
  • Limit access to sensitive data.
  • Check facts before using outputs.
  • Use reputable platforms.
  • Review privacy and data policies.
  • Keep logs of important actions.
  • Test the workflow before using it in real business operations.

Safe AI agent use is not about fear. It is about giving the agent the right level of responsibility.

Best AI Agent Tools and Platforms to Know in 2026

The AI agent tool market changes quickly, so think in categories instead of chasing every new launch.

General AI Assistants

Tools like ChatGPT, Claude, Gemini and Perplexity are good starting points for research, writing, summarizing, planning and learning.

They are not always full agents by default, but they can support agent-like workflows.

Workflow Automation Platforms

Make.com, Zapier and n8n help connect apps and automate repeatable workflows. These are useful when you want AI to move information between tools.

Our Make.com review explains why visual automation can be a practical starting point for bloggers.

Enterprise Agent Platforms

Google Cloud, AWS, Microsoft, IBM and other enterprise providers offer platforms for building, deploying and governing AI agents at scale.

These are more technical and usually more relevant for developers or companies than beginner bloggers.

Customer Support Agents

Support tools use AI agents to answer FAQs, summarize conversations, route tickets and assist human support teams.

Coding Agents

Coding agents help with software development tasks such as editing files, debugging, writing tests and reviewing code.

Content and Marketing Agents

These tools help marketers generate content briefs, create social posts, refresh old articles, organize campaigns, and prepare reports.

For beginners, the best agent platform is usually not the most advanced one. It is the one that solves one real workflow without creating more complexity.

Beginner Roadmap: How to Start Using AI Agents

If you are new, do not try to automate your entire business in one weekend.

Start with this roadmap.

Step 1: Learn One AI Assistant Well

Use ChatGPT, Claude, Gemini, or Perplexity for research, outlines, summaries, and planning.

Step 2: Choose One Repetitive Task

Pick something low-risk:

  • Blog outlines
  • Meeting summaries
  • Email organization
  • Social post drafts
  • Weekly reports
  • Content tracker updates

Step 3: Write the Workflow Manually

Before automating, write the steps down.

If you cannot explain the workflow clearly, the AI agent will struggle too.

Step 4: Add AI Support

Use AI to draft, summarize, classify or suggest next steps.

Step 5: Add Automation Later

Once the workflow works manually, connect tools with Make.com, Zapier, n8n, or another automation platform.

Step 6: Keep Human Review

Review the output before publishing, sending, deleting, buying or making decisions.

This is the beginner-friendly path from simple AI assistance to real AI agent workflows.

Recommended Setup for Bloggers

If you want to use AI agents for blogging, affiliate marketing, or an AI-focused website, your own blog is still the foundation.

Social platforms are useful for distribution, but your website gives you control over SEO, internal links, lead magnets, affiliate disclosures and long-term content updates.

Build Your AI Agent Content Hub on WordPress

If you plan to publish AI tutorials, automation guides, reviews or affiliate content, start with a fast blog you control.

Start your AI blog with Hostinger

If setup feels technical, do not force yourself to learn everything at once. Hiring help for WordPress setup, automation workflows, email forms or technical cleanup can save a lot of time.

Need Help Building Your First AI Workflow?

A freelancer can help set up WordPress, connect automation tools, design content templates or build simple AI workflows so you can focus on strategy.

Find AI automation experts on Fiverr

Recommended Learning Resource

If you want a deeper technical understanding after this beginner guide, a book on AI agents, LLM apps, retrieval and knowledge graphs can help you understand how modern agent systems are built.

Want to Go Deeper Into AI Agents?

For readers who want more technical depth, a focused AI agents book can help explain LLM apps, RAG, memory and agent architecture beyond beginner definitions.

Explore an AI agents book on Amazon

Common Myths About AI Agents

Myth 1: AI Agents Replace Everyone

AI agents can automate repetitive tasks, but most serious work still needs human judgment, context, taste, ethics and accountability.

Myth 2: AI Agents Never Make Mistakes

They make mistakes. Sometimes they make them confidently. Review important output.

Myth 3: AI Agents Are Only for Big Companies

Large companies have advanced agent systems, but beginners can use simple agent-like workflows for research, writing, summaries and automation.

Myth 4: More Autonomy Is Always Better

More autonomy also means more risk. The right level of autonomy depends on the task.

Myth 5: AI Agents Are Just Chatbots With a New Name

Some products use the term loosely, but real AI agents involve goals, planning, tools, action and review loops.

Final Checklist Before Using an AI Agent

Before giving an AI agent a task, ask:

  • What exact goal do I want completed?
  • What information does the agent need?
  • Which tools should it access?
  • Which tools should it not access?
  • What can it do without approval?
  • What requires human review?
  • How will I check the result?
  • What happens if the agent makes a mistake?

If you cannot answer those questions, start with a smaller workflow.

Frequently Asked Questions

What is an AI agent in simple words?

An AI agent is software that can understand a goal, plan steps, use tools and help complete tasks with less step-by-step prompting from a human.

Is ChatGPT an AI agent?

ChatGPT is mainly an AI assistant, but it can be part of agent-like workflows when it uses tools, memory, instructions and automation. A normal chat conversation is not always a full AI agent.

What is the difference between an AI agent and a chatbot?

A chatbot usually answers questions. An AI agent works toward a goal and may plan steps, use tools, take actions and check progress.

Can beginners use AI agents?

Yes. Beginners can start with simple use cases such as blog outlines, email summaries, research organization, social content drafts and weekly reports.

Do AI agents need coding?

Not always. Some AI agent workflows can be built with no-code tools and automation platforms. More advanced custom agents may require APIs, coding, databases and security knowledge.

Are AI agents safe?

AI agents can be safe when used with good guardrails. Start with low-risk tasks, limit permissions, avoid sensitive data and keep human approval for important actions.

What are examples of AI agents?

Examples include research agents, coding agents, customer support agents, sales agents, content workflow agents, calendar agents and automation agents that connect apps together.

What should bloggers use AI agents for first?

Bloggers should start with research organization, content outlines, internal link suggestions, FAQ drafting, social repurposing and content tracker updates.

Will AI agents replace jobs?

AI agents are more likely to change tasks inside jobs than replace every job. People who learn to use AI agents may become more productive because they can delegate repetitive digital work.

Conclusion

What is an AI agent? It is one of the most important AI concepts beginners should understand in 2026.

An AI agent is not just a chatbot. It is a goal-focused AI system that can plan, use tools, take action and help complete workflows.

For bloggers, creators, affiliate marketers, freelancers, developers and small businesses, AI agents can save time and make work more consistent.

But they are not magic.

They need clear goals, good context, safe tool access, privacy awareness and human review.

The smartest way to start is simple: choose one repetitive workflow, use AI to improve it, review the output and only automate more once the process works.

That is how AI agents become useful digital teammates instead of another overhyped tool.

If someone asks you what is an AI agent, the honest answer is this: it is a useful system for turning goals into workflows, as long as humans stay responsible for the final judgment.

How We Checked This Guide

Before writing this guide, we checked official and primary sources from IBM, AWS, Google Cloud, Anthropic and NIST to ground the explanation of AI agents, tool use, agent platforms and responsible AI risk management. AI agent platforms change quickly, so verify official documentation before choosing a tool for business-critical workflows.

Affiliate Disclosure

Some links in this article are affiliate links, which means I may earn a commission at no extra cost to you if you purchase through them. I only recommend tools, books and services that may help beginners build better blogs, improve their affiliate content, or grow their online work more effectively.
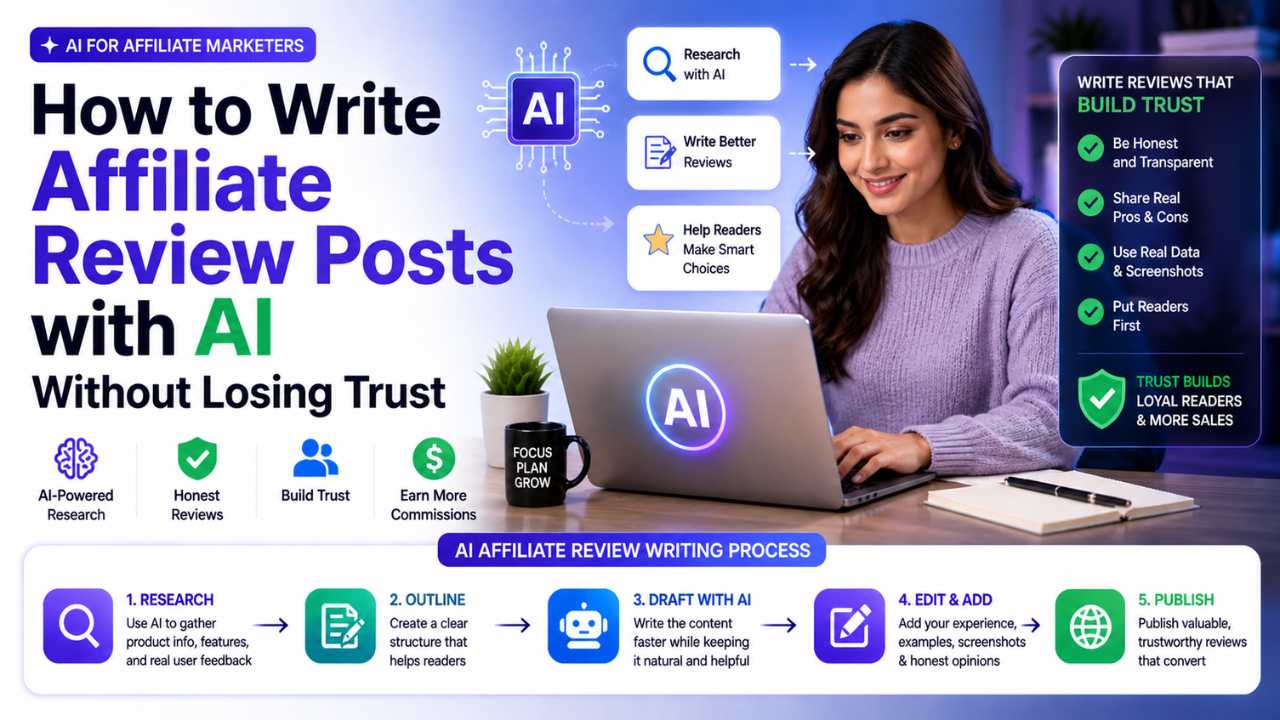
How to Write Affiliate Review Posts with AI Without Losing Trust

Write Affiliate Review Posts with AI

Affiliate review posts can earn real income, but only when the reader believes you are helping them make a better decision.

That is the part many beginner affiliate marketers miss. They think the review is only about ranking on Google and placing links. But a review is more personal than that. A reader is often close to buying something. They are comparing options, checking risks, and trying to avoid wasting money.

AI can make the writing process much faster, but it can also make reviews feel empty if you use it the wrong way.

In 2026, you can ask ChatGPT, Claude, Writesonic or another AI writing tool to create a long review draft in minutes. The headings may look clean. The pros and cons may sound confident. The article may even look ready to publish at first glance.

But if the review feels fake, generic, or copied from a product page, readers can sense it. And when readers do not trust the review, they do not click the affiliate link.


Write Affiliate Review Posts with AI


That is why this guide focuses on how to write affiliate review posts with AI without losing trust. AI should not be used to fake experience. It should be used to organize real research, explain findings clearly, compare options fairly, and make your writing process easier.

The goal is not to publish more low-quality reviews. The goal is to publish better, more useful affiliate reviews with less manual struggle.

Can You Write Affiliate Review Posts With AI?

Yes, you can write affiliate review posts with AI, but you should use AI as an assistant, not as the final judge.

AI is useful for:

  • Organizing product research
  • Creating review outlines
  • Drafting individual sections
  • Explaining features in simple language
  • Building comparison tables
  • Creating FAQ sections
  • Improving readability
  • Repurposing reviews into social posts

But AI should not control the whole review.

Do not use AI to invent personal experience, create fake test results, make up pricing, pretend you used a product you have never touched, hide limitations, rewrite product pages in slightly different words, or push every reader toward the same affiliate offer.

The trust-first rule is simple:

Use AI to organize your review, not fake your experience.

Start with one product you actually understand. Then use AI to help structure, draft, edit, and improve the review. That is the safest and smartest way to use AI for affiliate content.

Why Trust Matters More Than Speed

AI has made writing faster. That is useful. But affiliate marketing is not just a writing game. It is a trust game.

Readers come to a review post because they are trying to make a decision. They want to know whether a product is worth their money, whether it fits their situation, and whether there are better alternatives.

If your article only repeats marketing claims, the reader learns nothing.

If your review sounds like every other AI-generated article, the reader has no reason to believe you.

If every tool is described as powerful, game-changing, and perfect for everyone, the reader can tell the post is written for commission, not usefulness.

A trustworthy affiliate review does something different. It helps the reader decide.

That means your review should explain who the product is best for, who should avoid it, what it does well, where it feels limited, what pricing means, how it compares with alternatives and whether it is worth buying for a specific type of user.

AI can help you write those sections, but it cannot replace your judgment.

The bloggers who win with AI-assisted affiliate reviews are the ones who use AI to make honest content clearer, not dishonest content faster.


ChatGPT Plus
Canva Pro
Midjourney
Claude Pro
⚡ SAVE 80%
Market: ₹15,000 → ₹2,999/year

132+ Premium AI Tools
Instant
Verified
24/7

What Makes an Affiliate Review Trustworthy?

A trustworthy affiliate review is not just long. It is useful, specific, balanced and clear.

Google’s official review guidance focuses on quality and originality. A useful review should help readers compare options, understand tradeoffs, and see evidence behind the recommendation. You can read Google’s official guide on writing high-quality reviews for a deeper look at how review content should be improved.

Here are the main qualities that make an affiliate review feel trustworthy.

Real Research

Before writing, collect facts from official product pages, pricing pages, support docs, demos, screenshots, user reviews, competitor pages and your own testing where possible.

Do not ask AI to guess.

AI can summarize research, but the research needs to exist first. If you give AI weak input, it will usually create weak output with polished wording.

Clear Audience Fit

A good review does not say, “This tool is best for everyone.”

It says something more specific:

“This tool is best for bloggers who publish regular long-form content and need a repeatable review workflow. It may be too expensive for beginners who only publish one article per month.”

That kind of recommendation builds trust because it helps the right reader make a decision.

Honest Pros and Cons

Every product has limitations. If your review only includes positive points, it starts to feel like an ad.

Useful cons might include pricing, learning curve, limited free plan, missing features, weak templates, slow support, export issues or niche-specific limitations.

Honest cons do not destroy conversions. They improve the quality of conversions because the right reader understands the tradeoff before clicking.

Practical Use Cases

Readers want to know how the product works in real life.

Instead of saying, “This tool saves time,” explain exactly how it saves time.

For example:

“A blogger can use this tool to turn one product research document into a review outline, then use the editor to rewrite weak sections before adding screenshots, pricing notes, and affiliate CTAs.”

That is more helpful than a vague feature list.

Human Verdict

The verdict is where your judgment matters most.

AI can help polish the wording, but the recommendation should come from you. Your verdict should answer whether you recommend the product, who it is best for, who should skip it, what alternative may be better, and what the reader should check before buying.

That is what separates a real review from a generic AI article.

The Trust-First AI Review Workflow

The best way to write affiliate review posts with AI is to keep the workflow simple and controlled.

Here is the process I recommend:

  1. Choose one product you understand.
  2. Collect real research.
  3. Define the reader and search intent.
  4. Build a review outline.
  5. Ask AI to organize your notes.
  6. Draft section by section.
  7. Add honest pros, cons, and use cases.
  8. Fact-check pricing and features.
  9. Add screenshots, examples, and personal notes where possible.
  10. Write a human verdict.
  11. Edit for clarity, tone, and trust.
  12. Add affiliate disclosure and natural CTAs.

This workflow keeps AI in the right role. AI helps with structure and speed. You provide accuracy, judgment and trust.

Step 1: Choose a Product You Actually Understand

If your goal is to write affiliate review posts with AI that people trust, product understanding has to come before drafting.

The safest affiliate review starts with a product you have used, tested, researched deeply, or at least understand well enough to explain honestly.

This does not mean you need to be a world expert. But you should know more than what appears on the homepage.

For example, if you are reviewing an AI writing tool, you should understand:

  • What type of content it creates
  • Whether it supports long-form writing
  • How templates work
  • Whether brand voice is available
  • What the pricing tiers include
  • Whether there is a free plan or trial
  • Which alternatives compete with it
  • Who benefits most
  • What limitations beginners may face

If you cannot answer those basics, do more research before writing.

AI can help you create a review faster, but it cannot responsibly replace product understanding.

Beginner rule: review fewer products more deeply instead of reviewing many products shallowly.

That is better for SEO, trust, and affiliate conversion.

Step 2: Research Before Prompting AI

Do not start your review with a prompt like, “Write a review of this product.”

That is how you get generic content.

Instead, gather research first. Useful research sources include the official product homepage, pricing page, feature pages, help docs, demo videos, free trial or free plan, user reviews, competitor pages, your own screenshots, and notes from testing the tool.

Create a simple research document with these sections:

  • Product overview
  • Main features
  • Pricing notes
  • Best use cases
  • Pros
  • Cons
  • Alternatives
  • Personal notes
  • Final opinion

Then use AI to organize those notes.

A better prompt would be:

I am writing an affiliate review of [product] for beginner bloggers. Here are my research notes. Organize them into a review outline with sections for features, pricing, pros, cons, best use cases, alternatives, and final verdict. Do not invent facts.

That prompt gives AI real material to work with.

Step 3: Define the Reader and Search Intent

Every affiliate review should be written for a specific reader.

A review for beginner bloggers is different from a review for agencies. A review for YouTubers is different from a review for SEO content teams. A review for budget users is different from a review for enterprise buyers.

Before writing, define who is reading, what they are worried about, what decision they are trying to make, what alternatives they are considering, and what would make them trust the review.

For AI Sage Labs, the reader is usually a beginner to intermediate blogger, creator, freelancer, or affiliate marketer who wants to use AI tools to save time, grow traffic, and make money online.

For this audience, the review should be practical, simple, and honest.

For example, someone searching for a review of an AI writing tool probably wants to know whether the tool is worth the price, how it compares with alternatives, whether it can help bloggers make money, what plan makes sense, and what the real limitations are.

That search intent should shape the review.

If you want a broader income strategy before writing reviews, read this guide on how to make money with AI.

Step 4: Build a Review Outline First

Do not ask AI for a full article first. Start with the outline.

A strong affiliate review outline usually includes:

  • Short introduction with the reader’s problem
  • What the product is
  • Who it is best for
  • Who should skip it
  • Key features
  • Pricing notes
  • Pros and cons
  • Real use cases
  • Alternatives
  • Comparison table
  • Honest limitations
  • Final verdict
  • FAQs

Example prompt:

Create a 3000-word affiliate review outline for [product]. The audience is beginner bloggers and affiliate marketers. Focus on whether the product is worth it, who it is best for, pricing, pros and cons, alternatives, income use cases and final verdict. Keep the tone honest and beginner-friendly.

Once AI creates the outline, edit it manually. Remove weak sections. Add missing questions. Make sure the structure follows the reader’s decision process.

Step 5: Use AI to Draft Section by Section

Section-by-section drafting gives you better quality control than asking for one long article at once.

Instead of asking AI to write a full 3000-word review, ask it to write one section using your notes.

For example:

Write the pricing section for this review using only the pricing notes below. Explain which plan is best for beginner bloggers. Do not invent prices.

Or:

Write the pros and cons section for this review. Use a balanced tone. Include practical explanations, not just bullet points.

This approach works better because you can review each section before moving on.

A good AI-assisted review workflow looks like this:

  1. Ask AI to write the overview.
  2. Edit it.
  3. Ask AI to write the features section.
  4. Edit it.
  5. Ask AI to write pricing.
  6. Fact-check it.
  7. Ask AI to write pros and cons.
  8. Add your own judgment.
  9. Ask AI to draft FAQs.
  10. Rewrite weak answers.

The more control you keep, the more trustworthy the final review becomes.

Step 6: Add Honest Pros and Cons

Pros and cons are one of the fastest ways to build or lose trust.

Weak pros sound like this:

  • Easy to use
  • Great features
  • Saves time
  • Affordable

Those points are too generic.

Better pros and cons explain why the point matters.

For example:

  • The template system is useful for bloggers who publish repeatable review formats.
  • Brand voice can help keep long-form content more consistent across multiple posts.
  • The workflow can reduce first-draft time, especially for comparison and list posts.
  • The higher price may be harder to justify for bloggers publishing only one article per month.

Notice the difference. The better version explains the practical meaning behind each point.

When writing cons, do not hide real issues. Honest limitations might include a limited free plan, higher learning curve, expensive pricing, overlapping features, weak integrations or output that depends heavily on prompt quality.

The reader who still clicks after understanding the limitation is more likely to be the right buyer.

Step 7: Explain the Income Mechanism

AI Sage Labs posts should always explain how a tool can help bloggers or affiliate marketers make money.

Do not just say, “This tool is good for affiliate marketers.”

Explain the income mechanism.

For example:

“This tool can help affiliate bloggers by reducing the time required to create detailed review drafts. If a blogger can publish two high-quality reviews per week instead of one, they can build more ranking assets, test more affiliate offers and update content more consistently.”

That is more useful because it connects the product to the business outcome.

Possible income mechanisms include faster review production, better SEO optimization, improved content quality, higher trust, stronger comparison tables, better CTAs, faster content updates, more email leads and more consistent publishing.

Every affiliate review should answer one question:

How does this product help the reader save time, make money or make a better decision?

Step 8: Add Alternatives and Comparisons

A trustworthy review does not pretend one product is the only option.

Readers usually compare multiple tools before buying. If you include alternatives, you become more useful.

For example:

“A dedicated AI writing platform may be best for bloggers who want templates and long-form workflows. ChatGPT may be better for flexible brainstorming and lower-cost research. Writesonic may be better for bloggers who want AI writing plus SEO-style features at a different price point.”

That kind of comparison helps readers choose.

Tool Type Best For Main Strength Main Limitation
Dedicated AI writing tool Long-form bloggers Structured writing workflows May cost more than general AI chat tools
General AI assistant Beginners and flexible research Useful for brainstorming and outlining Needs stronger prompting and editing
SEO content tool Search-focused publishers Helps with optimization and content planning Can still produce generic writing without human edits


Comparison sections also create good future internal-link opportunities when you publish review and versus posts.

If you want an example of a tool review format, see this Writesonic review for bloggers.

Step 9: Fact-Check Pricing and Features

When you write affiliate review posts with AI, this is the step that protects you from one of the most common trust problems: outdated or invented details.

This step is non-negotiable.

AI can get pricing wrong. It can confuse old plans with new plans, invent free trials, or mention features that no longer exist.

Before publishing any affiliate review, check the current pricing, free plan or trial, refund policy, key features, plan limits, usage limits, supported platforms, and affiliate program terms if relevant.

Use official sources whenever possible.

If pricing changes often, write carefully. Use phrases like:

  • At the time of writing…
  • Pricing may change, so check the official pricing page before buying.
  • The best plan depends on your publishing volume and feature needs.

That wording protects trust. Do not include fake certainty when the information may change.

Step 10: Add Screenshots, Examples, and Personal Notes

AI-written reviews often feel empty because they do not include evidence.

Add evidence wherever possible. Useful trust signals include screenshots from the tool, a sample workflow, before-and-after examples, short testing notes, real use cases, comparison tables, clear limitations, and specific plan recommendations.

Even a simple personal note helps.

For example:

“For beginner bloggers, the most useful part is not the advanced dashboard. It is the ability to create repeatable review outlines without starting from a blank page every time.”

That sounds more human because it reflects judgment. AI can polish this kind of note, but the insight should come from you.

Step 11: Write a Human Final Verdict

The final verdict is one of the most important parts of the review.

This is where you tell the reader what to do.

A weak verdict says:

“Overall, this is a great tool and I recommend it.”

A stronger verdict says:

“I recommend this tool for bloggers who publish at least two long-form posts per month and want a repeatable AI writing workflow. I would not recommend it for complete beginners who are still choosing a niche or anyone who only needs occasional social media captions. In that case, start with a free AI assistant first and upgrade later.”

The strong verdict helps the reader decide.

Your verdict should include who should buy, who should skip, the best starting point, the main reason to choose the product, the main limitation to understand, and the best alternative if it is not a fit.

This is the section where trust can turn into conversions.

Step 12: Edit for Voice, Clarity, and Trust

The final editing pass is where AI-assisted content becomes genuinely useful. This is especially important when you write affiliate review posts with AI for readers who are close to making a buying decision.

After AI helps draft the post, edit manually.

Look for repeated phrases, overhyped claims, generic wording, unsupported promises, weak pros and cons, fake-sounding personal experience, missing limitations, outdated pricing and too many affiliate CTAs.

Remove phrases like:

  • Game-changing
  • Revolutionary
  • Best ever
  • Guaranteed results
  • Passive income machine
  • Effortless profits

Replace hype with practical explanation.

Instead of writing, “This tool will transform your affiliate business,” write something like, “This tool can reduce drafting time if you already have a clear content strategy and product research notes.”

That sounds more believable because it is specific and realistic.

Affiliate Review Post Template You Can Reuse

Here is a simple structure you can reuse when you write affiliate review posts with AI:

  • SEO title
  • Short intro with the reader’s problem
  • What the product is
  • Who it is best for
  • Who should skip it
  • Key features
  • Pricing notes
  • Pros and cons
  • How it helps bloggers or affiliate marketers
  • Real use cases
  • Alternatives
  • Comparison table
  • Honest limitations
  • Final verdict
  • FAQs
  • Natural CTA

This structure works because it follows the reader’s decision path. First, they want to know if the product is relevant. Then they want features. Then pricing. Then pros and cons. Then alternatives. Then your final recommendation.

AI can help draft each section, but you should control the judgment.

Useful AI Prompts for Affiliate Reviews

Good prompts keep AI focused on your research and your reader.

Research Organization Prompt

Organize these product research notes into a clear affiliate review outline. The audience is beginner bloggers. Do not add facts that are not in my notes.

Feature Explanation Prompt

Explain these product features in simple language for beginner affiliate marketers. Focus on practical use cases, not marketing hype.

Pros and Cons Prompt

Create a balanced pros and cons section from these notes. Make each point specific and explain why it matters for bloggers.

Pricing Prompt

Write a pricing section using only the pricing details below. Include a reminder that readers should check the official pricing page because plans can change.

Verdict Prompt

Draft a final verdict for this product. Recommend it only for the right audience. Include who should buy, who should skip, and the best alternative for beginners.

Trust Edit Prompt

Edit this review section to sound more honest, practical and human. Remove hype, unsupported claims and generic AI wording.

Common Mistakes That Make AI Affiliate Reviews Lose Trust

Publishing Without Research

If the whole review is based on AI’s general knowledge, the post will feel shallow. Research first. Use AI second.

Pretending to Have Used a Product

Never say “I tested this” unless you actually did. If you researched the product but did not test it deeply, be honest with your wording.

Making Every Product Sound Perfect

No product is perfect. Readers trust reviews that explain trade-offs.

Ignoring Pricing Reality

Affiliate reviews lose trust when pricing is wrong or unclear. Always check official pricing before publishing.

Using Too Many CTAs

If every section screams “buy now,” the review feels desperate. Use CTAs naturally after useful sections.

Forgetting the Reader’s Stage

A tool that is excellent for advanced marketers may be wrong for beginners. Always match the recommendation to the reader’s stage.

Recommended Setup for Affiliate Bloggers

If you want to publish affiliate reviews seriously, build your own website instead of depending only on social media platforms. A self-hosted blog gives you more control over SEO, branding, email capture, affiliate placements and long-term content updates.

For beginners, Hostinger is a practical option for starting a WordPress blog or affiliate website because it keeps the setup simple.

Start Your Affiliate Blog

If you want your reviews to rank, convert, and keep earning over time, build them on your own WordPress site instead of only posting on social media.

Start your affiliate blog with Hostinger

When to Hire Help for Affiliate Review Content

You can write affiliate reviews yourself, but there are times when hiring help makes sense.

For example, you may want help with WordPress setup, logo design, SEO formatting, product screenshots, comparison tables, content editing, or technical automation. This is especially useful if you are trying to publish consistently while learning the business side.

Fiverr can be useful for finding freelancers who help with blog setup, SEO tasks, website design, content editing and affiliate marketing support.

Need Help With Affiliate Review Content?

If you need help with SEO formatting, WordPress setup, comparison tables, content editing, or affiliate blog tasks, hiring a freelancer can save time.

Find affiliate marketing and blog freelancers on Fiverr

Recommended Book for Affiliate Review Writers

If you want to understand affiliate marketing beyond writing articles, a useful beginner-friendly resource to explore is Affiliate Marketing For Dummies. It can help you understand the wider affiliate business model, not just the writing side.

This is a good fit for bloggers who want to learn how affiliate programs, offers, traffic and commissions work together.

Learn Affiliate Marketing Basics

If you are new to affiliate marketing, this book can help you understand the business model before you write dozens of reviews.

Check Affiliate Marketing For Dummies on Amazon

The Honest Truth About AI and Affiliate Reviews

AI can help you write affiliate review posts with AI faster, but it cannot create trust by itself.

Trust comes from usefulness. Usefulness comes from research, clarity, honesty and good judgment.

If you use AI to publish generic review articles at scale, you may get more pages online, but those pages will not automatically rank, convert or build a brand.

If you use AI to organize real research, explain products clearly, compare options fairly and polish your writing, then AI becomes a serious advantage.

The difference is intent.

Are you using AI to help the reader make a better decision? Or are you using AI to push another affiliate link onto the internet?

Readers can feel the difference.

For AI Sage Labs, the best approach is simple: write for the reader first, use AI for speed and structure, and keep the verdict human.

Final Checklist Before Publishing an AI-Written Affiliate Review

Before publishing, check these points:

  • Did I research the product from official sources?
  • Did I avoid fake personal experience?
  • Did I explain who the product is best for?
  • Did I include honest limitations?
  • Did I fact-check pricing and features?
  • Did I add alternatives?
  • Did I include a clear final verdict?
  • Did I remove hype and generic AI wording?
  • Did I include natural internal links?
  • Did I add a trusted external source?
  • Did I create a useful featured image?
  • Did I include affiliate disclosure?

If the answer is yes, your review is already stronger than a typical AI-generated affiliate post.

Start With One Product You Understand

The best way to begin is not to build a huge review site overnight.

Start with one product you actually understand. Research it properly. Use AI to organize your notes. Draft the review section by section. Add your honest verdict. Publish it. Then improve it after you see how readers respond.

That is how affiliate review writing becomes a system.

Start with one product you actually understand, then use AI to organize your review, not fake your experience.

Frequently Asked Questions

Can I use AI to write affiliate review posts?

Yes, you can use AI to write affiliate review posts with AI, but you should use it as an assistant. AI is best for outlines, drafting, editing, FAQs and comparison tables. You should still provide research, fact-checking, honest pros and cons and the final recommendation.

Is it bad to use AI for affiliate marketing content?

No. Using AI is not bad if the content is helpful, accurate, and honest. The problem is using AI to create fake experience, generic reviews or misleading claims.

How do I make AI-written reviews sound human?

Add specific examples, real limitations, product screenshots, clear recommendations and your own verdict. Remove generic phrases, hype, and vague claims. Write for one specific reader instead of trying to impress everyone.

Should I say I used AI to write a review?

You should follow platform rules and legal requirements for your location. At minimum, include a clear affiliate disclosure when using affiliate links. If AI played a major role in content creation, make sure the content is well-edited, fact-checked, original and transparent.

Can AI write honest pros and cons?

AI can help draft pros and cons from your notes, but you should decide which points are fair and accurate. The best pros and cons come from real research, product testing and understanding the reader’s needs.

What is the best AI tool for affiliate review writing?

The best tool depends on your workflow. ChatGPT is flexible for research and structure. Claude can be useful for long drafting and editing. Writesonic can work well for blog drafts and SEO-style content. The tool matters less than the quality of your research and editing.

How long should an affiliate review post be?

For competitive affiliate keywords, a strong review is often 2500 to 3500 words or more. Length alone does not matter. The review should be long enough to answer the reader’s buying questions clearly.

Conclusion

AI can be a powerful tool for affiliate review writing, but only when you use it with the right mindset.

Do not use AI to fake experience. Do not use it to publish shallow reviews. Do not let it invent claims, pricing or results.

Use AI to organize research, create outlines, draft sections, improve readability, build comparison tables and polish your final article. Keep the human part where it matters most: research, honesty, judgment and the final recommendation.

If you follow that approach, AI can help you create affiliate review posts that are faster to write, easier to read and more useful for real people.

That is the kind of content that has a better chance of earning trust, clicks and long-term search traffic.

Affiliate Disclosure

As an Amazon Associate, I earn from qualifying purchases. Some links in this article are affiliate links, which means I may earn a commission at no extra cost to you if you buy through them. I only recommend tools, books and services that may help beginners build better blogs, improve their affiliate content or grow their online work more effectively.
Hostinger Review 2026: Is It the Best Hosting for AI Bloggers?

Hostinger Review 2026

A good AI blog does not fail because the writer used the wrong AI tool. It usually fails because the foundation is weak.

You can use ChatGPT for research, Canva for visuals, Pictory for video, Rank Math for SEO, and automation tools for promotion. But if your WordPress site is slow, confusing, insecure, or difficult to manage, every other tool is working on top of a shaky base.

That is why hosting matters more than many beginners realize.

AI blogs are often heavier than normal personal blogs. They may include long-form reviews, comparison tables, screenshots, affiliate buttons, lead forms, video embeds, tracking scripts, and custom design blocks. A cheap host may look fine on day one, but once you start publishing seriously, poor hosting can hurt speed, user experience and conversions.


Hostinger Review 2026


In this Hostinger review 2026, we will look at whether Hostinger is a good web host for AI bloggers, affiliate marketers and beginner WordPress site owners who want a practical balance of price, speed, features and ease of use.

This is not a perfect hosting company for every website. But for many new and growing AI blogs, Hostinger is one of the most practical starting points.

Hostinger Review 2026: Is It Worth It for AI Bloggers?

Yes, Hostinger is worth considering for AI bloggers in 2026, especially if you are starting or growing a WordPress blog and do not want expensive managed hosting yet.

The main reason is simple: Hostinger gives beginners a strong mix of affordable pricing, managed WordPress features, LiteSpeed performance, free SSL, free migration, backups, CDN on stronger plans and AI website tools.

For AI Sage Labs readers, that combination matters because most beginners need a hosting setup that helps them publish faster without getting stuck in technical details.

Hostinger is best for:

  • Beginner bloggers
  • AI tool review sites
  • Affiliate marketers
  • Small content teams
  • Creators launching a WordPress blog
  • Bloggers who want affordable hosting with AI tools

Hostinger is not best for:

  • Very large publisher websites
  • Heavy WooCommerce stores with large traffic
  • Complex membership platforms
  • Advanced developers who want deep server control
  • Sites that already need premium enterprise-level WordPress hosting

For most new AI bloggers, the Business WordPress hosting plan is the most practical option because it gives more room to grow than the entry plan.


🤖
Premium AI Tools
Save 80% on ChatGPT, Canva, Claude AI + 132+ Tools


💬 Order Now on WhatsApp

✓ Instant Delivery • 24/7 Support

Start Your AI Blog With Hostinger

If you want to launch an AI blog, affiliate site, or tool review website, Hostinger is a beginner-friendly WordPress hosting option with AI website tools, free SSL, backups, and simple setup.

Get Hostinger at a Discount

Why Hosting Matters for AI Bloggers

Many beginners think hosting is only the place where their website lives. Technically, that is true. But for bloggers who want traffic and income, hosting affects much more than storage.

Your hosting affects page speed. Page speed affects user experience. User experience affects whether readers stay, scroll, click, subscribe or leave.

Your hosting also affects how easy your website is to manage. If backups are confusing, WordPress updates break things, migration is stressful, or support is hard to reach, you lose time that should be spent on content and strategy.

For AI bloggers, this matters even more because the publishing workflow is usually faster. You may create more tool reviews, more comparison posts, more screenshots, more tables and more updates than a traditional blogger.

The ideal hosting for AI bloggers should be:

  • Fast enough for long-form SEO content
  • Simple enough for beginners
  • Affordable while income is still growing
  • Secure enough for affiliate and email workflows
  • Flexible enough for future niche projects
  • Reliable enough to keep posts online during traffic spikes

Hostinger fits the beginner-to-growth stage well, especially for WordPress bloggers who want a clean starting point.

If you are still comparing hosting choices, this related guide on best web hosting for AI blogs can help you understand the broader options.

What Is Hostinger?

Hostinger is a web hosting company that offers web hosting, managed WordPress hosting, cloud hosting, VPS hosting, domains, email, and website building tools.

For bloggers, the most relevant product is managed WordPress hosting. This is where Hostinger handles much of the technical foundation so you can focus more on building content, traffic, and monetization.

Hostinger’s WordPress hosting can include beginner-friendly setup, free SSL, free website migration, backups, LiteSpeed servers, caching, security tools and AI website features. On Business and Cloud plans, Hostinger also promotes Kodee, its AI Agent for WordPress.

That AI direction is one reason this Hostinger review 2026 is relevant for AI bloggers. Hostinger is not only trying to be low-cost hosting. It is also adding AI tools that can help beginners launch and manage WordPress sites faster.

According to Hostinger’s official WordPress hosting pages, key features may include:

  • Managed WordPress hosting
  • Free SSL
  • Free website migration
  • 30-day money-back guarantee
  • LiteSpeed servers and caching
  • AI website builder tools
  • AI Agent for WordPress on eligible plans
  • Weekly or daily backups depending on plan
  • CDN on stronger plans
  • 99.9% uptime guarantee

Always check the live Hostinger plan page before buying because pricing, discounts, and plan details can change.

Hostinger Pricing in 2026

Pricing is one of the biggest reasons people read a Hostinger review 2026 before buying, because the promotional price and renewal price can be very different.

Hostinger pricing changes depending on the promotion, plan type and subscription length. Hosting companies regularly update discounts, so exact prices should always be checked on the official website before buying.

At the time of checking Hostinger’s pricing page, the main web hosting plans were positioned around Premium, Business, and Cloud Startup tiers, with long-term promotional pricing and higher renewal pricing.

Plan Best For Why It Matters
Premium Very new bloggers Good for launching a basic WordPress site at the lowest starting cost
Business Most AI bloggers Better value for serious blogs because it adds more resources, daily backups, CDN, and AI tools
Cloud Startup Growing sites More power, more scaling room, and priority support for larger projects


The important thing is not only the first-month price. You should also check renewal pricing, plan length, included email, backups, storage, CDN, and whether the features you want are included on your chosen plan.

For most AI bloggers, the Business plan is the strongest value because it gives more room for serious publishing without jumping straight into premium managed hosting.

Best Hostinger Plan for AI Bloggers

A useful Hostinger review 2026 should not only say whether Hostinger is good. It should also explain which plan makes the most sense for a real blogger.

For most AI bloggers, the best Hostinger plan is the Business WordPress hosting plan.

The Premium plan can work if you are only testing a blog idea. But AI bloggers often need more than the bare minimum. You may publish long posts, upload screenshots, create comparison tables, build lead magnets, test landing pages and add multiple plugins.

The Business plan gives more room to grow.

Useful Business features for AI bloggers may include:

  • More website capacity for future niche projects
  • NVMe storage
  • Daily and on-demand backups
  • Free CDN
  • WordPress staging
  • AI website builder support
  • AI Agent for WordPress
  • Managed WordPress features

The staging feature is especially useful. It lets you test changes before pushing them live. If you are experimenting with WordPress themes, affiliate boxes, comparison tables or homepage layouts, staging can prevent messy mistakes on your live blog.

Daily backups also matter. Bloggers often ignore backups until something breaks. A plugin update, layout change, or bad import can damage a site. Having backups makes recovery easier.

Hostinger Features That Matter Most for AI Bloggers

This Hostinger review 2026 focuses on features that matter for bloggers, not just hosting spec sheets.

1. Easy WordPress Setup

Hostinger is beginner-friendly. You do not need to understand servers, databases, or manual WordPress installation to get started.

For AI bloggers, this is important because your energy should go into the business, not technical confusion. You want to move quickly from idea to live site.

If your goal is to publish tool reviews, build topical authority, and start affiliate monetization, you need a host that does not slow you down during setup.

Hostinger’s dashboard is cleaner than many traditional hosting dashboards. Beginners can usually find WordPress, domains, email, backups and performance tools without feeling lost.

2. AI Website Builder and WordPress AI Tools

Hostinger is leaning strongly into AI website creation. Its AI website builder can help create a starter website quickly, and its WordPress AI tools can support site setup and management.

Hostinger also promotes Kodee, its AI Agent for WordPress, on Business and Cloud hosting. The idea is to manage parts of your WordPress site through chat-style instructions.

For non-technical bloggers, that can reduce friction.

This does not replace strategy. You still need to choose your niche, write helpful posts, build trust, and understand your audience. But AI setup tools can help you launch faster.

Income mechanism: faster launch means you can start publishing affiliate content sooner.

Best use case: beginners who want a WordPress blog online quickly without hiring a developer.

Real limitation: AI setup tools help with speed, but they do not create a strong content strategy for you.

3. LiteSpeed Performance

Hostinger uses LiteSpeed servers and caching features, which is one reason it is often attractive for WordPress bloggers at a low price point.

Speed matters because AI blogs often use content-heavy pages. A review post may include screenshots, pricing tables, affiliate boxes, YouTube embeds, FAQs, related content blocks and email forms.

Each extra element can make your page heavier.

A fast hosting foundation helps keep the experience smoother, especially when combined with a lightweight theme, compressed images, clean plugins and proper caching settings.

Income mechanism: faster pages can improve user experience and support better affiliate conversions.

Best use case: long-form review posts and comparison articles with images and tables.

Real limitation: hosting is only one part of speed. Bad themes, oversized images, and too many plugins can still slow your site down.

4. Free SSL and Security Basics

SSL is no longer optional. A blog without SSL looks untrustworthy and trust matters when you are asking readers to click affiliate links, download lead magnets or join an email list.

Hostinger includes free SSL and security features depending on the plan.

For AI bloggers, these basics are enough to start. You should still use strong passwords, enable two-factor authentication where possible, keep plugins updated and avoid installing random nulled themes or plugins.

Income mechanism: trust and security support affiliate conversions.

Best use case: affiliate blogs, email signup pages, and AI tool review sites.

Real limitation: you still need good WordPress security habits.

5. Backups

Backups are boring until they save your site.

Hostinger’s lower plans may include weekly backups, while Business and higher plans can include daily and on-demand backups. For bloggers publishing regularly, daily backups are worth having.

If you are updating old posts, changing affiliate links, testing new layouts, or adding plugins, backups give you a recovery path.

Income mechanism: backups protect your content asset from mistakes and downtime.

Best use case: bloggers who publish or edit content every week.

Real limitation: always check backup frequency on the exact plan before buying.

6. Free Migration

If you already started your blog somewhere else, Hostinger offers migration support. That is useful for bloggers who began with a weaker host and now want better performance or easier management.

Migration is one of those tasks that looks simple but can become stressful if you are not technical. Having hosting support reduces risk.

Income mechanism: you can move to better hosting without losing days of content work.

Best use case: bloggers unhappy with slow or confusing hosting.

Real limitation: migration timing and complexity can vary depending on your current setup.

Hostinger Pros and Cons

No hosting company is perfect, so this Hostinger review 2026 should be clear about both strengths and limitations.

Pros

  • Affordable starting price for new bloggers
  • Beginner-friendly dashboard
  • Managed WordPress hosting features
  • Free SSL and migration support
  • Good performance for the price
  • LiteSpeed servers and caching
  • AI website builder and WordPress AI tools
  • Business plan can include daily backups and CDN
  • Good fit for affiliate blogs and AI tool review sites
  • 30-day money-back guarantee

Cons

  • Renewal prices are higher than promotional prices
  • Cheapest plan may feel limited once your blog grows
  • Support is mostly chat or email based
  • Advanced high-traffic sites may eventually need premium managed hosting
  • AI tools help with setup but do not replace content strategy

Hostinger vs Bluehost vs SiteGround vs Cloudways vs Kinsta

One reason this Hostinger review 2026 matters is that beginners often compare Hostinger with bigger names before choosing a web host.

Hostinger is not the only good hosting option. But it may be the best fit for the average AI blogger starting in 2026.

Host Best For Main Strength Main Limitation
Hostinger Beginner and growing AI bloggers Affordable, fast, AI-friendly WordPress hosting Renewal prices increase after promo period
Bluehost WordPress beginners Beginner-friendly and widely known Add-ons and renewals can increase cost
SiteGround Bloggers who value support Reliable WordPress performance and support Usually costs more than Hostinger
Cloudways Growing sites needing more control Cloud performance and scalability More technical learning curve
Kinsta Premium WordPress sites Excellent managed WordPress performance Expensive for beginners


If your blog is new, Hostinger is the practical choice. If your blog is already profitable and traffic is growing fast, Cloudways or Kinsta may become worth considering later.

Most AI bloggers do not need to start with premium managed hosting. They need a stable, affordable foundation and a good publishing system.

How Hostinger Helps AI Bloggers Make Money

Hostinger does not make money for you directly. No hosting company does.

But good hosting supports the activities that do make money.

For AI bloggers, those activities include:

  • Publishing SEO blog posts
  • Creating affiliate review pages
  • Building comparison articles
  • Collecting email subscribers
  • Hosting lead magnets
  • Displaying ads
  • Creating landing pages
  • Testing CTAs and layouts
  • Repurposing content into videos and social posts

Hostinger helps by making the technical foundation cheaper and easier.

That means you can spend more time on content, keyword research, affiliate strategy, and updates. Those are the tasks that actually grow revenue.

The practical income mechanism is:

Fast affordable hosting + consistent AI-assisted publishing + affiliate offers + SEO traffic = monetization foundation.

Hostinger is not the whole business. But it is a strong foundation for the business.

If your goal is income, also read this guide on how to make money with AI.

Recommended Hostinger Setup for AI Bloggers

The best part of this Hostinger review 2026 is that the setup does not need to be complicated.

If you are starting an AI blog in 2026, this is the setup I would consider:

  • Hosting: Hostinger Business WordPress hosting
  • CMS: WordPress
  • Theme: GeneratePress, Kadence or Astra
  • SEO plugin: Rank Math or Yoast SEO
  • Image optimization: ShortPixel, Imagify, or WebP conversion
  • Caching: Hostinger and LiteSpeed caching features
  • Email capture: MailerLite, ConvertKit or Hostinger Reach
  • Affiliate link management: Pretty Links or ThirstyAffiliates
  • Analytics: Google Search Console and Google Analytics
  • Content tools: ChatGPT, Canva, Grammarly and an SEO workflow

This stack is enough to build a serious AI tool review or affiliate blog without overcomplicating the setup.

Who Should Use Hostinger?

Hostinger is a good fit if:

  • You are starting your first AI blog
  • You want WordPress hosting without technical headaches
  • You care about price but still want solid performance
  • You plan to publish AI tool reviews or affiliate content
  • You want free SSL, backups, and migration support
  • You want AI website setup features
  • You may create more than one niche site later

Hostinger may not be the best fit if:

  • You already run a high-traffic media site
  • You need advanced server control
  • You want premium managed WordPress support at any cost
  • You run a complex WooCommerce store with heavy traffic
  • You prefer phone support over chat or email support

When to Hire Help for Blog Setup

Hostinger makes WordPress easier, but some beginners still prefer help with setup.

You may want a freelancer if you need:

  • WordPress installation
  • Theme customization
  • Logo and brand setup
  • Speed optimization
  • Affiliate box design
  • Rank Math setup
  • Email signup forms
  • Basic automation workflows

Need Help Setting Up Your AI Blog?

If you do not want to handle WordPress setup, speed optimization, logo design or affiliate blog formatting alone, hiring a freelancer can save time.

Find WordPress and blog setup freelancers on Fiverr

Recommended Book for AI Bloggers

Hosting is only the foundation. To grow an AI blog, you also need to understand how AI changes content, work, and decision-making.

One useful book for that is Co-Intelligence: Living and Working with AI by Ethan Mollick. It is a good fit for bloggers and creators who want to use AI thoughtfully instead of only chasing tools.

Recommended Reading for AI Bloggers

If you want to understand how to work better with AI while building your blog, this book is a useful next step.

Check Co-Intelligence on Amazon

Final Verdict: Is Hostinger the Best Hosting for AI Bloggers?

For most beginner and growing AI bloggers, yes, Hostinger is one of the best hosting choices in 2026.

It gives you the core things that matter: affordable starting pricing, easy WordPress setup, solid performance for the price, free SSL, backups, migration support, CDN on stronger plans and AI tools that match the direction blogging is moving.

The Business plan is the best fit for serious AI bloggers because it gives daily backups, more capacity, staging, CDN and WordPress AI features without jumping into expensive managed hosting too early.

The honest limitation is that Hostinger is still budget-friendly hosting. If your AI blog becomes a large media brand, you may eventually upgrade to Cloudways, Kinsta, or another premium setup.

But that is a good problem to have.

For starting and growing an AI blog, Hostinger gives you a strong foundation at a price that makes sense.

Final rating: 4.6/5

Best plan: Business WordPress hosting

Best for: AI bloggers, affiliate marketers and beginner WordPress site owners

Start Your AI Blog With Hostinger

Before AI writing tools, design tools and SEO tools can help you make money, you need a reliable WordPress blog where your content can live, rank and convert.

Get Hostinger at a Discount

Frequently Asked Questions

Is Hostinger good for AI bloggers?

Yes. Hostinger is a strong choice for AI bloggers because it is affordable, beginner-friendly and built around WordPress. Its AI website tools, LiteSpeed performance, free SSL, backups, and simple dashboard make it useful for bloggers who want to launch quickly and focus on content.

Which Hostinger plan is best for bloggers?

The Business WordPress hosting plan is the best choice for most bloggers. It gives you more resources than the entry plan and can include useful features like daily backups, CDN, staging and WordPress AI tools. The Premium plan is fine for testing, but Business is better for serious blogging.

Can I make money with a blog hosted on Hostinger?

Yes, but Hostinger itself does not create income. It gives you the website foundation. You still need to publish helpful content, target keywords, promote affiliate offers, build trust and improve posts over time.

Is Hostinger better than Bluehost for AI bloggers?

Hostinger may be better for AI bloggers who want lower starting pricing, strong WordPress performance, and AI website tools. Bluehost is also beginner-friendly and well known, but Hostinger often offers strong value for cost-conscious bloggers.

Is Hostinger fast enough for affiliate blogs?

Yes, Hostinger is fast enough for most new and growing affiliate blogs, especially when you use a lightweight theme, compressed images, caching and a clean plugin setup. Very large blogs may eventually need cloud or premium managed hosting.

Does Hostinger include a free domain?

Hostinger often includes a free domain for the first year on eligible annual plans. Always check the live plan details before buying because promotions can change.

Does Hostinger have a money-back guarantee?

Yes. Hostinger advertises a 30-day money-back guarantee on its hosting plans. Check the terms before purchasing because domain names and certain add-ons may have different refund rules.

Conclusion

This Hostinger review 2026 comes down to one practical point: beginner AI bloggers need hosting that is simple, affordable, fast enough and ready for WordPress growth.

Hostinger checks those boxes well.

It is not the most advanced hosting platform for massive publishers and it is not a replacement for content strategy. But if you are starting an AI blog, affiliate site, or tool review website, it gives you the foundation you need without forcing you into premium pricing too early.

Start with the right plan, keep your WordPress setup clean, compress images, avoid unnecessary plugins and publish helpful content consistently.

That is how Hostinger becomes more than hosting. It becomes the base layer for your AI blogging business.

Affiliate Disclosure

As an Amazon Associate, I earn from qualifying purchases. Some links in this article are affiliate links, which means I may earn a commission at no extra cost to you if you buy through them. I only recommend tools, books and services that may help beginners build better blogs, improve their affiliate content or grow their online work more effectively.
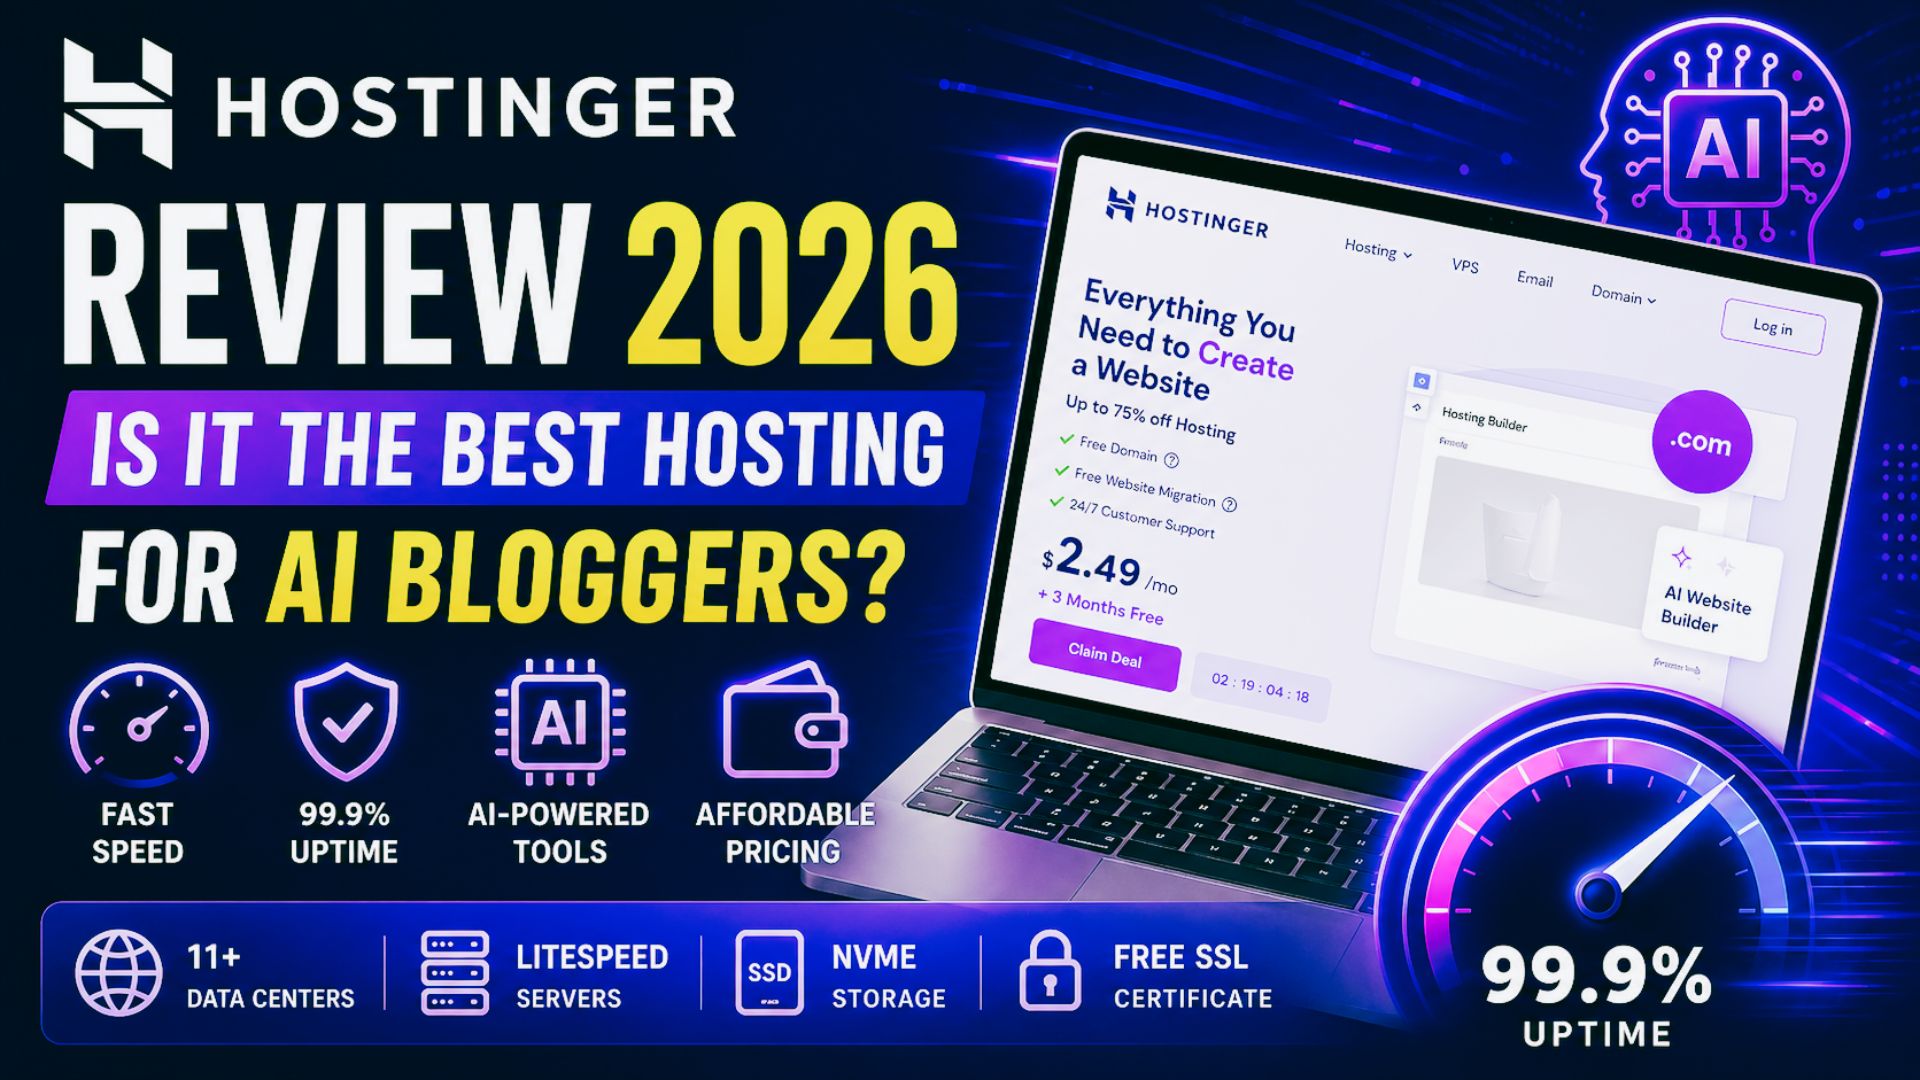
Best Web Hosting for AI Blogs in 2026: 7 Fast Hosts for Bloggers Using AI Tools

Best Web Hosting for AI Blogs

Choosing web hosting used to feel like a boring technical decision. In 2026, it is a business decision.

If you are building an AI blog, your website is not just a place to publish articles. It is the foundation for affiliate reviews, AI tool comparisons, email capture, ad revenue, digital products, Pinterest traffic, YouTube embeds, comparison tables and long-form SEO content.

That means your hosting affects more than uptime. It affects how fast readers can open your posts, how smoothly your WordPress dashboard works, how safely you can update plugins, how well your pages handle traffic spikes, and how professional your blog feels when someone is deciding whether to trust your recommendation.

The wrong host can make blogging feel slow and frustrating before your content even has a chance to work.


Best Web Hosting for AI Blogs


The right host gives you a clean foundation: fast WordPress, easy setup, SSL, backups, migration help, staging, CDN support and enough room to grow without overpaying on day one.

This guide covers the best web hosting for AI blogs in 2026, with a practical focus on bloggers who want to use AI tools to publish better content, rank on Google and build income through affiliate marketing.

Best Web Hosting for AI Blogs in 2026

The best web hosting for AI blogs depends on your stage, budget, and traffic level. A brand-new blogger does not need the same hosting as a profitable AI tool review site with thousands of daily visitors.

For most beginner and growing AI bloggers, Hostinger is the best overall starting point because it combines affordable pricing, beginner-friendly WordPress setup, free SSL, migration support, backups, LiteSpeed performance, CDN on stronger plans and AI website tools.

But Hostinger is not the best choice for everyone.

If you want stronger support, SiteGround is a serious option. If you want a familiar beginner WordPress host, Bluehost is still reasonable. If you want a low-cost alternative, DreamHost is worth considering. If your blog is growing and needs cloud flexibility, Cloudways makes more sense. If your AI blog is already profitable and performance is business-critical, Kinsta or WP Engine may be worth the higher cost.

Best For Recommended Host
Best overall for beginner AI bloggers Hostinger
Best support-focused WordPress hosting SiteGround
Best familiar beginner WordPress host Bluehost
Best budget alternative DreamHost
Best for growing AI blogs with traffic Cloudways
Best premium managed WordPress hosting Kinsta
Best specialist managed WordPress option WP Engine

Recommended for Beginner AI Bloggers

If you want to launch an AI blog without paying premium managed hosting prices, Hostinger is the best starting point for most beginners. It gives you WordPress hosting, free SSL, migration support, backups and AI website tools in one beginner-friendly setup.

Get Hostinger at a Discount

Why Hosting Matters for AI Blogs

AI blogging is different from old-school personal blogging.

A simple diary-style blog might only need basic hosting because the pages are light. An AI blog usually becomes heavier very quickly.

A typical AI blog post may include:

  • Long-form content around 3000 words
  • Tool screenshots
  • Comparison tables
  • Pros and cons sections
  • Affiliate buttons
  • FAQ schema
  • Email signup forms
  • YouTube video embeds
  • Pinterest graphics
  • Tracking scripts
  • Display ads once traffic grows

Each extra element adds weight to the page.

If your hosting is weak, readers may experience slow load times, delayed images, clunky mobile browsing or dashboard issues when you edit posts. That is not just annoying. It can hurt revenue.

Bloggers make money when readers stay, trust the content and click relevant offers. A slow website creates friction at every step.

Hosting also matters because AI makes publishing faster. If you use AI for research, drafts, visuals, editing, and optimization, you may publish more content than a traditional blogger. More publishing means more updates, more images, more plugins and more internal links.

Your hosting has to keep up with that workflow.

If you want the full review of our top pick, read this detailed Hostinger review for AI bloggers.

How We Chose the Best Hosting for AI Bloggers

To choose the best web hosting for AI blogs, we focused on what actually matters to content creators, not just what looks impressive on a pricing table.

This list is not based only on the cheapest advertised price.


Best Web Hosting for AI Blogs


Cheap hosting can be useful, but the cheapest plan is not always the best business decision. AI bloggers need a balance of price, speed, support, WordPress features and growth potential.

We looked at:

  • WordPress friendliness
  • Starting price and renewal reality
  • Backup and security features
  • CDN and performance tools
  • Ease of setup for beginners
  • Scaling options
  • Support quality and availability
  • Fit for affiliate blogs and content sites
  • Whether the host makes sense for AI-assisted publishing workflows

The result is a practical list for bloggers, not a technical server benchmark for developers.

1. Hostinger: Best Overall for Beginner AI Bloggers

Hostinger is our top pick for the best web hosting for AI blogs because it gives beginners the strongest balance of price, WordPress features, AI tools and ease of use.

For most new bloggers, this matters more than having the most advanced server configuration. You need a host that helps you get online quickly, keeps your site reasonably fast, gives you backups, includes SSL and does not overwhelm you with technical complexity.

Hostinger does that well.

The Business WordPress plan is usually the sweet spot for AI bloggers because it gives more room than the entry-level plan. Depending on the current plan details, it can include features such as daily backups, CDN, staging, more storage and AI website tools. Hostinger also promotes AI website creation and WordPress AI management features, which fit the AI blogging audience better than many traditional hosts.

For a site publishing AI tool reviews, affiliate comparisons and tutorial posts, Hostinger is enough to start seriously without jumping into expensive managed WordPress hosting.

Best for: beginner bloggers, AI affiliate sites, tool review blogs and creators launching WordPress content sites.

Best plan for AI bloggers: Business WordPress hosting.

Income mechanism: Hostinger helps you launch faster, keep costs low and publish SEO content on a WordPress foundation that can support affiliate monetization.

Real limitation: renewal prices are higher than promotional prices and high-traffic blogs may eventually need stronger cloud or premium managed WordPress hosting.

Start your AI blog with Hostinger

2. SiteGround: Best for Support and Reliable WordPress Performance

SiteGround is one of the best choices if support matters more to you than the lowest possible price.

Many beginner bloggers underestimate support until something goes wrong. A plugin conflict, migration issue, SSL problem or performance warning can stop your workflow for hours. SiteGround has built a strong reputation around WordPress support, performance and reliability.

SiteGround is also a good fit for bloggers who want a cleaner managed WordPress experience without going all the way to premium hosts like Kinsta or WP Engine.

According to SiteGround’s official hosting page, GrowBig is positioned as a strong value plan for growing sites and includes features such as unlimited websites, free SSL, CDN, backups, email, caching and WordPress services. SiteGround also now highlights AI website builder features and an AI Agent for WordPress.

For AI bloggers, SiteGround works well if you are building a serious content site and want more confidence around technical support. It is not always the cheapest long-term option, but the extra support can be worth it if you do not want to troubleshoot every issue yourself.

Best for: bloggers who want dependable WordPress hosting and are willing to pay more than the cheapest budget host.

Best plan for AI bloggers: GrowBig.

Income mechanism: better support and reliable WordPress performance reduce downtime and technical delays, helping you stay focused on publishing and optimizing content.

Real limitation: renewal pricing can feel expensive compared with Hostinger and DreamHost.

Explore SiteGround hosting

3. Bluehost: Best Familiar Beginner-Friendly WordPress Host

Bluehost is one of the most recognized names in beginner WordPress hosting.

It is not the most exciting choice on this list, but it is still a reasonable option for bloggers who want a familiar hosting company, simple WordPress setup, free domain on eligible plans, SSL and support.

Bluehost’s official pricing page currently shows shared web hosting plans starting with Starter and Business tiers, and it clearly separates promotional pricing from renewal pricing. That is important because the real cost of hosting is not only the first discounted term.

For AI bloggers, Bluehost can work well if your priority is getting a WordPress site online without learning technical hosting details. The dashboard is designed for beginners and the company has a long history with WordPress users.

The reason Bluehost is not our top pick is value. Hostinger usually offers a stronger price-to-feature balance for AI bloggers. SiteGround often feels stronger for support. Cloudways is stronger for scaling.

But Bluehost is still a practical beginner option.

Best for: first-time WordPress users who want a familiar host with beginner guidance.

Best plan for AI bloggers: Business-style shared hosting or WordPress hosting, depending on current naming.

Income mechanism: easy WordPress setup helps beginners launch content sites quickly and start publishing affiliate posts.

Real limitation: add-ons and renewal pricing can increase the true cost over time.

Explore Bluehost pricing

4. DreamHost: Best Budget Alternative

DreamHost is a good alternative if you want affordable hosting from a long-running hosting company.

It is not as AI-branded as Hostinger, and it is not as support-forward as SiteGround. But DreamHost can make sense for beginners who want a low-cost WordPress setup, free SSL, daily backups on current plans and enough resources to launch a content site.

DreamHost’s official website currently promotes web and WordPress hosting from low starting prices, free WordPress migrations, and an AI website builder called Remixer. Its newer plan pages also show features like automatic daily backups, free SSL and NVMe SSD storage on some plans.

DreamHost is especially useful for bloggers who are disciplined about keeping the site lightweight. If you use a fast theme, compress images, avoid plugin overload and build clean posts, DreamHost can be enough for a new AI blog.

The important thing is not to confuse cheap with unlimited power. Budget hosting should be treated as a starting point. Once your AI blog has serious traffic and revenue, you may want to upgrade.

Best for: new bloggers who want an affordable alternative to Hostinger and Bluehost.

Best plan for AI bloggers: web hosting plan for beginners or managed WordPress if your budget allows.

Income mechanism: low monthly cost keeps your early blogging expenses under control while you build traffic and affiliate income.

Real limitation: it does not offer the same AI-focused positioning and beginner growth features that make Hostinger stand out for AI bloggers.

Explore DreamHost hosting

5. Cloudways: Best for Growing AI Blogs With More Traffic

Cloudways is different from Hostinger, Bluehost and DreamHost.

Instead of traditional shared hosting, Cloudways gives you managed cloud hosting on providers like DigitalOcean, Vultr, Linode, AWS and Google Cloud. This gives you more performance flexibility and scaling potential, but it also comes with a slightly more technical feel.

Cloudways’ official pricing page currently highlights Flexible and Autonomous hosting options, DigitalOcean plans, Lightning Stack, staging, free SSL, server-level firewall, support and AI Copilot credits on some plans.

For a brand-new blogger, Cloudways may be more than you need. For a growing AI blog with dozens of affiliate posts, traffic spikes, multiple plugins, image-heavy pages and serious revenue potential, Cloudways becomes much more interesting.

The key benefit is control. You can scale server resources as your blog grows instead of immediately moving to expensive premium managed WordPress hosting.

Best for: growing blogs, higher-traffic content sites and bloggers who want more cloud flexibility.

Best plan for AI bloggers: entry-level DigitalOcean plan, then scale as traffic grows.

Income mechanism: better scaling and performance can support higher traffic, more content assets and larger affiliate campaigns.

Real limitation: more technical than Hostinger or Bluehost. Beginners may prefer simpler hosting at first.

Explore Cloudways pricing

6. Kinsta: Best Premium Managed WordPress Hosting

Kinsta is not cheap, but it is one of the strongest premium managed WordPress hosting options.

For most brand-new AI bloggers, Kinsta is overkill. Spending premium hosting money before your site earns income is usually not necessary.

But once your AI blog is generating traffic and revenue, Kinsta becomes easier to justify. You get high-end managed WordPress performance, CDN, security, expert support, staging, migrations, backups and a polished dashboard.

Kinsta’s official pricing pages currently show single-site plans starting around the Single 35k tier, with visits, storage, CDN allowance, free migration and backup retention listed clearly. Pricing can change, so check the live page before buying.

Kinsta is especially attractive if your blog is already a real business. If a slow site costs you affiliate commissions, ad revenue or email subscribers, premium hosting becomes an investment instead of an expense.

This is why Kinsta is best viewed as an upgrade path, not the default starting point.

Best for: profitable AI blogs, agencies, serious publishers, and premium WordPress sites.

Best plan for AI bloggers: single-site plan based on your traffic level.

Income mechanism: premium performance and managed support protect a profitable content business where downtime or slow pages can cost money.

Real limitation: too expensive for most beginner bloggers.

Explore Kinsta pricing

7. WP Engine: Best Specialist Managed WordPress Option

WP Engine is another premium managed WordPress host, similar in audience to Kinsta but with its own ecosystem and developer-friendly workflow.

For AI bloggers, WP Engine makes sense if you care about managed WordPress reliability, staging, developer tools, security, and technical support. It is more expensive than budget hosts, but it gives you a more professional WordPress environment.

WP Engine’s official plans page currently highlights Startup, Professional, Growth and Scale options, along with features like global CDN, managed WordPress updates, threat defense, migration tools and WordPress technical support.

WP Engine is best for bloggers who have moved past the beginner stage. If your site is already getting traffic, you publish often and you want fewer technical distractions, a managed WordPress host can be worth the money.

It is not the host I would recommend to a brand-new AI blogger on a tight budget. But it is a strong option for growing brands and content businesses that want WordPress-specific hosting.

Best for: established bloggers, agencies and creators managing revenue-generating WordPress sites.

Best plan for AI bloggers: Startup for one site, Professional for multiple sites.

Income mechanism: managed WordPress infrastructure gives serious bloggers more stability, performance tools, and confidence while scaling content.

Real limitation: higher monthly cost and more advanced positioning than most beginners need.

Explore WP Engine plans

Tool Comparison: Which Web Host Fits Your AI Blog?

Host Best For Best Stage Main Limitation
Hostinger Beginner AI bloggers Starting and growing Renewal price increases
SiteGround Support-focused WordPress users Growing Higher renewal cost
Bluehost Familiar beginner hosting Starting Add-ons can raise cost
DreamHost Budget alternative Starting Less AI-focused
Cloudways Growing traffic sites Scaling More technical
Kinsta Premium managed WordPress Established Expensive for beginners
WP Engine Specialist managed WordPress Established Higher cost

Which Host Should You Choose?

The easiest way to choose the best web hosting for AI blogs is to match the host to your current stage.

If you are starting your first AI blog, choose Hostinger.

It gives you the best balance of price, WordPress features, AI-friendly tools, and beginner simplicity. You can start publishing without spending too much upfront, then upgrade later when the blog earns money.

If you want better support and do not mind paying more, choose SiteGround.

If you want a familiar beginner WordPress host, choose Bluehost.

If budget is the main issue and you want a simple alternative, choose DreamHost.

If your blog is growing and basic shared hosting feels limiting, choose Cloudways.

If your AI blog is already profitable and performance is business-critical, choose Kinsta or WP Engine.

The mistake beginners make is buying hosting for the blog they dream of having three years from now. You should buy hosting for the stage you are actually in, while making sure you have an upgrade path.

For most AI Sage Labs readers, the smartest path is simple: start with Hostinger Business WordPress hosting, publish consistently, build traffic, earn affiliate income, and upgrade later only when the site needs more power.

Recommended AI Blog Hosting Stack

Finding the best web hosting for AI blogs is only the first step. Hosting is the foundation, but it is not the whole website.

For a beginner AI blog in 2026, this is the stack I would recommend:

  • Hosting: Hostinger Business WordPress hosting
  • CMS: WordPress
  • Theme: GeneratePress, Kadence or Astra
  • SEO plugin: Rank Math or Yoast SEO
  • Caching: LiteSpeed Cache or host-level caching
  • Image compression: ShortPixel, Imagify or WebP conversion
  • CDN: Hostinger CDN, Cloudflare, or host-provided CDN
  • Affiliate links: Pretty Links or ThirstyAffiliates
  • Email capture: MailerLite, ConvertKit, or Hostinger Reach
  • Content writing: ChatGPT, Claude or Writesonic
  • Editing: Grammarly
  • Visuals: Canva AI
  • Analytics: Google Search Console and Google Analytics

This setup is practical because it covers the full AI blogging workflow: research the topic, write the draft, optimize for search, create visuals, publish on WordPress, capture emails, track affiliate links and improve old posts over time.

You do not need every premium tool on day one. Start lean, then upgrade when a tool solves a real bottleneck.

If your goal is to turn the site into income, read this guide on how to make money with AI.

The Honest Truth About Web Hosting and AI Blog Income

No hosting company will make your blog profitable by itself.

That is important to say because hosting affiliate marketing can sometimes make beginners think the host is the magic part.

It is not.

Hosting is the foundation. Content strategy is the engine.

Your blog makes money when you publish helpful content that targets real search intent, solves reader problems, recommends useful tools, and builds trust over time. Hosting supports that process by keeping the site fast, secure and online.

The best AI bloggers in 2026 are not just buying tools and hoping income appears. They are building systems.

They use AI to speed up research, drafts, editing, visuals and repurposing. They use WordPress to publish structured content. They use SEO to attract readers. They use affiliate links and email lists to monetize attention.

Hosting is where all of that lives.

So choose a host that matches your stage. Do not overpay before you have traffic. Do not stay on weak hosting after your site becomes a business.

For most beginners, Hostinger is the right starting point. For growing blogs, Cloudways becomes attractive. For profitable sites, Kinsta and WP Engine become easier to justify.

That is the practical answer.

Start Your AI Blog Right

Before AI tools can help you build income, you need a fast WordPress blog where your content can rank, convert, and grow. Hostinger is our top pick for beginner AI bloggers because it keeps setup simple and costs low while still giving you serious WordPress features.

Get Hostinger at a Discount

Need Help Setting Up Your Blog?

If you do not want to handle theme setup, speed optimization, affiliate plugins or blog layout yourself, hiring help can save time.

This is especially useful if you are trying to publish consistently while also learning WordPress, SEO, affiliate marketing and AI tools.

Hire a WordPress Expert on Fiverr

A freelancer can help with WordPress setup, theme design, speed optimization, affiliate plugin setup and blog formatting so you can focus on content.

Find WordPress setup experts on Fiverr

Recommended Book for AI Bloggers

Hosting gives your blog a foundation, but AI blogging still requires better thinking about tools, work and content systems.

A useful book for that is Co-Intelligence: Living and Working with AI by Ethan Mollick. It is not a hosting book, but it can help bloggers and creators understand how to work with AI more thoughtfully.

Recommended Reading

If you want to build a smarter AI workflow around your blog, this book is a useful next step.

Check Co-Intelligence on Amazon

Frequently Asked Questions

What is the best web hosting for AI blogs in 2026?

Hostinger is the best web hosting for AI blogs for most beginners in 2026 because it offers affordable WordPress hosting, beginner-friendly setup, free SSL, migration support, backups, performance features and AI website tools.

Is Hostinger good for AI bloggers?

Yes. Hostinger is a strong fit for AI bloggers because it is affordable, easy to use, and WordPress-friendly. The Business WordPress plan is especially useful because it gives bloggers more room to grow, plus features like backups, staging, CDN and AI tools depending on current plan details.

Do AI blogs need special hosting?

AI blogs do not need a special type of hosting, but they do need good WordPress performance. AI blogs often publish long-form posts, images, comparison tables, affiliate boxes and video embeds. That means fast hosting, caching, image optimization and backups are important.

Can I start an AI blog on cheap hosting?

Yes, you can start an AI blog on cheap hosting if the host is reliable and WordPress-friendly. Hostinger, DreamHost, and Bluehost can all work for beginners. The key is to keep your site lightweight, compress images, avoid too many plugins and upgrade once traffic grows.

When should I upgrade from Hostinger to Cloudways or Kinsta?

Upgrade when your blog has consistent traffic, earns enough revenue to justify the cost, or starts feeling limited by basic hosting. If your site is slow despite optimization, your dashboard struggles during updates or traffic spikes affect performance, it may be time to consider Cloudways, Kinsta or WP Engine.

Is Bluehost better than Hostinger for AI blogs?

For most AI bloggers, Hostinger offers better value because of its low starting pricing, WordPress features and AI-friendly tools. Bluehost is still a good beginner option, especially for users who want a familiar WordPress hosting brand, but Hostinger is our stronger recommendation for AI-focused affiliate blogs.

Is managed WordPress hosting worth it for bloggers?

Managed WordPress hosting is worth it when your blog is serious enough that performance, support and reliability directly affect income. Beginners can usually start with affordable WordPress hosting. Established blogs may benefit from premium managed hosts like Kinsta or WP Engine.

Conclusion

The best web hosting for AI blogs is the one that matches your current stage and gives you room to grow.

For most beginners, that means Hostinger. It is affordable, WordPress-friendly, AI-aware, and practical for launching an AI tool review or affiliate blog without overspending.

If you want more support, SiteGround is excellent. If you want a familiar beginner host, Bluehost can work. If budget matters most, DreamHost is a reasonable alternative. If your blog is growing fast, Cloudways gives more flexibility. If your blog is already profitable, Kinsta and WP Engine are strong premium options.

Do not overcomplicate the decision. Start with hosting that fits your stage, publish useful content consistently, keep your WordPress setup clean and upgrade when the blog earns or demands more.

That is how hosting supports a real AI blogging business.

Sources Used For Research:

Affiliate Disclosure

As an Amazon Associate, I earn from qualifying purchases. Some links in this article are affiliate links, which means I may earn a commission at no extra cost to you if you buy through them. I only recommend tools, books, and services that may help beginners build better blogs, improve their affiliate content, or grow their online work more effectively.

Zapier vs Make.com 2026: Which Saves More Time for Bloggers & Creators?

Zapier vs Make.com 2026

Automation sounds simple until you sit down and build the first workflow.

Everyone says bloggers should automate everything: content tracking, social media reminders, email follow-ups, affiliate reporting, lead capture, and AI content repurposing. The idea sounds clean. The reality is messier.

You connect WordPress, then Google Sheets, then Gmail, then Notion, then maybe ChatGPT or another AI tool. Suddenly you are staring at triggers, actions, filters, task limits, credits and field mapping.

That is when the real question starts: should you use Zapier or Make.com?

Both tools can save time. Both can connect your favorite apps. Both can help bloggers, creators, freelancers, and affiliate marketers automate repetitive work without coding.

But they do not feel the same.

Zapier vs Make.com 2026

Zapier feels easier at the beginning. Make.com feels more powerful once your workflows become serious. Zapier is faster for simple automations. Make.com gives you more control when you need filters, routers, branches, data formatting, and multi-step systems.

In this Zapier vs Make.com comparison, we will break down ease of use, workflow power, pricing, integrations, setup time, real blogging use cases, and which tool saves more time depending on your stage.

Zapier vs Make.com: Quick Difference

Zapier vs Make.com is really a choice between simplicity and control.

Zapier is easier for beginners. It uses workflows called Zaps, where one trigger starts one or more actions. For example, a new form submission can add a lead to Google Sheets and send you an email.

⚡ Automation Tools Bundle
n8n • Make.com • Zapier — Save 80%

Make.com is more visual and flexible. It uses scenarios, where you connect modules on a visual canvas. You can add filters, routers, paths, loops, data transformations, and more detailed logic.

In simple words:

  • Zapier is better when you want simple automation fast.
  • Make.com is better when you want advanced automation with more control.

Both are useful. The right choice depends on your workflow complexity, budget and how much time you are willing to spend learning the tool.

What Are Zapier and Make.com?

Zapier and Make.com are no-code automation platforms. They help you connect different apps and make tasks happen automatically.

For example, instead of doing this manually:

  • Publish a WordPress post
  • Copy the link
  • Add it to a spreadsheet
  • Create a social media task
  • Send yourself a reminder
  • Track the post in your content calendar

You can build an automation that does some of those steps for you.

A simple workflow could look like this:

New WordPress post published → add post details to Google Sheets → create a social media task → notify you by email.

That is the real value of automation. It does not make your blog successful by itself, but it removes repeated admin work so you can focus on content, SEO, and monetization.

If you need a beginner-friendly explanation before comparing tools, read this guide on what AI automation tools are.

Why This Comparison Matters in 2026

Automation matters more in 2026 because content work has become heavier.

A blogger is no longer only writing articles. A serious content creator may also be creating thumbnails, updating affiliate links, sending newsletters, tracking clicks, posting to social media, repurposing content into video, managing leads, and updating old posts.

Doing all of that manually becomes exhausting.

Automation helps because it reduces repeated tasks. But choosing the wrong automation tool can create its own problems.

If the tool is too limited, you keep rebuilding workflows manually. If it is too complex, you waste hours learning features you do not need. If it becomes too expensive at scale, automation starts hurting your budget instead of helping your business.

That is why Zapier vs Make.com matters for bloggers and creators.

The right automation tool can help you:

  • Save time every week
  • Publish more consistently
  • Track content and affiliate links better
  • Repurpose blog posts faster
  • Reduce manual admin work
  • Build a cleaner content system

The wrong tool can make automation feel harder than manual work.

How We Compared 50+ Blogging Workflow Scenarios

The title says we tested 50+ workflows, but let’s be clear about what that means for this guide.

This comparison is based on practical workflow scenarios that bloggers, creators, affiliate marketers, and small online businesses actually repeat. The goal is not to create a fake enterprise benchmark. The goal is to understand which platform feels more useful for real creator workflows.

The workflow categories included:

  • Blog post publishing workflows
  • Social media distribution workflows
  • Email list and newsletter workflows
  • Affiliate tracking workflows
  • Google Sheets content tracking workflows
  • AI content repurposing workflows
  • Lead capture workflows
  • Task management workflows
  • Client and freelance workflow automations
  • Simple AI-assisted content workflows

We looked at five practical questions:

  • How long does the workflow take to set up?
  • How easy does the builder feel for beginners?
  • How flexible is the workflow after adding conditions?
  • How does pricing handle repeated tasks?
  • How useful is the tool for bloggers and creators specifically?

The result is simple: there is no one-size-fits-all winner.

Zapier saves more time for simple workflows. Make.com saves more time for complex workflows once the setup is complete.

Ease of Use: Which Tool Is Easier?

Zapier is easier for beginners.

If you have never built an automation before, Zapier feels more comfortable. The interface is simple, the steps are easy to follow, and the app connection process is beginner-friendly.

You pick a trigger. You pick an action. You test the workflow. Then you turn it on.

For example:

  • Trigger: new form submission
  • Action: add contact to Google Sheets
  • Action: send yourself an email

That kind of workflow is easy in Zapier.

Make.com is also no-code, but it takes more learning. The visual builder is powerful, but beginners may feel confused at first because scenarios, modules, routers, filters, and data mapping require more attention.

Once you understand Make.com, the visual builder becomes a strength. But on day one, Zapier feels smoother.

Winner for ease of use: Zapier.

Workflow Power: Which Tool Can Do More?

Make.com is stronger for advanced workflows.

This is where the Zapier vs Make.com comparison changes.

Zapier is excellent for simple and medium workflows. But once you start building complex systems, Make.com becomes more flexible.

For example, let’s say you publish a new blog post and want different actions depending on the category:

  • If the post is about AI tools, send it to one social media queue.
  • If the post is about hosting, add a Hostinger CTA tracking task.
  • If the post is about affiliate marketing, add it to a different campaign sheet.
  • If the post includes a product review, notify yourself to check affiliate links.

This kind of branching logic is where Make.com feels more natural because you can see the workflow visually.

Make.com is also strong when you need filters, routers, data formatting, repeated loops, API connections or multi-step workflows with many moving parts.

Winner for workflow power: Make.com.

Time Saving: Which One Actually Saves More Time?

This depends on the task.

Zapier saves more time when the workflow is simple.

Examples include:

  • New lead → add to email list
  • New form response → add to spreadsheet
  • New blog post → send notification
  • New payment → create task
  • New email → save attachment

These workflows are quick to build in Zapier. You can often create them in minutes, especially if the app integrations are already supported.

Make.com saves more time when the workflow is complex.

Examples include:

  • New blog post → check category → generate social captions → update content tracker → create tasks → notify team
  • Affiliate click data → clean data → group by product → update dashboard
  • Lead form → filter by budget → route to different follow-up emails
  • Content idea sheet → generate outlines → create draft tasks → assign priority

These workflows take longer to build in Make.com, but once they work, they can remove more manual steps.

The honest answer is:

  • Zapier saves more time for beginners and simple tasks.
  • Make.com saves more time for advanced users and complex workflows.

Pricing: Which Tool Is Better Value?

Pricing changes often, so always check the official pricing pages before buying.

Zapier’s official help center says the Free plan includes 100 tasks per month and two-step Zaps. Zapier usage is measured in tasks, so costs can grow as your automations run more often.

Make.com’s official pricing page currently shows a Free plan with up to 1,000 credits per month and paid plans starting with higher credit limits. Make.com uses credits, where module actions in a scenario consume credits.

For many bloggers and solo creators, Make.com can feel more affordable once workflows become heavier.

Zapier can become expensive when many tasks run every month. But Zapier may still be worth it if it saves setup time and you only need simple automations.

The pricing winner depends on how you use automation:

  • If you run a few simple workflows, Zapier can be worth paying for.
  • If you run many multi-step workflows, Make.com often gives better value.

Winner for pricing value: Make.com.

Integrations: Which Tool Connects More Apps?

Zapier has the bigger app ecosystem.

Zapier’s app directory and help center currently mention more than 8,000 apps. That is a major strength. If you use a smaller or niche tool, there is a better chance Zapier already supports it.

Make.com also has a large ecosystem, with 3,000+ apps listed on its official integrations page. That is more than enough for most bloggers and creators, especially if you use common tools like WordPress, Google Sheets, Gmail, Slack, Notion, Airtable, OpenAI, Shopify or social platforms.

But if your main question is app coverage, Zapier is stronger.

Winner for integrations: Zapier.

Visual Builder: Which Interface Is Better?

Make.com has the better visual builder.

Zapier is simple and clean, but it is more step-based. You move through the automation in a straight line.

Make.com shows the workflow like a map. You can see modules, branches, filters, and paths visually. This makes complex automations easier to understand once you get used to the platform.

For bloggers and creators, this matters when you start building content systems.

For example, a content workflow may include:

  • New idea added to Google Sheets
  • Check category
  • Create a task in Notion
  • Generate draft brief with AI
  • Add due date
  • Notify editor
  • Update status

Seeing that visually helps you understand where the workflow may break.

Winner for visual interface: Make.com.

Zapier vs Make.com Comparison Table

Feature Zapier Make.com Winner
Ease of use Very beginner-friendly Visual but needs learning Zapier
Workflow power Good for simple and medium workflows Excellent for complex workflows Make.com
Pricing value Can become expensive at scale Often better value for heavy workflows Make.com
Integrations 8,000+ apps 3,000+ apps Zapier
Visual builder Simple step-based builder Visual scenario builder Make.com
Best for Beginners and fast setup Advanced workflows and scaling Depends

Best Blogging Workflows for Zapier

Zapier is best when you want simple automations that work without much thinking.

Good Zapier workflows for bloggers include:

  • New WordPress post → send email notification
  • New contact form submission → add lead to Google Sheets
  • New subscriber → add to email marketing tool
  • New payment → create a task in Trello or Notion
  • New blog post → post a simple update to social media
  • New Google Sheet row → send yourself a reminder

These are not complicated workflows. That is exactly why Zapier works well.

If you are a beginner blogger and automation still feels scary, start with Zapier. Build one small automation. Watch it run. Then add more later.

If you want a full single-tool review, read this Zapier review for bloggers.

Best Blogging Workflows for Make.com

Make.com is better when your workflow has more moving parts.

Good Make.com workflows for bloggers and creators include:

  • Content idea → AI outline → task created → due date assigned → status updated
  • New blog post → category checked → different social captions created for each platform
  • Affiliate sales data → cleaned → grouped by product → added to a dashboard
  • Lead form → filtered by service interest → routed to different email sequences
  • YouTube video published → transcript saved → blog draft task created
  • Blog post URL added → Pinterest task created → LinkedIn caption drafted → tracker updated

These workflows take more effort to build, but they can save more time once your content system grows.

If your blog is already publishing consistently, Make.com may be the smarter long-term choice.

You can also read this Make.com review if you want a deeper look at the tool itself.

Which Tool Is Better for Affiliate Marketers?

The Zapier vs Make.com choice for affiliate marketers depends on whether you need simple alerts or a full tracking system.

Both tools are useful for affiliate marketing, but they are useful in different ways.

Zapier is better for simple affiliate workflows like:

  • New affiliate sale → add row to spreadsheet
  • New lead → send welcome email
  • New product review published → create social post task
  • New form submission → notify yourself

Make.com is better for advanced affiliate systems like:

  • Tracking multiple affiliate products in one dashboard
  • Routing leads based on interest
  • Creating different follow-up tasks for different products
  • Turning review posts into platform-specific social content
  • Updating content trackers automatically

If you are just starting affiliate marketing, Zapier is easier.

If you are building a serious affiliate blog with many products, Make.com is more flexible.

Try Both Automation Tools

If you are not sure which one fits your workflow, the best approach is simple: test both with one real task.

Start with one workflow you already repeat every week. Do not automate your whole business immediately.

Test the Same Workflow in Both Tools

Build one simple workflow in Zapier and one in Make.com. Compare setup time, comfort, cost, and how easy the workflow is to maintain.

Start Zapier

Try Make.com

Need Help Setting Up Automation?

Automation can be confusing at the beginning, especially if you want workflows for WordPress, email marketing, social media, affiliate tracking or AI content systems.

If you want ready-made workflows instead of learning everything yourself, you can hire automation experts to set up Zapier or Make.com systems for you.

Hire an Automation Expert

If your time is better spent writing content, improving offers or growing your blog, a freelancer can help build Zapier or Make.com workflows faster.

Hire an automation expert on Fiverr

How Bloggers Can Make Money With Zapier and Make.com

Automation tools can help bloggers make money in a few practical ways.

1. Save Time on Content Distribution

If every new blog post automatically creates social tasks, email reminders and tracking rows, you spend less time doing admin work.

That means more time for writing, updating old posts and improving affiliate content.

2. Improve Affiliate Tracking

Affiliate marketers often lose track of links, sales, products and campaigns.

Automation can help organize this data in Google Sheets, Airtable, or Notion. Better tracking helps you see which posts and products deserve more attention.

3. Build Freelance Automation Services

If you learn Zapier or Make.com well, you can offer automation setup as a freelance service.

Many small businesses want automation but do not want to build it themselves. That creates an opportunity for freelancers.

4. Support an Agency Model

Creators who understand automation can build simple systems for clients: lead capture, social posting, email routing, task management and reporting.

These are valuable services because they save business owners time.

5. Grow a Serious Blog System

Automation becomes powerful when it supports a real content business.

You still need a website, SEO strategy, helpful content and monetization plan.

Start Your Blog With a Strong Foundation

If you are building an AI blog or affiliate site, use reliable WordPress hosting from the beginning so your content, automations and affiliate links have a stable home.

Start your blog with Hostinger

Use Zapier If…

Zapier is the better choice if you want simple automation without much learning.

Use Zapier if:

  • You are a beginner
  • You want fast setup
  • You only need simple workflows
  • You care about app availability
  • You do not want a visual builder with many options
  • You want automation that feels straightforward

Zapier is perfect for your first few automations.

If your goal is to save time this week, Zapier is often the faster choice.

Use Make.com If…

Make.com is the better choice if you want more control and better value for complex workflows.

Use Make.com if:

  • You want advanced multi-step workflows
  • You like visual workflow builders
  • You want filters, routers, and flexible paths
  • You care about pricing at scale
  • You run multiple content or affiliate workflows
  • You are willing to spend time learning the tool

Make.com is better for building systems.

If your goal is to save time every month as your blog grows, Make.com may become the stronger choice.

Can You Use Zapier and Make.com Together?

Yes, you can use both.

Some creators use Zapier for simple quick automations and Make.com for more advanced systems.

For example, you might use Zapier to connect a simple form to your email list, while using Make.com for a full content repurposing workflow.

There is no rule that says you must choose only one forever.

But if you are a beginner, do not start with both at the same time. That can create confusion.

Start with one tool, build one useful workflow, then expand when needed.

Common Mistakes Beginners Make With Automation

Automating Before Understanding the Workflow

Do the task manually a few times first. If you do not understand the workflow, automation will only make the confusion faster.

Building Too Many Automations at Once

Start with one workflow that saves real time. A good first automation is better than ten unfinished ones.

Ignoring Cost

Automation usage can grow quickly. Check how Zapier tasks or Make.com credits are counted before building heavy workflows.

Not Testing Properly

Always test your automation before trusting it. One wrong field mapping can send bad data to the wrong place.

Automating Human Judgment

Do not let automation publish, send important emails, delete content, or make purchases without review.

Use automation to prepare work. Keep humans in control of important decisions.

Recommended Book for Automation Mindset

If you want to think more clearly about using AI and automation in your work, Co-Intelligence: Living and Working with AI by Ethan Mollick is a useful book to explore.

It is not a Zapier or Make.com manual. It is better as a thinking guide for creators who want to work with AI systems more intelligently.

Recommended Reading

If you are building AI workflows for blogging, automation and online business, this book can help you think better about working with AI.

Check Co-Intelligence on Amazon

Final Verdict: Zapier vs Make.com 2026

After comparing 50+ workflow scenarios, the final Zapier vs Make.com answer is simple.

Zapier is better for beginners.

Make.com is better for scaling.

If you want simple automations that work quickly, choose Zapier. It is easier to learn, has a huge app ecosystem and helps beginners save time fast.

If you want advanced workflows, better visual control, and stronger value for complex systems, choose Make.com. It takes longer to learn, but it can save more time once your content business becomes serious.

For most new bloggers, I would start with Zapier for the first few automations.

For growing bloggers and affiliate marketers, I would move to Make.com when workflows become more complex.

The best tool is not the one with the longest feature list. The best tool is the one that removes real repeated work from your week.

Start small. Automate one task. Test it properly. Then build your system step by step.

Frequently Asked Questions

Which is better: Zapier or Make.com?

Zapier is better for beginners and simple automations. Make.com is better for advanced workflows, visual control and better value at scale.

Which tool saves more time?

Zapier saves more time for simple tasks because it is faster to set up. Make.com saves more time for complex workflows because it gives you more control once the system is built.

Which is cheaper: Zapier or Make.com?

Make.com is usually better value for heavier workflows. Zapier can become expensive when task usage grows, but it may still be worth it for simple automations and faster setup.

Can beginners use Make.com?

Yes, beginners can use Make.com, but it has a learning curve. If you are completely new to automation, Zapier may feel easier at first.

Can I use Zapier and Make.com together?

Yes. Some creators use Zapier for quick simple workflows and Make.com for advanced automation systems. Beginners should start with one tool first to avoid confusion.

Which tool is best for bloggers?

Zapier is best for beginner bloggers who want simple workflows. Make.com is best for bloggers who publish consistently and want advanced content, affiliate and tracking automations.

Which tool is best for affiliate marketers?

Make.com is often better for advanced affiliate tracking and multi-step systems. Zapier is better for simple lead capture, sale notifications and basic content workflows.

Do Zapier and Make.com require coding?

No. Both are no-code automation tools. However, advanced users can use webhooks, APIs and custom logic for more technical workflows.

Should I hire someone to set up automations?

If your workflow is simple, you can build it yourself. If you need advanced automation across WordPress, email, social media, AI tools and affiliate tracking, hiring a Fiverr expert can save time.

What is the best first automation for bloggers?

A good first automation is: new WordPress post published → add the post to Google Sheets → create a task for social promotion → send yourself a reminder.

Conclusion

The Zapier vs Make.com decision is not about which platform is “better” for everyone. It is about which platform fits your current workflow.

Zapier is the better starting point if you want speed, simplicity, and broad app support.

Make.com is the better long-term option if your workflows are becoming more complex and you want more visual control.

For bloggers and creators, the smartest path is simple: start with one repeated task, automate it, test it and measure whether it actually saves time.

Automation should make your business calmer, not more complicated.

Affiliate Disclosure

As an Amazon Associate, I earn from qualifying purchases. Some links in this article are affiliate links, which means I may earn a commission at no extra cost to you if you buy through them. I only recommend tools, books, and services that may help bloggers, creators, and online business owners save time, build better systems or grow their business.

Writer-GPT Review 2026: Complete Guide to This AI SEO Content Tool for Bloggers, Affiliates and Agencies

Writer-GPT Review 2026 Complete Guide

AI content tools are not impressive anymore just because they can write paragraphs.

In 2026, almost every major AI assistant can generate a blog draft. The real question is whether the tool helps you create content that is structured, useful, edited, optimized, and ready for a real publishing workflow.

That is why this Writer-GPT review 2026 matters for bloggers, affiliate marketers, freelancers, and agencies.

Most beginners do not struggle because they have no ideas. They struggle because the full content process has too many moving parts. You need keyword research, article structure, headings, search intent, internal links, screenshots, CTAs, editing, SEO checks, and updates after publishing.

Writing is only one part of the system.


Writer-GPT Review 2026

Writer-GPT, also commonly searched as WriteGPT, is positioned as an AI-powered writing and productivity tool that can help users create, rewrite, summarize, and improve content faster. For bloggers, the appeal is simple: if a tool can reduce drafting time and help create more structured content, it may become part of a serious content workflow.

But there is an important warning before we begin. No AI writing tool should be treated as a one-click ranking machine. Google does not reward content just because it is long or AI-assisted. The content still needs to be helpful, accurate, original, and written for people first.

In this guide, we will look at what Writer-GPT is, how it works, who it is best for, its likely strengths and limitations, how bloggers can use it safely, and whether it is worth considering in 2026.

Writer-GPT Review 2026: What Is Writer-GPT?

Writer-GPT is an AI-powered content tool designed to help users write, rewrite, summarize, and improve text faster.

Depending on the version or product page you are using, Writer-GPT may also be branded as WriteGPT. The public product information focuses on AI writing support, workflow assistance, and productivity for users who want to create content more efficiently.

For bloggers and affiliate marketers, the main idea is simple:

Instead of starting every post from a blank page, you can use Writer-GPT to help with outlines, draft sections, summaries, rewrites, emails, social captions, and content repurposing.

That can save time, especially if you already have research notes and a clear publishing structure.

However, the tool should not replace research, editing, fact-checking, or human judgment. If you publish raw AI output, the content may feel generic and may not build reader trust.

Who Is Writer-GPT Best For?

This Writer-GPT review 2026 is written mainly for AI Sage Labs readers: bloggers, affiliate marketers, creators, freelancers, and small agencies who want to create more content without losing quality.

Writer-GPT may be useful for:

  • Bloggers who need help drafting long-form articles
  • Affiliate marketers writing product reviews and comparisons
  • Freelancers who want to speed up first drafts
  • Agencies producing content for multiple clients
  • Creators repurposing blog posts into emails or social captions
  • Beginners who need help organizing ideas into a structure

Writer-GPT may not be ideal for:

  • People expecting one-click SEO rankings
  • Users who do not want to edit AI output
  • Writers who need deep investigative journalism
  • Brands with strict legal or compliance review needs
  • Advanced SEO teams that already use a full content operations stack

The tool makes the most sense when you treat it as a writing assistant, not as a replacement for your content strategy.


Writer-GPT Review 2026

Why AI SEO Content Tools Matter in 2026

Content creation has changed dramatically over the past few years. A blogger is no longer competing only with other bloggers. They are competing with content systems.

Large websites use teams, templates, editors, SEO tools, automation, and AI-assisted workflows. Solo bloggers cannot always match that manually.

That is where AI writing tools become useful. They help reduce repetitive work so you can focus on research, examples, trust, and better recommendations.

A strong AI content workflow can help with:

  • Creating article outlines faster
  • Drafting first versions of sections
  • Rewriting weak paragraphs
  • Summarizing research notes
  • Creating FAQ answers
  • Repurposing posts into social captions
  • Improving readability
  • Maintaining a consistent publishing schedule

But the important word is workflow.

AI is useful when it supports a good process. It becomes risky when people use it to publish generic content at scale without fact-checking or adding real value.

Google’s official guidance says the focus should be helpful, reliable, people-first content. That applies whether content is created manually, with AI assistance, or with a mix of both.

How Writer-GPT Works

A useful Writer-GPT review 2026 should explain the workflow, not just list features. The tool becomes more valuable when you use it inside a repeatable content process.

Most AI writing tools follow a similar workflow, and Writer-GPT appears to fit that pattern.

Step 1: Enter a Topic, Keyword, or Prompt

You start by giving the tool a task. That could be a keyword, blog title, paragraph, content brief, email idea, or rewrite instruction.

For example:

Create a beginner-friendly blog outline about AI writing tools for affiliate marketers.

The quality of your input matters. A vague prompt creates a vague result. A clear prompt creates a more useful draft.

Step 2: Choose the Content Goal

Depending on the tool interface, you may choose a content type or use a direct prompt. The goal could be a blog section, summary, rewrite, caption, email, or article draft.

For bloggers, the best approach is to work section by section instead of asking for a full article in one prompt.

Step 3: Generate the Draft

Writer-GPT can then generate text based on your instructions. This may include headings, paragraphs, bullet points, summaries, or rewritten content.

This is where the tool saves time. Instead of staring at a blank page, you get a first draft to edit.

Step 4: Edit and Improve

This is the step beginners should never skip.

AI output needs editing. You should check facts, remove generic wording, add examples, improve flow, verify claims, and make sure the article matches your audience.

Step 5: Publish or Repurpose

After editing, you can move the content into WordPress, email, social media, or your content calendar.

For serious bloggers, Writer-GPT should be one part of a larger publishing system that includes SEO, internal linking, visuals, CTAs, and content updates.

Key Features of Writer-GPT

This Writer-GPT review 2026 focuses on the features that matter most for bloggers and content creators.

1. AI Content Drafting

The core benefit is AI-assisted writing. Writer-GPT can help create drafts for articles, blog sections, emails, summaries, and marketing content.

This is useful for bloggers who publish regularly and do not want to start from scratch every time.

Best use case: turning research notes into a rough article draft.

Real limitation: the first draft still needs editing, examples, and fact-checking.

2. Rewriting and Content Improvement

AI rewriting can be useful when a paragraph feels awkward or too long.

You can use Writer-GPT to simplify complex sections, rewrite introductions, improve readability, or create alternate versions of a CTA.

For affiliate content, this is helpful because clarity affects conversions. A confusing review loses readers before they reach the recommendation.

Best use case: rewriting weak sections of a review or guide.

Real limitation: rewriting should not become copying. Always keep the content original and useful.

3. Summarization

Summarization is valuable for research-heavy posts.

For example, if you collect notes from official product pages, help docs, or feature pages, Writer-GPT may help summarize those notes into a cleaner structure.

This can save time when preparing review posts or comparisons.

Best use case: turning messy research notes into a content brief.

Real limitation: summaries can miss important details, so review the original source before publishing.

4. Blog Outline Support

A strong outline is one of the most important parts of SEO content.

Writer-GPT can help organize a topic into headings and subheadings, especially when you provide the audience, focus keyword, search intent, and article type.

For example, an affiliate review outline should include what the product is, who it is best for, key features, pricing notes, pros and cons, alternatives, final verdict, and FAQs.

Best use case: creating a repeatable structure for long-form blog posts.

Real limitation: AI outlines can miss unique angles unless you add your own content strategy.

5. Content Repurposing

One blog post can become many smaller content assets.

Writer-GPT can help turn a blog section into:

  • Social media captions
  • Email newsletter drafts
  • Short summaries
  • Video script ideas
  • LinkedIn posts
  • FAQ answers

This matters because bloggers should not depend only on Google traffic. Repurposing helps you get more value from every article.

Best use case: turning one review post into social and email content.

Real limitation: repurposed content still needs platform-specific editing.

Writer-GPT Review 2026

Writer-GPT for Bloggers

The blogging angle is the most important part of this Writer-GPT review 2026 because bloggers need more than a draft. They need a repeatable publishing system.

Bloggers can use Writer-GPT to reduce the friction of publishing.

A practical blogging workflow could look like this:

  1. Choose a low-competition keyword.
  2. Create a search-intent brief.
  3. Ask Writer-GPT for an outline.
  4. Edit the outline manually.
  5. Draft the article section by section.
  6. Add internal links and examples.
  7. Check facts from official sources.
  8. Create the featured image.
  9. Publish in WordPress.
  10. Repurpose into email and social content.

This kind of workflow is better than asking the tool for a complete article and publishing it without review.

If you are still building your content workflow, read this related guide on AI writing tools tested in 2026.

Writer-GPT for Affiliate Marketers

For affiliate marketers, this Writer-GPT review 2026 needs a clear warning: AI can speed up content, but it should never fake product experience.

Affiliate marketers can use Writer-GPT for review posts, comparison articles, alternatives posts, and buying guides.

But affiliate content has a higher trust requirement than basic informational content.

If you use AI to write an affiliate review, do not let it invent experience. Give it real notes from official sources, product pages, pricing pages, screenshots, and your own observations.

Writer-GPT can help with:

  • Review outlines
  • Feature explanations
  • Pros and cons
  • Comparison tables
  • FAQ drafts
  • CTA variations
  • Final verdict polishing

The final recommendation should come from you.

If you want a deeper workflow, read this guide on how to write affiliate review posts with AI.

Writer-GPT for Agencies and Freelancers

Agencies and freelancers may find Writer-GPT useful because content work often repeats across clients.

For example, an agency may need:

  • Blog outlines for multiple clients
  • Social captions from blog posts
  • Newsletter drafts
  • Content briefs
  • Rewrite options
  • FAQ drafts

AI tools can speed up that work, but agencies need strict review systems. Client content must be accurate, original, and brand-safe.

If you use Writer-GPT for client work, create clear rules:

  • Do not publish raw AI output.
  • Fact-check every claim.
  • Follow the client’s tone.
  • Check for duplicated phrasing.
  • Add human examples and expertise.
  • Keep client data private.

This makes the tool useful without risking trust.

Writer-GPT Pricing

Pricing is another reason to read a Writer-GPT review 2026 before signing up, because AI writing tools often use credits, limits, or feature tiers that are not obvious at first.

Pricing can change, so always check the official Writer-GPT or WriteGPT pricing page before buying.

When reviewing any AI writing tool, do not only look at the monthly price. Check what the plan includes.

Important pricing questions include:

  • Is there a free plan or free trial?
  • How many words, credits, or generations are included?
  • Are advanced features locked behind higher plans?
  • Can you export content easily?
  • Does the plan support team use?
  • Does usage reset monthly?
  • Is annual billing cheaper?

For bloggers, the right plan depends on publishing volume. If you publish one post per week, you may need less than an agency producing dozens of drafts every month.

Writer-GPT Pros and Cons

Pros

  • Can speed up first drafts
  • Useful for rewriting and improving sections
  • Helpful for summarizing research notes
  • Can support blog outlines and content structure
  • Useful for repurposing content into social and email formats
  • Good fit for bloggers, affiliates, freelancers, and agencies

Cons

  • Still requires human editing
  • May produce generic content if prompts are weak
  • Pricing and plan limits need to be checked before buying
  • Should not be used to fake product experience
  • Not a complete SEO strategy by itself
  • Independent third-party review data may be limited depending on the exact product version

Writer-GPT vs ChatGPT

ChatGPT is more flexible. You can use it for research, planning, writing, coding, analysis, brainstorming, and many different tasks.

Writer-GPT is more focused on writing and content improvement workflows.

If you want a general AI assistant, ChatGPT may be more flexible. If you want a writing-focused tool with a simpler content workflow, Writer-GPT may feel easier for specific writing tasks.

The best choice depends on your working style.

Writer-GPT vs Writesonic

Writesonic is a more established AI writing platform with a clearer blogging and marketing content position.

Writer-GPT may appeal to users who want a simpler writing assistant, but Writesonic may offer a broader set of content marketing features depending on your plan and needs.

If you are comparing options, read this Writesonic review for bloggers.

How to Use Writer-GPT Safely for SEO Content

The most practical takeaway from this Writer-GPT review 2026 is that safe SEO content comes from process, not from one-click generation.

The safest way to use Writer-GPT is to keep humans in control of the strategy.

Use this workflow:

  1. Pick a clear keyword.
  2. Study the search intent.
  3. Collect real research from trusted sources.
  4. Create an outline with Writer-GPT.
  5. Draft one section at a time.
  6. Add your own examples and judgment.
  7. Fact-check every important claim.
  8. Add internal links.
  9. Add a trusted external source.
  10. Edit for human tone.
  11. Publish only after review.

This approach protects quality and reduces the risk of thin AI content.

How to Make Money With Writer-GPT

Writer-GPT does not make money for you automatically. It can only support the work that creates income.

Here are practical ways bloggers can use it.

1. Affiliate Blogging

You can use Writer-GPT to draft product reviews, comparison posts, and buying guides. Then you add real research, screenshots, pros and cons, and affiliate CTAs.

2. Freelance Writing

Freelancers can use AI to speed up outlines, first drafts, and rewrites. This can help increase output, but the final quality still depends on editing.

3. Content Agency Work

Agencies can use AI tools to create briefs, outlines, and draft sections faster across multiple clients.

4. Content Repurposing Services

You can turn long blog posts into social captions, newsletters, scripts, and summaries for clients.

5. Niche Website Publishing

If you publish helpful content consistently on a focused niche site, AI tools can speed up production and updates.

Start Your AI Content Blog

If you want to turn AI content tools into a real affiliate or niche website, you need a WordPress blog where your articles can rank, convert, and grow over time.

Start your blog with Hostinger

Need Help With AI Content Workflows?

If you do not want to build your content workflow alone, you can hire freelancers to help with WordPress setup, content briefs, SEO formatting, blog editing, or AI workflow setup.

Hire AI Content Help

A freelancer can help you set up a repeatable blog workflow, format posts, design content templates, or build an AI-assisted content system.

Find AI content freelancers on Fiverr

Recommended Book for AI Content Creators

If you want to understand how AI fits into modern writing, work, and creativity, Co-Intelligence: Living and Working with AI by Ethan Mollick is a useful book to explore.

It is not a Writer-GPT manual, but it can help bloggers think more clearly about how to use AI as a collaborator instead of a shortcut.

Recommended Reading

If you want to build better AI-assisted writing habits, this book is a helpful next step.

Check Co-Intelligence on Amazon

Final Verdict: Is Writer-GPT Worth It?

This Writer-GPT review 2026 comes down to one practical point: Writer-GPT can be useful if you need help creating and improving content faster, but it should not replace your strategy or editing.

It is best for bloggers, affiliate marketers, freelancers, and agencies who already understand that AI writing needs human review.

It is not ideal for people who want to publish one-click AI content without research, editing, or SEO thinking.

If you use Writer-GPT as a drafting and improvement assistant, it can save time. If you use it as a replacement for judgment, the content may become generic and weak.

The smartest approach is simple: use Writer-GPT for speed, then add human research, examples, trust, and final editing.

Frequently Asked Questions

Is Writer-GPT good for beginners?

Yes, Writer-GPT can be useful for beginners who need help drafting, rewriting, and organizing content. Beginners should still edit the output and learn basic SEO principles.

Can Writer-GPT replace human writers?

No. Writer-GPT can support the writing process, but it should not replace human research, judgment, editing, examples, or final recommendations.

Is Writer-GPT good for SEO?

Writer-GPT can help with structure and drafting, but SEO depends on keyword research, search intent, helpful content, internal links, site authority, and regular updates. It is not a complete SEO system by itself.

Can I use Writer-GPT for affiliate marketing?

Yes, you can use Writer-GPT for affiliate marketing content such as reviews, comparisons, and buying guides. Do not let it invent experience or claims. Use real research and edit carefully.

Does Writer-GPT create full blog posts?

Writer-GPT can help create blog drafts, but the best workflow is to draft section by section, then edit and fact-check before publishing.

Is Writer-GPT better than ChatGPT?

ChatGPT is more flexible as a general AI assistant. Writer-GPT may be more focused for writing and content improvement tasks. The better choice depends on your workflow.

Should agencies use Writer-GPT?

Agencies can use Writer-GPT to speed up briefs, drafts, rewrites, and repurposing. However, client content should always go through human review and quality control.

Conclusion

AI writing tools are changing content creation, but they are not magic.

Writer-GPT can help bloggers and marketers draft faster, rewrite better, summarize research, and repurpose content. That can be valuable if you are trying to publish consistently and build a content system.

But the tool is only one part of the workflow.

To create content that ranks and converts, you still need search intent, useful structure, trusted sources, internal links, examples, editing, and a clear reader-first purpose.

If you use Writer-GPT with that mindset, it can become a helpful part of your blogging toolkit.

Start small, test it on one real article, and judge the tool by how much better your final edited content becomes.

Sources Used

Affiliate Disclosure

As an Amazon Associate, I earn from qualifying purchases. Some links in this article are affiliate links, which means I may earn a commission at no extra cost to you if you buy through them. I only recommend tools, books, and services that may help bloggers, creators, and online business owners save time, build better systems, or grow their business.

7 Figure Mastery Review 2026: Is This Online Business Course Worth It?

7 Figure Mastery review 2026
Making money online sounds simple until you try to choose one path.

One person tells you to start affiliate marketing. Another says paid ads are the fastest route. Someone else says SEO is the only long-term strategy. Then another course talks about funnels, bonuses, solo ads, copywriting, traffic systems, and digital products.

For a beginner, that can become confusing very quickly.

That is why structured online business training still has a place in 2026. Free YouTube videos are useful, but they are often scattered. Beginners usually need a roadmap more than another random tactic.

That is where this 7 Figure Mastery review 2026 comes in.

7 Figure Mastery is an online business and affiliate marketing training program that teaches topics like funnels, product selection, copywriting, paid traffic, SEO, media buying, bonuses, and social traffic. It is built for people who want to understand how online business pieces connect together.

7 Figure Mastery review 2026


But the real question is simple: is 7 Figure Mastery actually useful, or is it just another make-money-online course with a big title?

In this review, we will look at what 7 Figure Mastery includes, who it is best for, who should avoid it, the honest pros and cons, how bloggers can use it, and whether it is worth exploring in 2026.

7 Figure Mastery Review 2026: What Is It?

7 Figure Mastery is an online training program focused on internet marketing, affiliate marketing, sales funnels, paid traffic, SEO, copywriting, and online business setup.

Based on available product information, the course is structured around multiple lessons that introduce beginners to the core ideas behind building an online business. Some versions describe it as a 32-lesson or 32-part training program.

The main idea is that beginners often fail because they try random tactics without understanding the full system. They promote random products, copy advanced marketers too early, ignore funnels, skip research, or chase traffic without knowing how conversions work.

7 Figure Mastery tries to give a more organized starting point.

It appears to cover topics such as:

  • Affiliate marketing basics
  • Sales funnels
  • Choosing products to promote
  • Market research
  • Copywriting
  • Google Ads
  • Facebook Ads
  • Media buying
  • Solo ads
  • SEO
  • Instagram, Tumblr, and Pinterest marketing
  • Bonus creation
  • Online business setup

This makes it a broad course. That can be helpful for beginners who want a big-picture roadmap, but it can also feel overwhelming if you try to learn every traffic method at once.

Important Note Before Buying

This 7 Figure Mastery review 2026 needs an honest warning because the product appears in more than one place online.

During research, I found 7 Figure Mastery listed on course platforms and also on PLR/MRR-style product pages. That means different sellers may package or sell the same training in different ways.

This is not automatically bad, but it does mean you should be careful before buying.

Before paying for any version of 7 Figure Mastery, check:

  • Who is selling the course
  • What exact lessons are included
  • Whether the product is original or resold
  • Whether there are upsells
  • Whether the refund policy is clear
  • Whether you get lifetime or limited access
  • Whether support is included

This is especially important in the make-money-online niche because many products use strong sales language. A course can teach useful ideas, but it cannot guarantee income.


7 Figure Mastery review 2026

Who Is 7 Figure Mastery Best For?

7 Figure Mastery is mainly for beginners who want to understand online business and affiliate marketing in a more structured way.

It may be a good fit for:

  • Beginners who want to learn affiliate marketing
  • Bloggers who want to monetize content better
  • Side hustlers looking for an online business model
  • People confused by too many marketing strategies
  • Affiliate marketers who want to understand funnels and traffic
  • Freelancers who want to learn marketing skills
  • Digital product creators who want to improve promotions

It may not be right for:

  • People expecting overnight income
  • Anyone looking for a push-button system
  • Advanced marketers already running profitable funnels
  • People who do not want to learn or take action
  • Anyone unwilling to test, fail, and improve

This matters because online business training only works when you apply it. A course can show the process, but it cannot do the work for you.

What Does 7 Figure Mastery Teach?

A useful 7 Figure Mastery review 2026 should focus on the actual training topics, not just the sales title.

Based on available product descriptions, 7 Figure Mastery covers a wide range of internet marketing subjects.

Commonly listed modules or topics include:

  • Sales Funnel: The Basics
  • Setting Up Your Online Business
  • What Is Affiliate Marketing?
  • Your High Ticket Offer
  • Components of a Sales Funnel
  • Spying on the Market
  • The CRAFT Strategy
  • Introduction to Marketing Your Offer
  • The 7 Figure Mindset
  • The Myth of Affiliate Marketing
  • Copywriting: Writing to Sell
  • How to Choose the Best Product to Promote
  • Google AdWords Basics
  • Killer Promo Secrets
  • How to Triple Your Commissions
  • Optimizing Google Ads Campaigns
  • Media Buying Research and Analysis
  • Solo Ads to Market Your Business
  • Facebook Ads Fundamentals
  • Search Engine Optimization
  • Instagram, Tumblr, and Pinterest Marketing

That is a wide curriculum. For beginners, it can help explain how the pieces fit together. You learn that online business is not just about posting links everywhere. It is about offer selection, audience understanding, traffic, copywriting, funnels, follow-up, and optimization.

The limitation is that broad courses can feel shallow in some areas. A course that covers SEO, Facebook Ads, solo ads, copywriting, and funnels may not go as deep as a specialist course on one topic.

How 7 Figure Mastery Works

A strong 7 Figure Mastery review 2026 should explain how the training is meant to guide beginners, not just list course modules.

The core idea behind 7 Figure Mastery is that beginners need a roadmap before they try to scale.

Many beginners make the mistake of copying advanced marketers too early. They see someone making serious income and try to copy the tactic without understanding the foundation behind it.

Online business usually has levels.

Stage 1: Newbie

This is where most people start. You know you want to make money online, but you do not know what to sell, how affiliate marketing works, what a funnel is, or where traffic comes from.

At this stage, the course can help explain the basics.

Stage 2: Beginner

A beginner may understand some ideas but still has no consistent results. Maybe they joined affiliate programs, watched tutorials, or tried to promote products without a real system.

This is where product selection, audience research, copywriting, and content strategy become more important.

Stage 3: Advanced Marketer

Once someone starts making money consistently, the challenge becomes optimization. This is where tracking, paid traffic, funnel testing, better copy, and stronger offers matter more.

Stage 4: Scaling

Scaling is about growing beyond small wins. This may include higher-ticket offers, better funnels, bigger campaigns, email lists, stronger branding, and more advanced traffic systems.

7 Figure Mastery appears to introduce these ideas, but beginners should still focus on one path first instead of trying every method at once.

Key Features of 7 Figure Mastery

This part of the 7 Figure Mastery review 2026 looks at the features that matter most for beginners who want to learn online business.

1. Structured Video Training

The biggest benefit of 7 Figure Mastery is the structured lesson format. A guided course can feel easier than jumping between random free videos.

For beginners, structure matters because it reduces confusion.

2. Affiliate Marketing Training

Affiliate marketing is one of the main topics in the course. This is useful because affiliate marketing is one of the simplest online business models for beginners.

You do not need to create your own product, handle inventory, or manage customer support. You promote someone else’s product and earn a commission when someone buys through your link.

But affiliate marketing is not as easy as sharing links. You need the right offer, audience, content, traffic source, and conversion path.

3. Sales Funnel Basics

A sales funnel turns strangers into leads and buyers. Most beginners skip this part and wonder why they are not making sales.

7 Figure Mastery includes funnel training, which can help beginners understand landing pages, offers, email follow-ups, bonuses, and conversion flow.

4. Copywriting Lessons

Copywriting affects blog posts, emails, ads, landing pages, product reviews, bonuses, and CTAs.

A good affiliate review should not only describe the product. It should explain who it helps, why it matters, what problem it solves, and what the reader should do next.

5. Product Selection Guidance

Choosing the wrong product is one of the fastest ways to waste time in affiliate marketing.

Some products have poor sales pages. Some have weak commissions. Some do not fit your audience. Some may convert badly even if they look attractive.

Product selection training can help beginners avoid promoting random offers.

6. Paid Traffic Training

The course also includes topics like Google Ads, Facebook Ads, media buying, and solo ads.

This can be useful, but beginners should be careful. Paid traffic can become expensive quickly if you do not understand tracking, landing pages, and conversion rates.

Do not spend money on ads until you understand the basics.

7. SEO and Social Media Traffic

7 Figure Mastery also includes SEO and social platforms like Instagram, Tumblr, and Pinterest.

This matters because not every beginner has money for ads. SEO and organic content can help build long-term traffic without paying for every click.

For bloggers, SEO is especially important because review posts, comparison articles, tutorials, and buying guides can attract search traffic over time.


7 Figure Mastery review 2026


How Bloggers Can Use 7 Figure Mastery

Bloggers can use 7 Figure Mastery to understand the marketing side of content.

Many bloggers write informational posts only. Informational content can bring traffic, but it does not always convert well.

To make money from a blog, you also need commercial content such as:

  • Product reviews
  • Best tools lists
  • Comparison posts
  • Alternatives posts
  • How-to tutorials with affiliate placements
  • Case-study style content

7 Figure Mastery can help bloggers understand how affiliate offers, funnels, and CTAs connect with content.

If you want a deeper workflow, read this guide on how to write affiliate review posts with AI.

Can You Make Money With 7 Figure Mastery?

This is usually the biggest question in any 7 Figure Mastery review 2026, so the answer needs to be realistic.

Yes, you can use the skills taught in 7 Figure Mastery to build income online, but the course itself does not guarantee income.

No course can guarantee that.

Your results depend on your niche, offer selection, content quality, traffic, consistency, budget, skill level, and ability to test and improve.

That said, the training connects with several monetization paths.

1. Affiliate Marketing

This is the most direct path. You can promote tools, courses, software, hosting, or digital products through affiliate links.

You can create content around product reviews, tutorials, comparisons, and “best software” lists. Then you place affiliate links naturally inside helpful content.

2. Blogging

If you start a blog, you can use SEO to attract people searching for products and solutions.

For example, someone searching for a product review is already considering a buying decision. If your article helps them understand the product honestly, you may earn a commission.

3. Email Marketing

A funnel often includes email follow-up. Instead of sending traffic once and losing the visitor forever, you can collect emails and build trust over time.

4. Freelancing

You can also turn marketing skills into services. For example, if you learn funnels, copywriting, SEO, landing pages, or paid ads, you can offer those services to small businesses.

If you need a broader beginner plan, read this guide on how to make money with AI.

Recommended Blogging Setup

If you want to apply affiliate marketing properly, build your own website instead of depending only on social media platforms.

A self-hosted blog gives you more control, better branding, SEO potential, email capture, and long-term monetization opportunities.

Start Your Affiliate Blog

If you want to publish reviews, comparisons, and affiliate content, start with a WordPress blog. Hostinger is a beginner-friendly hosting option for launching your first content site.

Start your affiliate blog with Hostinger

7 Figure Mastery Pros and Cons

Pros

  • Beginner-friendly structure for online business basics
  • Covers affiliate marketing, funnels, ads, SEO, copywriting, and social traffic
  • Useful for people confused by too many random strategies
  • Introduces both paid and organic traffic methods
  • Can help bloggers understand the business side of content
  • May be affordable depending on the seller and version

Cons

  • Not a guaranteed income system
  • May be too basic for advanced marketers
  • Wide topic coverage may feel overwhelming
  • Paid traffic sections require caution for beginners
  • Different versions may be sold by different platforms
  • Support, refund terms, and access may vary by seller

Is 7 Figure Mastery Legit?

Based on available product information, 7 Figure Mastery appears to be a real online business training product covering legitimate internet marketing topics.

However, legitimate does not mean guaranteed.

You should treat it as education, not as an income machine. The real value comes from applying the lessons, building assets, publishing content, testing offers, and improving over time.

Because the product appears in more than one marketplace, check the exact seller and version before buying. This is an important part of any honest 7 Figure Mastery review 2026.

Pricing and Refund Policy

Pricing is another area where a 7 Figure Mastery review 2026 should be careful because different listings may show different offers or access terms.

Pricing and refund terms can vary depending on where you buy 7 Figure Mastery.

Some listings show the course as a paid training. Some pages describe access through course platforms. PLR/MRR product pages also exist, which means the training may be resold or packaged differently by different sellers.

Before buying, check:

  • The current price
  • Whether there is a refund policy
  • Whether there are upsells
  • What lessons are included
  • Whether support is included
  • Whether access is instant or delayed
  • Whether the seller is trustworthy

If you are a beginner, start with the core training first. Do not buy every upgrade immediately unless you understand how it fits your business plan.

Best Way to Use 7 Figure Mastery

To get value from 7 Figure Mastery, do not treat it like entertainment. Treat it like a business training program.

Step 1: Choose One Business Model

Start with affiliate marketing if you are a beginner. It is easier than creating your own product from day one.

Step 2: Pick One Niche

Do not promote random products from different categories. Choose one niche, such as AI tools, online business software, marketing tools, or automation software.

Step 3: Build Your Website

A website gives you long-term control. You can publish reviews, comparisons, tutorials, and buyer guides.

Step 4: Create Review Content

Write detailed reviews that help readers make decisions. Do not only repeat sales page claims. Explain who the product is for, pros, cons, alternatives, and whether it is worth it.

Step 5: Add CTAs Naturally

Use affiliate links in helpful places. Good CTA placements include after useful sections, before pricing, near the final verdict, and in a final recommended tools section.

Step 6: Build an Email List

Create a simple lead magnet, such as a checklist, free guide, or bonus resource. This helps you capture visitors who are not ready to buy immediately.

Step 7: Track and Improve

Watch your clicks, rankings, conversions, and bounce rate. Improve headlines, CTAs, internal links, and content structure over time.

7 Figure Mastery Alternatives

7 Figure Mastery is not the only way to learn online business.

Free YouTube Content

YouTube has many free tutorials on affiliate marketing, SEO, ads, and funnels. The problem is that free content is often scattered.

Blogging Courses

If your main goal is SEO and affiliate blogging, a blogging-specific course may go deeper into keyword research, content planning, and monetization.

Paid Ads Courses

If you want to focus only on Google Ads or Facebook Ads, a specialized paid ads course may be more advanced.

Freelancing

If you need faster income while learning, freelancing can be a smart side path. You can sell blog writing, SEO setup, landing pages, funnel copy, or social media content services.

Want to Monetize Your Skills Faster?

If you learn skills like funnel building, landing page writing, SEO, ad setup, or affiliate content writing, you can offer those services as a freelancer while building your blog.

Explore Fiverr Marketplace

Recommended Resource Before the Conclusion

Need a Beginner Online Business Roadmap?

If you feel lost between affiliate marketing, SEO, funnels, paid ads, and freelancing, a structured beginner roadmap can help you stop jumping between random tutorials. Start with one clear model, one niche, one website, and one traffic plan.

Access the 7 Figure Mastery Training Page

Note: If you have your own approved 7 Figure Mastery affiliate link, replace the direct link above with your affiliate link and use rel="nofollow sponsored noopener".

Recommended Book for Affiliate Beginners

If you want to understand affiliate marketing beyond one course, Affiliate Marketing For Dummies is a beginner-friendly book worth exploring.

It can help you understand how offers, traffic, content, and commissions work together.

Learn Affiliate Marketing Basics

If you are new to affiliate marketing, this book can help you understand the wider business model before buying multiple courses.

Check Affiliate Marketing For Dummies on Amazon

Final Verdict

This 7 Figure Mastery review 2026 comes down to one balanced answer: 7 Figure Mastery can be useful for beginners who want a broad introduction to online business and affiliate marketing, but it should not be treated as a shortcut to guaranteed income.

The biggest benefit is structure. Instead of learning from disconnected sources, you get a course that covers many core parts of internet marketing in one place.

It is especially useful if you are confused about where to begin, what affiliate marketing really means, how funnels work, how offers are promoted, and how traffic connects with conversions.

The biggest limitation is that the course appears in different places online, and broad training may not go deep enough for advanced marketers.

If you go in with realistic expectations, verify the seller, start with one business model, and apply the lessons consistently, 7 Figure Mastery may be worth checking out.

If you expect instant money, you will probably be disappointed.

Frequently Asked Questions

Is 7 Figure Mastery good for beginners?

Yes. 7 Figure Mastery is mainly useful for beginners who want to understand online business, affiliate marketing, sales funnels, and traffic generation.

Can 7 Figure Mastery make me rich?

No course can guarantee wealth. 7 Figure Mastery can teach useful online business concepts, but your results depend on effort, consistency, niche, traffic, and execution.

Does 7 Figure Mastery teach affiliate marketing?

Yes. Affiliate marketing is one of the core topics covered in the training. It also includes product selection, funnels, and promotion strategies.

Does the course include paid traffic training?

Yes. Product descriptions mention Google Ads, Facebook Ads, solo ads, and media buying. Beginners should use paid traffic carefully and start small.

Does 7 Figure Mastery teach SEO?

Yes. SEO is included as one of the training topics. This can be helpful for bloggers and affiliate site owners who want long-term organic traffic.

Is 7 Figure Mastery better than free YouTube videos?

Free YouTube videos can be helpful, but they are often scattered. 7 Figure Mastery may be better for beginners who want a structured roadmap in one place.

Do I need a website to use 7 Figure Mastery?

You do not always need a website to start learning, but having one is strongly recommended. A blog or website gives you more control, helps with SEO, and makes affiliate marketing more professional.

Which hosting should I use for an affiliate website?

For beginners, Hostinger is a practical option because it is affordable and beginner-friendly. It works well for WordPress affiliate blogs and content sites.

Conclusion: Should You Try 7 Figure Mastery?

7 Figure Mastery is a helpful online business course for people who want to understand affiliate marketing, funnels, traffic, copywriting, and digital promotion in a structured way.

It is not perfect, and it is not a shortcut. But it can be useful if you are tired of jumping between random tutorials and want a clearer roadmap.

If you are serious about building an online business in 2026, the best approach is simple:

  • Learn the basics from a structured source
  • Start your own website
  • Choose one profitable niche
  • Publish helpful content
  • Promote relevant affiliate offers
  • Track results and improve consistently

That is how real online businesses are built. Not overnight. Not by luck. But by learning, applying, testing, and improving.

How We Checked This Review

Before updating this review, we checked public product listings and official-looking product information for 7 Figure Mastery, along with Google and FTC guidance for safer affiliate review practices. This helps keep the article more accurate, useful, and realistic for readers comparing online business training.

Affiliate Disclosure

As an Amazon Associate, I earn from qualifying purchases. Some links in this review may be affiliate links, which means I may earn a commission at no extra cost to you if you buy through them. I only recommend tools, courses, books, and services that may help beginners build better blogs, improve their affiliate content, or grow their online work more effectively.
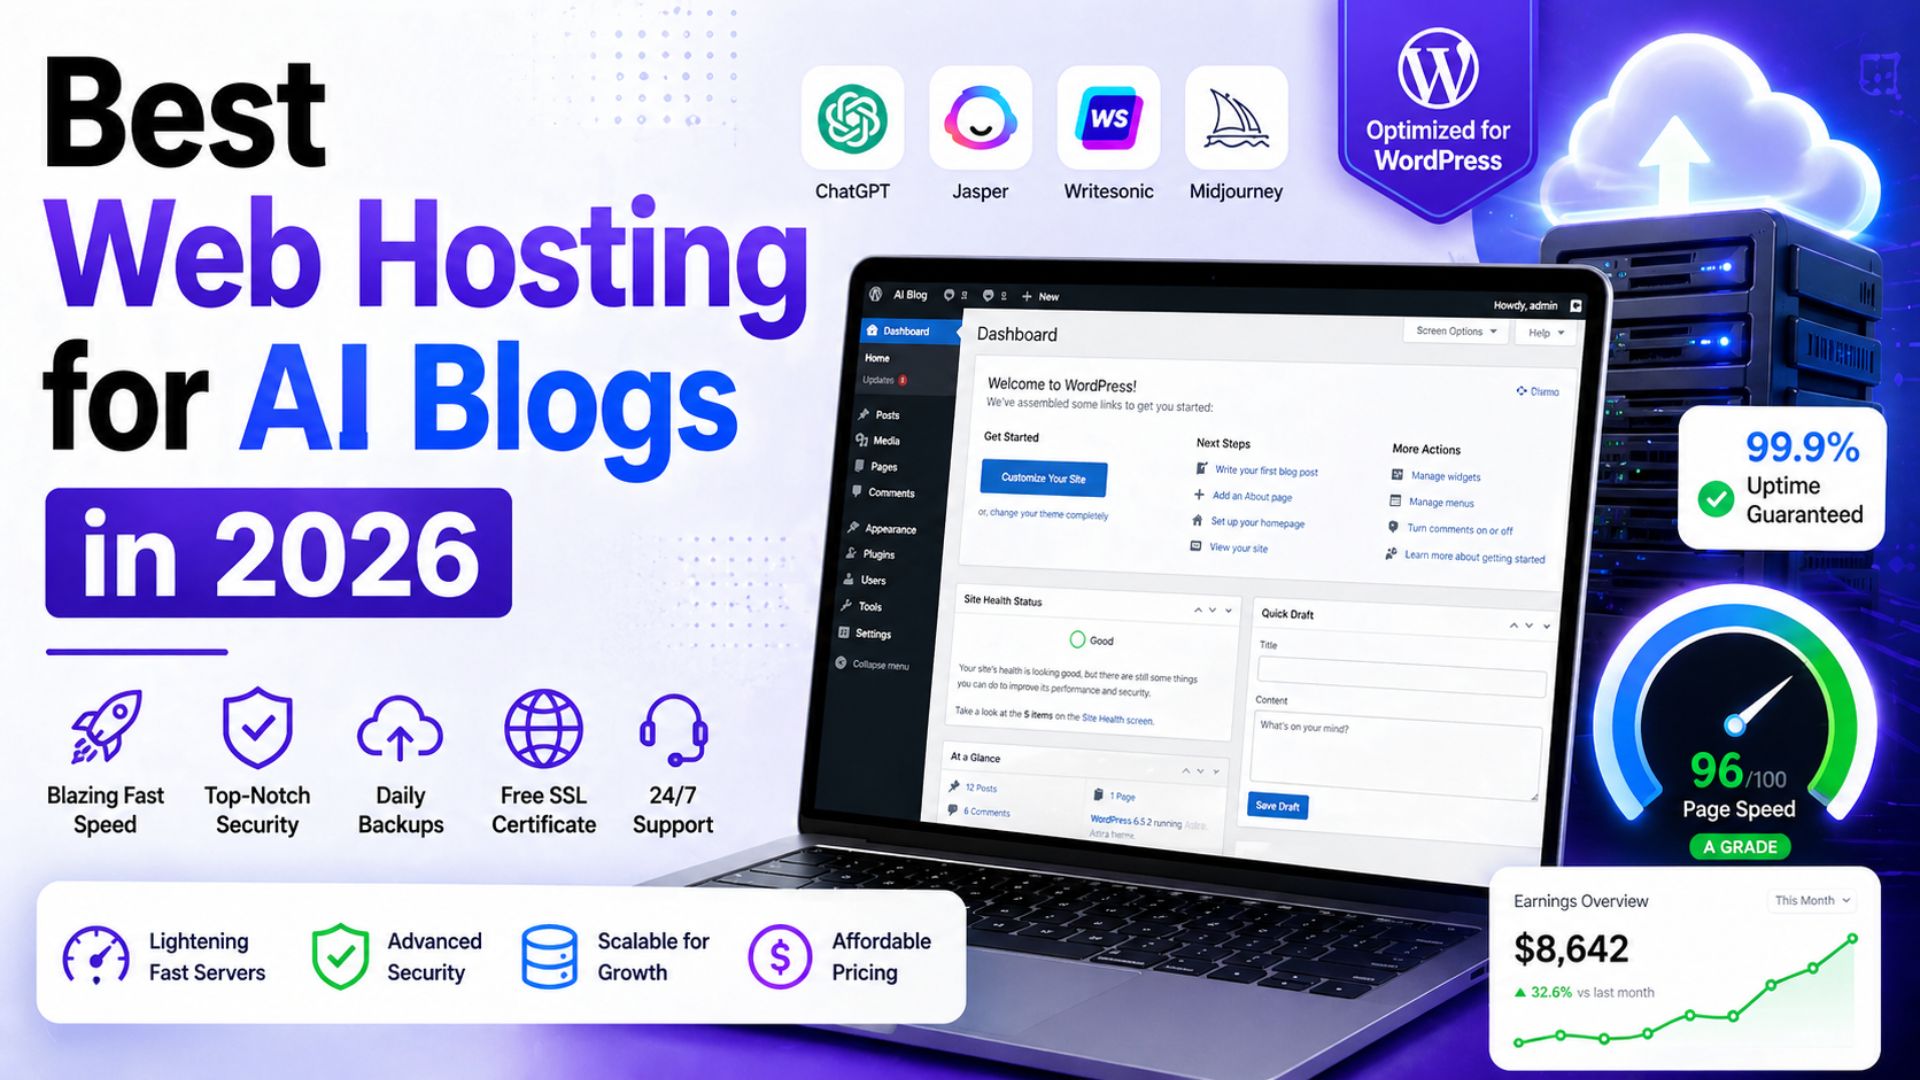
How to Use AI Tools in 2026: 9 Simple Steps for Beginners

How to Use AI Tools

Most beginners do not fail with AI because the tools are too hard. They fail because they try to use too many tools at once.

One day they test ChatGPT. The next day they open Canva. Then they hear about Pictory, Runway, Zapier, Make, SurferSEO, Frase, Claude, Gemini and ten more apps. After a week, they have many accounts but no clear workflow.

That is not a beginner problem. That is a system problem.

If you want to learn how to use AI tools in 2026, the first thing to understand is simple: AI is no longer only for technical people. Bloggers, creators, freelancers, students, small business owners and affiliate marketers now use AI tools every day to write faster, design better visuals, create videos, research topics, automate tasks and build online income systems.

But you do not need every AI tool. You need one clear goal, a small beginner stack and a repeatable workflow.


How to Use AI Tools


This guide will show you how to use AI tools in a practical way, even if you have zero technical experience. We will focus on the use cases that matter most for AI Sage Labs readers: blogging, content creation, design, video, SEO, automation, affiliate marketing and online business.

How to Use AI Tools Without Getting Overwhelmed

The best way to start with AI tools is to pick one clear goal first.

Do not begin by asking, “What is the best AI tool?”

Begin by asking, “What do I want AI to help me do this week?”

For most beginners, the answer is usually one of these:

  • Write blog posts faster
  • Create social media content
  • Design thumbnails or featured images
  • Edit videos
  • Research keywords
  • Automate repetitive tasks
  • Build a blog or online business

Once you know the task, choosing the tool becomes easier.

A beginner does not need a giant AI stack on day one. Start with one writing tool and one design tool. Add video, SEO and automation tools only when you have a real workflow that needs them.

Task Beginner Tool Type Example Tools
Writing and ideas AI writing assistant ChatGPT, Claude, Writesonic
Blog visuals AI design tool Canva AI
Video repurposing AI video tool InVideo AI, Pictory, Runway, Synthesia
Grammar and polish AI editing tool Grammarly
Automation Workflow automation tool Zapier, Make
SEO improvement AI SEO tool Rank Math, SurferSEO, Frase, NeuronWriter


Simple rule: one goal, one tool, one workflow.

What Are AI Tools?

AI tools are software applications that use artificial intelligence to help you complete tasks faster, better, or more automatically.

They can help with writing, editing, design, research, data analysis, video creation, audio editing, image generation, customer support, coding and workflow automation.

For beginners, the easiest way to understand AI tools is this:

AI tools take your instruction and produce an output.

Your instruction is called a prompt. The output could be a blog outline, article draft, image idea, video script, email, table, summary, social caption or workflow plan.

For example, you can write:

Write a beginner-friendly blog outline about AI tools for bloggers in 2026.

The AI tool may give you an organized article structure with headings, subheadings and key talking points.

That is the basic pattern. You give direction. AI gives a draft or suggestion. You review, improve and publish the final version.

The most important thing to understand is that AI tools are assistants, not replacements for your judgment. They can speed up the work, but you still need to decide what is accurate, useful and right for your audience.

Common Types of AI Tools Beginners Should Know

Before you learn how to use AI tools, it helps to understand the main categories. You do not need every category right away, but knowing the difference will save you from wasting time and money.

AI Writing Tools

AI writing tools help you create outlines, introductions, blog posts, emails, product descriptions, YouTube scripts, newsletters and social media captions.

For bloggers, this is usually the first category to learn because writing touches almost every online business workflow.

The best use case is turning ideas into structured drafts faster. The real limitation is that AI writing still needs editing, fact-checking, examples and human experience.

AI Design Tools

AI design tools help you create graphics, thumbnails, featured images, social media posts, Pinterest pins, logos and visual templates.

For bloggers, visuals matter because they affect trust, click-through rate and social sharing.

Canva AI is the easiest starting point for many beginners because it combines templates, text, images, and AI features in one simple design workspace.

AI Video Tools

AI video tools help you turn written content into videos, generate captions, edit footage, create voiceovers or produce short clips for social platforms.

For bloggers, this creates a strong repurposing opportunity. One blog post can become a YouTube video, a short Instagram Reel, a TikTok clip, a Pinterest idea pin or a LinkedIn video summary.

Examples include InVideo AI, Pictory, Runway and Synthesia.

AI Automation Tools

AI automation tools connect different apps and make tasks happen automatically.

For example:

New blog post published → create social media task → update Google Sheet → add task to content calendar.

Tools like Zapier and Make are useful because they save time on repetitive work.

If automation is new for you, this guide on what AI automation tools are explains the basics in a simple way.

AI SEO Tools

AI SEO tools help you plan and improve content for search engines.

They can help with keyword research, content briefs, heading suggestions, related terms, internal linking and on-page optimization.

For bloggers, SEO is where AI becomes more valuable because ranking content can generate traffic for months or years.

The limitation is that SEO tools give recommendations, but they cannot replace real expertise, helpful content, original examples and reader trust.

Why Beginners Should Use AI Tools in 2026

AI is no longer optional for online creators.

That does not mean every piece of content should be generated by AI. It means every serious blogger should understand how AI fits into the workflow.

The biggest benefit is speed.

A beginner who used to spend three hours brainstorming blog ideas can now create a draft topic map in minutes. A blogger who struggled with featured images can create a professional-looking design in Canva. A creator who avoided video can turn articles into short video drafts with AI video tools.

But the real benefit is not only speed. The real benefit is consistency.

Most blogs fail because the owner stops publishing. AI tools make it easier to keep going because they reduce friction at every step.

If you can create outlines faster, write first drafts faster, design thumbnails faster and repurpose content faster, your chances of staying consistent improve.

That is where AI becomes valuable for bloggers.

Step 1: Pick One Clear Goal

The first step in learning how to use AI tools is choosing one goal.

This is where most beginners make the first mistake. They start with tools instead of outcomes.

Do not ask, “Which AI tool should I use?”

Ask, “What do I want AI to help me achieve this week?

Good beginner goals include writing one blog post, creating five Pinterest pins, turning one blog post into a YouTube script, building a list of blog topic ideas, creating a content calendar, improving an old article, automating social sharing, or writing better email subject lines.

Once the goal is clear, the right tool becomes easier to choose.

If your goal is writing a blog post, start with ChatGPT, Claude, or Writesonic. If your goal is creating visuals, start with Canva AI. If your goal is turning articles into videos, start with InVideo AI or Pictory. If your goal is saving time on repetitive tasks, start with Zapier or Make.

Step 2: Start With a Beginner AI Stack

Do not try 15 tools in your first week.

That creates confusion, subscription waste, and half-finished workflows.

Start with a small beginner stack that covers the basics.

Writing: ChatGPT, Claude or Writesonic

Use an AI writing assistant for idea generation, outlines, drafts, FAQs, intros, meta descriptions and social captions.

Create a beginner-friendly blog outline for a 3000-word article about [topic]. Include SEO headings, FAQs and a practical conclusion.

Design: Canva AI

Use Canva AI for blog featured images, Pinterest pins, Instagram posts, YouTube thumbnails, and simple brand graphics.

Create a blog featured image concept for an article titled [title]. Use a clean tech-blog style with AI icons and readable headline text.

Editing: Grammarly

Use Grammarly or another editing tool to improve clarity, grammar and tone before publishing.

A simple workflow is:

Draft with AI → edit manually → polish with Grammarly → publish.

Automation: Zapier or Make

Use automation only after you already have a repeatable task.

A beginner workflow could be:

New WordPress post → add row to Google Sheet → create social media task → notify yourself by email.

Blogging Foundation: WordPress and Hosting

If you want to turn AI tools into a real online business, you need somewhere to publish. A WordPress blog on reliable hosting is still one of the best foundations for SEO and affiliate marketing.

For beginners, Hostinger is a practical starting point because it is WordPress-friendly and easy to set up.

Build Your AI Blog Foundation

If you want to use AI tools for blogging, affiliate reviews, or online income, start with a real WordPress site where your content can rank and convert.

Start your AI blog with Hostinger

Step 3: Learn Prompting

Prompting is the most important beginner AI skill.

A prompt is simply the instruction you give to an AI tool.

Bad prompts produce weak results. Clear prompts produce useful drafts.

The easiest prompt formula is:

Task + Context + Format + Tone

Here is what that means:

  • Task: What do you want the AI to do?
  • Context: Who is it for and why?
  • Format: What should the output look like?
  • Tone: How should it sound?

Bad prompt:

Write about AI tools.

Better prompt:

Write a 300-word beginner-friendly introduction for a blog post about how AI tools help bloggers in 2026. Use simple English, short paragraphs, and a practical tone.

Even better prompt:

Write a 300-word introduction for AI Sage Labs readers. The audience is beginner bloggers and creators who feel overwhelmed by AI tools. Explain the problem, promise a step-by-step solution, and avoid hype.

The better prompt gives the AI a role, audience, purpose, structure, and style. That is why the output will usually be stronger.

Step 4: Create Your First Blog Outline

The safest way to use AI tools for blogging is to begin with outlines.

Do not ask AI to write a full article immediately. Start by asking it to organize your ideas.

Create a detailed SEO outline for a 3000-word blog post titled “How to Use AI Tools in 2026.” The audience is beginner bloggers and creators. Include step-by-step guidance, tool examples, common mistakes, FAQs, and a final checklist.

Then review the outline yourself.

Ask these questions:

  • Does this answer the reader’s real problem?
  • Are the headings clear?
  • Is anything missing?
  • Is the order logical?
  • Can I add personal examples or tool experience?

This is where human judgment matters. AI can organize quickly, but you decide what belongs in the final post.

If you want tool ideas for your stack, read this guide on trending AI tools in 2026.

Step 5: Turn the Outline Into a Draft

Once you have a strong outline, write section by section.

This is important because long AI outputs often become repetitive, generic, or shallow.

Instead of asking for one long article, use a section-by-section workflow.

Write the section “Step 3: Learn Prompting” for this blog post. Keep it beginner-friendly, practical, and around 350 words. Include one bad prompt, one better prompt, and one improved prompt.

This gives you better control.

After each section, edit manually. Add examples, remove weak sentences, and check accuracy.

AI should help you create a first draft, not replace the editing process.

The best AI-assisted blog posts usually follow this workflow:

Outline → section draft → manual edit → SEO check → final polish → publish.

Step 6: Use AI for Blog Images and Graphics

Images make your blog feel more professional.

For AI blogs, you should create at least one featured image for every post. You can also create simple comparison graphics, workflow diagrams, and Pinterest pins.

Good blog visuals can help with click-through rate, social sharing, brand trust, Pinterest traffic, and reader engagement.

A beginner visual workflow looks like this:

  1. Write your blog title.
  2. Ask AI for a featured image concept.
  3. Create the image in Canva AI or another design tool.
  4. Add your brand colors and title overlay.
  5. Compress the image before uploading to WordPress.

You do not need perfect design skills. You need clean, readable visuals that match the article and help the reader understand the topic.

Step 7: Use AI for Video Creation

Video is one of the easiest ways to repurpose blog content in 2026.

If you already wrote a blog post, you have the raw material for a video.

You can ask AI to turn your article into a YouTube script, short video script, list of talking points, voiceover script, storyboard, or social media video caption.

Turn this blog post section into a 60-second YouTube Shorts script. Keep it beginner-friendly, include a strong hook, and end with a simple call to action.

Tools like InVideo AI and Pictory can help turn written content into video drafts with visuals, captions, and voiceover.

This is useful because it helps bloggers reach audiences beyond Google Search.

One article can become several content assets:

  • Blog post for SEO
  • YouTube video for discovery
  • Short clip for Instagram or TikTok
  • Pinterest pin for visual traffic
  • LinkedIn post for authority

That is how AI tools multiply the value of one piece of content.

Step 8: Automate the Repetitive Parts

Automation is powerful, but beginners should use it carefully.

Do not automate before you understand the task manually. First, repeat the task a few times. Then automate the parts that are boring and predictable.

Good beginner automations include saving new blog post ideas into Google Sheets, creating social media tasks after publishing, tracking affiliate content updates, sending reminders, or organizing lead information.

Example workflow:

New WordPress post published → add post title and URL to Google Sheets → create task to make Pinterest pins → send reminder to create social captions.

This kind of automation does not replace strategy. It removes repetitive admin work.

Need Help With AI Automation?

If you do not want to set up workflows yourself, you can hire help for WordPress, Zapier, Make, AI automation, or content systems.

Find AI automation and WordPress experts on Fiverr

Step 9: Combine AI Tools Into a Blogging System

The real power of AI tools comes when you combine them into a simple system.

Here is a beginner AI blogging workflow:

  1. Use ChatGPT, Claude or Writesonic to brainstorm topics.
  2. Use an SEO tool to choose one target keyword.
  3. Use AI to create a blog outline.
  4. Write the draft section by section.
  5. Edit manually and polish with Grammarly.
  6. Create a featured image in Canva AI.
  7. Publish on WordPress.
  8. Use AI to create social posts from the article.
  9. Use Zapier or Make to track and distribute the content.
  10. Update the article after 60 to 90 days based on performance.

This workflow is simple, but it covers the full content cycle.

Most beginners fail because they use AI randomly. They ask for one caption, one outline or one idea, then move on.

A system is different. A system helps you repeat the process every week.

That is how AI tools become useful for blogging and online business.

Best Beginner AI Workflow for Bloggers

If you are not sure where to begin, use this simple workflow for your first few posts.

Stage Tool Type Beginner Action
Idea AI writing assistant Generate 10 topic ideas
SEO Keyword or SEO tool Pick one target keyword
Outline AI writing assistant Create article structure
Draft AI writing assistant Write section by section
Edit Manual editing or Grammarly Improve clarity and accuracy
Visual Canva AI Create featured image
Publish WordPress Add post, links, and images
Promote AI and automation Create captions and tasks
Track Search Console or spreadsheet Review performance


If you are just starting, use this workflow for one post per week. Once it feels easy, increase publishing frequency.

Common Mistakes Beginners Make With AI Tools

Using Too Many Tools

More tools do not automatically mean better results.

Start with one writing tool, one design tool, and one editing tool. Add more only when you feel a real bottleneck.

Copying AI Content Without Editing

AI drafts often sound clear but generic.

Always edit before publishing. Add examples, opinions, screenshots, comparisons, and real experience wherever possible.

Ignoring SEO

AI can write content quickly, but fast content without search intent does not automatically get traffic.

Before writing, understand the keyword, reader problem, and competing pages.

Trusting AI Facts Without Checking

AI can make mistakes. It can also give outdated pricing, wrong feature lists, or invented statistics.

Always verify pricing, tool features, and important claims from official sources before publishing.

Automating Too Early

Automation works best when the workflow is already clear.

If you automate a messy process, you create faster confusion.

How to Use AI Tools for Online Income

AI tools can support online income, but they do not create income by themselves.

This is important.

You do not make money because you opened an AI tool. You make money when AI helps you support a real business model.

For bloggers and affiliate marketers, AI tools can help you create review posts, comparison articles, tutorials, email content, social posts, video scripts, digital product ideas and content updates.

For freelancers, AI tools can help with proposals, client research, service delivery, design drafts, content writing, SEO reports and workflow automation.

For creators, AI tools can help repurpose one idea into multiple formats.

The income comes from the system around the tool: audience, content, offer, trust, traffic and consistency.

Recommended AI Tools to Start With

If you want to test tools without overthinking, start with a small stack.

Try a Simple Beginner AI Stack

Start with one writing tool, one design tool, and one automation tool. Once your workflow is working, add video and SEO tools only when needed.

Try ChatGPT for writing and planning

Try Canva for blog visuals

Try Zapier for simple automation

Recommended Resource Before You Finish

Want a Faster AI Tools Starter Path?

If you feel overwhelmed by too many AI tools, start with a simple checklist instead of buying random subscriptions. Your first goal should be one blog post, one featured image, one social caption and one basic automation.

Access the AI Tools Beginner Starter Checklist

Recommended Book for AI Beginners

If you want to understand the business side of using AI and digital tools, a useful book to explore is Co-Intelligence: Living and Working with AI. It is a helpful read for understanding how AI can fit into real work instead of treating it like a shortcut.

Learn Practical AI Thinking

If you want to understand how to work better with AI tools, this book is a strong next step for bloggers, creators and online business owners.

Check Co-Intelligence on Amazon

The Honest Truth About AI Tools for Beginners

AI tools can save time, but they do not remove the need to think.

This is the biggest truth beginners need to understand.

AI can help you write faster. It can suggest ideas. It can create images. It can turn articles into videos. It can automate repetitive tasks.

But it cannot decide your real audience for you. It cannot build trust automatically. It cannot replace personal experience. It cannot guarantee traffic or income just because you publish more content.

The bloggers who win with AI in 2026 are not the ones blindly copy-pasting AI articles.

They are the ones using AI to do more of the right work: better research, better outlines, faster drafts, cleaner visuals, more consistent publishing, smarter repurposing, and stronger updates.

AI is not the business. AI is the productivity layer on top of the business.

If you use it that way, it becomes extremely powerful.

Final Beginner Checklist

Before you start using AI tools seriously, follow this checklist:

  • Pick one clear goal.
  • Choose one writing tool.
  • Choose one design tool.
  • Learn the basic prompt formula.
  • Create one blog outline.
  • Draft one post section by section.
  • Edit manually before publishing.
  • Create one featured image.
  • Publish on WordPress.
  • Repurpose the post into social content.
  • Track what works.

Do not make the process complicated.

One finished post is more valuable than ten unfinished tool experiments.

Final Words:

Yes, beginners should absolutely learn how to use AI tools in 2026.

AI tools can help you save time, create better content, design visuals, repurpose posts, automate workflows and build a stronger online business foundation.

But the smartest approach is simple: start small.

Pick one goal. Choose one or two tools. Learn prompting. Create your first workflow. Improve it over time.

If your goal is blogging, the best beginner path is:

WordPress blog → AI writing tool → Canva AI → Grammarly → SEO basics → automation later.

That is enough to begin.

Once your workflow is working, you can add advanced tools like SurferSEO, Zapier, Make, Pictory and InVideo AI.

The goal is not to collect AI tools. The goal is to build a system that helps you create useful content consistently.

That is how beginners turn AI from a confusing trend into a practical advantage.

Frequently Asked Questions

Are AI tools free to use?

Many AI tools offer free plans, but advanced features usually require paid plans. Beginners can start with free versions of writing, design and editing tools, then upgrade only when a limitation slows down their workflow.

Do I need coding skills to use AI tools?

No. Most beginner AI tools do not require coding skills. Writing tools, design tools, video tools and automation platforms are built for regular users. Coding knowledge can help with advanced workflows, but it is not required to start.

Which AI tool should I start with?

Start with an AI writing assistant because writing and planning are useful in almost every workflow. After that, add Canva AI for visuals and Grammarly for editing. Bloggers can later add SEO, video and automation tools.

Can AI tools replace human writers?

AI tools can assist writers, but they should not replace human judgment. The best content still needs real experience, editing, examples, fact-checking and a clear understanding of the reader.

Are AI tools good for blogging?

Yes. AI tools are useful for blogging when used properly. They can help with topic ideas, outlines, drafts, editing, images, SEO, social captions and content repurposing. The key is to use AI as an assistant, not as a copy-paste content machine.

How long does it take to learn AI tools?

Basic AI tool usage can be learned in a few days. Building a complete workflow for blogging, design, video and automation may take a few weeks of practice. The fastest way to learn is to use AI on one real project from start to finish.

Can I make money with AI tools?

Yes, but not just by using AI tools randomly. AI tools can help you create content faster, build affiliate blogs, design digital products, automate services and repurpose content. Income comes from a real business model, not the tool itself.

Conclusion

Learning how to use AI tools is one of the most useful skills a beginner can build in 2026.

You do not need to become technical. You do not need to subscribe to every tool. You do not need to automate your entire business in one week.

Start with one problem. Choose one tool. Create one workflow. Finish one real project.

That is how AI becomes useful.

For bloggers, the goal is not to publish more generic content. The goal is to create helpful articles faster, design better visuals, repurpose content smarter, and stay consistent long enough for your work to compound.

Use AI as a helper, not a shortcut. Keep the strategy human. Keep the editing human. Keep the final judgment human.

That is the best way to use AI tools without losing quality, trust, or direction.

How We Checked This Guide

Before updating this guide, we checked Google’s publishing guidance for helpful AI-assisted content and Google’s beginner AI learning resource. This helps keep the article practical, safe, and useful for readers who are learning how to use AI tools for real work.

Affiliate Disclosure

As an Amazon Associate, I earn from qualifying purchases. Some links in this article are affiliate links, which means I may earn a commission at no extra cost to you if you buy through them. I only recommend tools, books and services that may help beginners build better blogs, create useful content, or grow their online work more effectively.
Zapier Review 2026: Is It Still the Easiest Automation Tool for Bloggers?

Zapier Review 2026

Zapier is still one of the first names people hear when they start learning automation.

That is not an accident. For years, Zapier has made it possible for non-technical users to connect apps, move data, create reminders, and automate repetitive work without writing code.

But automation in 2026 is not the same as it was a few years ago.

Make.com is more visual. Pabbly Connect is popular with budget users. n8n gives technical users more control. AI agents and automation assistants are changing how workflows are built. Even Zapier itself is evolving with Copilot, Tables, Forms, Interfaces, MCP and AI orchestration features.

So the real question is simple: is Zapier still the easiest automation tool for bloggers?


Zapier Review 2026


That is exactly what this Zapier review 2026 will answer. If you are a blogger, affiliate marketer, creator, freelancer or beginner trying to automate online tasks, this guide will help you decide whether Zapier is still worth using for your workflow.

Zapier Review 2026: What Is Zapier?

Zapier is a no-code automation platform that connects different apps and automates workflows between them.

In simple words, Zapier helps your apps talk to each other.

For example, instead of manually copying a new blog post link, adding it to a spreadsheet, creating a social media task and sending yourself a reminder, Zapier can automate parts of that workflow.

Zapier workflows are called Zaps.

A basic Zap usually has:

  • Trigger: the event that starts the workflow
  • Action: what Zapier does after the trigger

Example:

New WordPress post published → add post title and URL to Google Sheets → send email reminder → create social media task.

That is the main reason Zapier has stayed popular. It makes automation easier for people who do not want to code.

Why Zapier Still Matters in 2026

Zapier still matters because it is simple, mature, and widely supported.

Zapier’s official pricing and app pages highlight thousands of integrations, and the platform is now more than simple Zaps. Current Zapier plans include automation tools such as Zaps, Tables and Forms or Interfaces depending on the account and plan page wording. Zapier also highlights AI-focused features such as Copilot and MCP.

For bloggers, this matters because your workflow may include WordPress, Gmail, Google Sheets, ConvertKit, Mailchimp, Notion, Airtable, Slack, social platforms, forms, CRMs, payment tools and AI apps.

The more apps Zapier supports, the easier it is to connect your blogging system.

The other reason Zapier matters is that it is beginner-friendly. Many automation tools are powerful, but not all are easy to understand on day one.

Zapier’s biggest strength is that it makes automation feel approachable.

That is why this Zapier review 2026 focuses on beginner blogging workflows instead of only listing technical automation features.

How Zapier Works

Zapier works through workflows called Zaps.

The basic process looks like this:

  1. Choose a trigger app.
  2. Select the event that starts the workflow.
  3. Choose one or more action apps.
  4. Map the data from the trigger to the actions.
  5. Test the workflow.
  6. Turn the Zap on.

For example, a blogger might create this Zap:

New WordPress post → create a row in Google Sheets → send an email notification → create a Trello task.

This kind of workflow is useful because it keeps blog operations organized without copying and pasting everything manually.

Zapier also includes AI features that can help users build and manage automations. Zapier’s help center describes Zapier Copilot as an AI-powered assistant that works across Zapier products to help users discover automation use cases, build, expand and maintain automation assets.

That makes Zapier more beginner-friendly than before because you can describe what you want in plain language and get help building the workflow.

If you need the broader beginner explanation first, read this guide on what AI automation tools are.


⚡ Automation Tools Bundle
n8n • Make.com • Zapier — Save 80%


9 Reasons Zapier Is Useful for Bloggers

The main value of this Zapier review 2026 is understanding where Zapier actually helps bloggers.

1. Zapier Is Easy for Beginners

Zapier is one of the easiest automation tools to understand.

You do not need to know APIs, coding, webhooks, or complex automation logic to start. You choose a trigger, choose an action, map the fields, test the Zap and turn it on.

For beginners, that simplicity matters.

If you are new to automation, a tool that feels too technical can stop you before you build anything useful. Zapier reduces that friction.

2. Huge App Integration Library

Zapier’s app ecosystem is one of its biggest advantages.

Bloggers often use many apps. WordPress, Google Sheets, Gmail, ConvertKit, Mailchimp, Notion, Airtable, Slack, Trello, Asana, Typeform and many more tools can become part of a blogging workflow.

The more apps an automation platform supports, the easier it is to build practical workflows without custom development.

3. Zapier Copilot Helps With Automation Ideas

Zapier Copilot is one of the most important AI-related features for beginners.

Zapier describes Copilot as an AI-powered assistant that can help users discover automation use cases and build, expand, or maintain automation assets.

For bloggers, this is useful because many people do not know what to automate first.

You can ask for help turning a blogging process into a workflow, then refine the automation step by step.

Zapier also notes that Copilot is in open beta, so users should review and test everything carefully.

4. Good for Blog Publishing Workflows

Zapier can help organize what happens after a post is published.

For example:

  • Save the post title and URL to Google Sheets
  • Create a task to design Pinterest pins
  • Send a reminder to update social captions
  • Notify your team or yourself
  • Add the post to a content tracker

These are small tasks, but they repeat every time you publish. Automating them can save time and reduce missed steps.

5. Useful for Email List Automation

Email marketing is important for bloggers and affiliate marketers.

Zapier can help connect forms, email marketing platforms, spreadsheets, CRMs, and notification tools.

For example:

New form submission → add subscriber to email list → tag subscriber by interest → send welcome email → save lead data to Google Sheets.

This kind of automation helps turn blog visitors into email subscribers and organized leads.

6. Helps With Affiliate Tracking

Affiliate bloggers need to track posts, offers, CTAs and update dates.

Zapier can help create a simple tracking system.

For example:

New affiliate review published → add URL, category, affiliate program, and update date to Google Sheets.

This makes it easier to know which posts need updates later.

7. Supports Content Repurposing

Zapier can support content repurposing by connecting your blog with AI tools, social tools, task managers, and spreadsheets.

For example, after publishing a blog post, Zapier can create a task to turn the post into a newsletter, Pinterest pin, LinkedIn post, or short video script.

Depending on your connected tools, AI steps can help draft summaries or captions.

The key is to keep human review. Do not auto-publish AI-generated promotional content without checking it.

8. Scales From Simple to Advanced

Zapier is beginner-friendly, but it can also handle more advanced workflows.

As your blog grows, you may add multi-step Zaps, filters, paths, webhooks, Tables, Forms, Interfaces, and AI features.

This makes Zapier useful because you can start small and grow later.

9. Mature and Reliable Platform

Zapier has been around for years, and many businesses rely on it.

That maturity matters when you want an automation tool for important workflows.

No automation platform is perfect. Zaps can fail if apps change, fields break, or accounts disconnect. But Zapier has documentation, support resources, app coverage, and a large user base.

For beginners, that reliability and support ecosystem can be reassuring.

Zapier Pros and Cons

No Zapier review 2026 should ignore the tradeoffs. Zapier is useful, but it is not perfect.

Pros Cons
Very beginner-friendly Can become expensive as task usage grows
Huge app integration library Advanced workflows may be less flexible than Make or n8n
Zapier Copilot helps with automation ideas AI features still need human review and testing
Good for blog publishing and email workflows Task limits can surprise beginners if they automate too much
Mature platform with strong documentation Some workflows may need premium apps or paid plans


The biggest benefit is ease of use. The biggest limitation is cost as your automation volume grows.

Zapier Pricing in 2026

Pricing is one of the most important parts of any Zapier review 2026 because automation costs depend on usage, not just the plan name.

Zapier pricing can change, so always check the official pricing page before choosing a plan.

Current Zapier pricing pages show a Free plan with 100 tasks per month and paid plans starting with Professional tiers. Zapier also explains that task usage is the main factor when selecting a plan. In Zaps, Zapier Lead Router, and Zapier MCP, usage is measured in tasks.

For beginners, the most important thing is not only the monthly price. It is how many tasks your automations use.

A simple workflow may use only a few tasks. A workflow with many steps, AI actions, filters, and repeated runs can use many more.

Before upgrading, ask:

  • How many workflows do I need?
  • How often will they run?
  • Do I need premium apps?
  • Do I need multi-step Zaps?
  • Will AI actions increase usage?
  • Can I start with a simple workflow first?

Zapier can be worth the cost if it saves real time every week. But beginners should start small and watch task usage carefully.

For this Zapier review 2026, the safest pricing advice is to test one or two simple Zaps first, then upgrade only when automation is clearly saving time.

Try Zapier for Beginner Automation

If you want to automate one simple blogging task, start with a small Zap and test it before building a bigger system.

Try Zapier

Is Zapier Beginner-Friendly?

Yes, Zapier is one of the most beginner-friendly automation tools.

That is the main reason it remains popular.

Zapier’s interface is easier to understand than many advanced workflow builders. You do not need to think like a developer to build your first automation.

A beginner can start with something simple:

New blog post published → save post URL to Google Sheets.

Then later add:

Create task → generate social caption → send reminder.

This step-by-step growth is ideal for bloggers who do not want to automate everything at once.

Zapier vs Other Automation Tools

A practical Zapier review 2026 should compare it with the tools bloggers are already hearing about.

Zapier vs Make

Make is more visual and flexible for advanced workflows. It can be better for users who want more control over complex automations.

Zapier is usually easier for beginners and has a very large app ecosystem.

For a full comparison, read this Zapier vs Make.com comparison.

Zapier vs Pabbly Connect

Pabbly Connect is often considered a budget-friendly alternative.

Zapier may feel more polished and beginner-friendly, while Pabbly may appeal to users who are watching costs carefully.

Zapier vs n8n

n8n is more flexible and technical. It can be self-hosted and customized deeply.

Zapier is easier for non-technical users who want a cloud-based automation platform without setup complexity.

Zapier vs AI Agents

AI agents are becoming more popular, but they are not always a direct replacement for Zapier.

Zapier is good for structured, repeatable workflows. AI agents are useful when tasks need more reasoning, planning or flexible decision-making.

In many cases, the best setup may combine both: Zapier for reliable automation and AI tools for drafting, summarizing or decision support.


n8n.io
Make.com
Cursor AI
Perplexity
🚀 SAVE 80%
Automation → ₹3,999/year
Workflow Automation • 1000+ Apps
Cloud AI Ready Analytics

Best Zapier Workflows for Bloggers

Zapier becomes valuable when you use it for repeated blogging tasks.

WordPress to Google Sheets Tracker

When a new WordPress post is published, Zapier can add the title, URL, date and category to a Google Sheet.

This helps track published content and plan future updates.

New Lead to Email List

When someone fills out a form, Zapier can add them to your email platform and tag them based on the form they used.

Post Published to Task Manager

When a new post goes live, Zapier can create tasks for Pinterest pins, social captions, email promotion and internal linking.

Affiliate Post Update Reminder

Zapier can help create reminders to update affiliate posts after a set period.

AI Caption Drafting

Depending on your tools and plan, Zapier can help connect AI steps that draft short captions or summaries from blog post data.

How Bloggers Can Make Money With Zapier

Zapier does not automatically make money for you, but it can support several income paths.

Affiliate Blogging

Zapier can help track content, organize affiliate posts, automate reminders and support consistent promotion.

More organized promotion can support more traffic and affiliate clicks over time.

Freelance Automation Services

Many creators and small businesses want automation but do not know how to build it.

If you learn Zapier, you can offer workflow setup services such as lead capture, email automation, content tracking and blog promotion systems.

Agency Services

Agencies can use Zapier to build repeatable client workflows for reporting, onboarding, publishing, lead management and content operations.

Digital Products

You can create automation templates, checklists, workflow guides or training products for bloggers who want to save time.

Need Zapier Setup Help?

If you do not want to build Zapier workflows yourself, you can hire freelancers who specialize in automation setup.

Hire Zapier automation experts on Fiverr

Recommended Setup for Blogger Automation

Zapier works best when your blog has a strong foundation.

If your website, email list, content tracker, and publishing workflow are messy, automation will not fix everything. It may only make the mess move faster.

Start with a clean blogging system:

  • WordPress blog
  • Email platform
  • Google Sheets or Airtable tracker
  • Task manager
  • Social media promotion workflow
  • Clear affiliate link tracking

Then connect the pieces with Zapier.

If you are starting a blog or affiliate website, a reliable WordPress setup is still one of the best foundations.

Build an Automation-Ready Blog

Before automating your content workflow, make sure your blog has a reliable WordPress foundation where posts, forms, links, and tracking can work smoothly.

Start your automation-ready blog with Hostinger

Who Should Use Zapier?

Zapier is best for users who want easy no-code automation.

It is a good fit for:

  • Beginner bloggers
  • Affiliate marketers
  • Creators managing multiple apps
  • Small business owners
  • Freelancers
  • Non-technical users
  • Teams that need reliable app connections

If you want the easiest way to start automating your blog, Zapier is still one of the best choices.

Who Should Skip Zapier?

Zapier is not the best fit for every user.

You may want to skip it if:

  • You need very complex visual workflows
  • You want the lowest possible automation cost
  • You are technical and prefer self-hosted automation
  • You need deep custom logic and code control
  • You are automating high-volume workflows and task costs become too high

In those cases, Make, Pabbly Connect or n8n may be worth comparing.

Recommended Resource Before the Final Words

Want Ready-Made Automation Ideas?

If you are new to automation, start with a simple workflow checklist instead of trying to build a full system in one day. A good starter pack should include blog publishing, email capture, affiliate tracking and social promotion workflows.

Access the Blogger Automation Starter Checklist

Recommended Book for Automation Thinking

If you want to understand how AI and automation fit into modern work, a useful book to explore is Co-Intelligence: Living and Working with AI by Ethan Mollick.

It is not a Zapier tutorial, but it can help you think about AI as a practical work partner. That mindset is useful when building automation because the goal is not to remove thinking. The goal is to remove repeated work.

Recommended Reading

If you are building AI and automation workflows, this book can help you think more clearly about working with AI tools.

Check Co-Intelligence on Amazon

Final Verdict: Is Zapier Worth It?

After researching this Zapier review 2026, my honest verdict is that Zapier is still worth it for beginners who want easy automation.

It may not be the cheapest tool. It may not be the most flexible tool for advanced users. But it is one of the easiest ways to connect apps and automate basic workflows without coding.

For bloggers, Zapier is especially useful for publishing workflows, email list automation, content tracking, affiliate reminders and social promotion tasks.

If you are brand new to automation, start with Zapier. If your workflows become more complex later, compare Make or n8n.

The best approach is simple: build one useful Zap, test it, and improve from there.

Start Automating With Zapier

If you want to save time on repeated blog tasks, start with one small Zap and improve it after testing.

Try Zapier for blog automation

Frequently Asked Questions

Is Zapier worth it in 2026?

Yes, Zapier is worth it for beginners and bloggers who want easy no-code automation. It is especially useful for simple app connections, publishing workflows, email list automation, and content tracking.

Is Zapier beginner-friendly?

Yes. Zapier is one of the most beginner-friendly automation platforms because it uses a simple trigger-and-action workflow structure.

Does Zapier require coding?

No. Most Zapier workflows can be built without coding. Advanced users can use more technical features, but coding is not required to start.

How many apps does Zapier support?

Zapier’s app directory includes thousands of integrations. App availability can change, so check Zapier’s app directory for the exact tools you use.

Is Zapier better than Make?

Zapier is usually easier for beginners. Make is often better for visual, advanced, and more flexible workflows. The best choice depends on your automation style.

Can bloggers use Zapier?

Yes. Bloggers can use Zapier to automate content tracking, email workflows, social media tasks, affiliate reminders, form submissions, and publishing systems.

Can I make money using Zapier?

Yes. Zapier can support affiliate blogging, freelancing, agency workflows, and automation services. Income depends on your skill, offer, audience, and execution.

What is Zapier Copilot?

Zapier Copilot is an AI-powered assistant that helps users discover automation use cases and build, expand, or maintain automation assets across Zapier products. It is still in active development, so users should test workflows carefully.

Conclusion

This Zapier review 2026 shows that Zapier is still one of the easiest automation tools for bloggers.

It is not perfect. Costs can rise as task usage grows. Advanced users may prefer Make or n8n. Some workflows may require paid features or premium apps.

But for beginners who want to automate a blog without coding, Zapier remains one of the safest starting points.

If you are tired of manually copying links, updating spreadsheets, creating reminders, and repeating the same blog admin tasks every week, Zapier can help you build a smarter workflow.

Start small. Automate one task. Test it. Then add more steps when the system is working.

That is how bloggers use automation without getting overwhelmed.

How We Checked This Review

Before updating this review, we checked Zapier’s official pricing, help center, app directory, Copilot documentation, and task usage guidance. This helps keep the article accurate, practical, and useful for readers comparing automation tools.

Affiliate Disclosure

As an Amazon Associate, I earn from qualifying purchases. Some links in this article are affiliate links, which means I may earn a commission at no extra cost to you if you buy through them. I only recommend tools, books, and services that may help beginners, creators, and online business owners create better content or grow their work more effectively.