

The 7 AI Workflows That Quietly Save Bloggers 10+ Hours Every Week

AI workflows for bloggers

Most bloggers do not have a traffic problem at the beginning.

They have a time problem.

You start the week with good intentions. Research one topic. Write one article. Create a Pinterest pin. Send a newsletter. Update an old post. Publish something on social media.

Simple enough.

Then reality arrives.

Research takes longer than expected. Screenshots eat 30 minutes. Canva turns into a one-hour design session. Affiliate links need updating. A WordPress plugin breaks something. The newsletter still has not been written. The article is half-done and the day is gone.

I have felt this while building AI Sage Labs.

AI workflows for bloggers

The interesting part is that many of those tasks do not require deep creativity. They are repetitive, administrative or structural. That is exactly where AI workflows for bloggers become useful.

Not because AI magically builds a successful blog. It does not.

But because the right workflows remove the boring parts that quietly eat hours every week.

Over the past year, I have tested dozens of AI tools, automation systems and content workflows. Some were overhyped. Some were genuinely useful. The seven workflows below are the ones I would start with first because they save real time without making content feel robotic.

If you are a blogger, affiliate marketer, content creator or solo founder, these are the AI workflows for bloggers that can realistically save 10+ hours a week once you use them consistently.

The best part is that these AI workflows for bloggers do not require a giant tech stack. They mostly require a repeatable way to plan, draft, polish, repurpose and track your work.

Why AI Workflows Matter More Than AI Tools

Most beginners approach AI the wrong way.

They ask, “What is the best AI tool?”

A better question is, “What part of my blogging workflow is wasting the most time?”

A tool without a workflow becomes another tab, another subscription and another excuse to delay publishing. A workflow gives the tool a job.

For example, ChatGPT is not a blogging system by itself. Canva is not a traffic strategy. Make.com is not a business plan. Grammarly is not an editor with judgment. Each tool becomes useful only when it fits into a repeatable process.

The strongest AI workflows for bloggers usually follow this pattern:

  1. Use data or reader questions to choose the topic.
  2. Use AI to organize research and build structure.
  3. Write with human experience and judgment.
  4. Use AI to edit, repurpose, and distribute.
  5. Track what worked and improve the next cycle.

That is not glamorous. But it works.

If you want a broader tool stack before building systems, our guide to the best AI automation tools for bloggers explains the core tools that fit into these workflows.

Workflow 1: Stop Starting Every Article From a Blank Page

One of the biggest time-wasters in blogging is not writing.

It is deciding what to write.

You open a new document. Look at a keyword. Open five browser tabs. Read competitor articles. Take notes. Get distracted. Open another tab. Repeat.

Before you write the first paragraph, you have already spent an hour.

A better workflow starts with real topic signals.

Use Google Search Console to find:

  • Queries where your site already gets impressions
  • Pages ranking outside the top 10
  • Topics with high impressions and low clicks
  • Search terms that reveal beginner questions
  • Older posts that could become stronger with updates

Then use an AI assistant to organize the opportunity.

A useful prompt:

I found these Search Console queries for my blog: [paste queries]. Group them into content topics. Suggest which topics should become new posts, which should be added to existing posts and which have buyer intent.

This removes the messy planning stage.

Instead of staring at a blank page, you start with a topic cluster, search intent and a clear angle.

For example, if Search Console shows impressions around “AI affiliate marketing,” “AI review posts,” and “AI tools for affiliate marketers,” you can turn those signals into a complete content cluster instead of guessing randomly.

That is the first serious time saving: fewer random ideas, more evidence-backed planning.

Workflow 2: Use AI to Turn Research Into a Clean Outline

Research is necessary. Research chaos is optional.

Many bloggers lose time because they collect information without turning it into a structure.

They have notes from competitor pages, official docs, YouTube videos, Reddit threads, screenshots, pricing pages and personal testing. But the article still feels unclear because the information is scattered.

This is where AI can act as a research organizer.

Do not ask AI to write the whole article first.

Ask it to organize your notes.

Use this workflow:

  1. Collect research from official sources, your own testing and competing articles.
  2. Paste the notes into ChatGPT, Claude or another AI assistant.
  3. Ask it to group the notes by reader question.
  4. Ask for a logical article outline.
  5. Edit the outline manually before drafting.

A good prompt:

I am writing a blog post for beginner bloggers about [topic]. Here are my research notes. Organize them into a helpful article outline with sections for beginner context, practical workflow, mistakes, examples, tools, FAQs, and final checklist. Do not add facts that are not in my notes.

This workflow helps you avoid generic AI content because the output is based on your research.

It also saves time because you are not trying to mentally hold the entire article structure in your head.

If you write affiliate content, this is especially important. Trust depends on research, clear comparison and honest judgment. Our guide on writing affiliate review posts with AI shows how to use this research-first method for product reviews.

Workflow 3: Draft Section by Section Instead of One Giant Article

One-click AI articles usually sound like one-click AI articles.

They are smooth, confident, and strangely empty.

The better workflow is section-by-section drafting.

Instead of asking AI to write a 3,000-word article, ask it to help with one section at a time.

For example:

  • Draft the introduction from this angle.
  • Explain this workflow in simple language.
  • Turn these notes into a pros and cons section.
  • Create a practical example for beginner bloggers.
  • Rewrite this paragraph to sound clearer and less salesy.
  • Create FAQs based only on the article above.

This gives you control.

You can review each section before moving on. You can add your own experience. You can remove hype early. You can prevent the article from becoming generic.

The best AI workflows for bloggers keep the human decision-maker in the loop.

A simple section prompt:

Write this section for beginner bloggers using the notes below. Keep the tone practical and honest. Avoid hype. Include one example and one caution. Do not invent statistics or results.

This approach is slightly slower than generating a full draft in one click, but it produces a much better article and saves editing time later.

Workflow 4: Build SEO While You Write

Many bloggers treat SEO as something that happens after the article is finished.

That creates extra work.

You write the post, then go back later trying to add keywords, internal links, FAQs, headings and missing search intent. It feels like patching the article instead of building it properly.

A better workflow is to build SEO into the writing process.

Keep a simple checklist open while drafting:

  • Does the introduction answer the main question quickly?
  • Does each section solve a real reader problem?
  • Are related questions answered naturally?
  • Are internal links added where they genuinely help?
  • Are examples included?
  • Is the content based on real research or experience?
  • Are FAQs included near the end?
  • Is the final verdict or takeaway clear?

Use AI to check the draft before publishing.

Prompt:

Review this draft for search intent gaps. What questions would a beginner still have after reading it? Suggest missing sections, FAQs, internal link opportunities and examples. Do not rewrite the whole article.

This workflow saves time because you are not doing a separate SEO pass from scratch.

It also helps you follow Google’s direction around helpful AI-assisted content. Google has said that appropriate use of AI is not against its guidelines, but content created mainly to manipulate rankings or add little value can be a problem.

That means AI should help you create clearer, more useful content, not thin pages at scale.

If you want to compare writing tools for this stage, our AI writing tools tested guide breaks down which tools are strongest for drafting, SEO, editing and budget use.

Workflow 5: Turn One Blog Post Into Five Content Assets

This is one of the fastest ways to save time.

Most bloggers publish an article once and move on.

That wastes effort.

Every strong blog post should become multiple assets. The article stays the source. AI helps reshape it for other platforms.

One article can become:

  • One Pinterest infographic
  • One Pinterest list pin
  • One Pinterest carousel
  • One Facebook post
  • One LinkedIn post
  • One newsletter
  • One short YouTube script
  • One lead magnet idea

For example, this article could become:

  • 7 AI workflows every blogger should try
  • 5 AI tools that save bloggers hours every week
  • AI blogging workflow checklist
  • How I plan one blog post in 15 minutes
  • The weekly AI blogging system I would use again

Use AI to create rough versions.

Prompt:

Turn this blog post into five promotional assets: one Pinterest pin title, one Pinterest description, one Facebook post, one newsletter intro and one short video script. Keep the tone practical and avoid clickbait.

Then edit the outputs manually.

For design, Canva is usually enough. You do not need to become a graphic designer to create a consistent visual system for blog promotion.

This workflow saves time because you stop asking, “What should I post today?” The blog post becomes the source of the entire promotion cycle.

Workflow 6: Create Lead Magnets From Existing Content

Most affiliate bloggers focus heavily on traffic and not enough on lead generation.

That creates a missed opportunity.

If someone reads your article and leaves, you may never see them again. A simple lead magnet gives them a reason to stay connected.

AI makes lead magnet creation much faster.

A blog post can become:

  • A checklist
  • A PDF guide
  • A prompt pack
  • A comparison worksheet
  • A swipe file
  • A resource library
  • A mini email course
  • A decision quiz

The key is relevance.

A post about AI writing tools should offer an AI writing checklist. A post about affiliate reviews should offer a review template. A post about automation should offer a workflow map.

A simple prompt:

Create a one-page checklist based on this blog post. The checklist should help beginner bloggers apply the advice in 20 minutes. Keep it practical, short, and printable.

Then use Canva to turn the checklist into a simple PDF.

This workflow can turn old content into email list growth without requiring a new article from scratch.

If your blog is monetized with affiliate offers, this also gives you a warmer audience for future recommendations. For broader income strategy, read our guide on how bloggers make money with AI tools.

Workflow 7: Automate Repetitive Admin Without Automating Judgment

Automation is powerful, but it should not be used blindly.

The goal is to automate repetitive admin, not human judgment.

Good tasks to automate:

  • Adding new post details to a content tracker
  • Sending a Slack or email reminder when a post is published
  • Creating a newsletter draft from a new post
  • Logging affiliate links in a spreadsheet
  • Saving form submissions to a CRM
  • Creating social draft tasks after publishing
  • Notifying you when a content update is due

Tasks not to fully automate:

  • Final product recommendations
  • Affiliate review verdicts
  • Income claims
  • Pricing accuracy
  • Medical, legal or financial advice
  • Publishing without human review

Make.com, Zapier, and n8n can all support blogging workflows, but you should start small.

One useful starter automation:

  1. New WordPress post published.
  2. Post title and URL are added to Google Sheets.
  3. AI creates three social draft ideas.
  4. A task is created to design pins.
  5. You review everything before publishing.

This saves time while keeping you in control.

Our Make.com review explains why visual automation is useful for bloggers once a workflow is already proven.

The Weekly AI Blogging System I Would Use

The biggest mistake bloggers make is treating every week like a fresh start.

A better approach is to build a repeatable weekly system.

Here is a simple version:

Day Main Task AI Support
Monday Research and topic selection Use Search Console queries and AI clustering
Tuesday Outline and first draft Use AI to structure notes and draft sections
Wednesday Edit and SEO pass Use AI to identify gaps, FAQs, and clarity issues
Thursday Design pins and visuals Use AI to create pin titles and Canva for design
Friday Newsletter and social posts Repurpose the article into email and social drafts
Saturday Update old content Use AI to find missing sections and outdated details
Sunday Plan next week Review tracker data and choose one priority

This system is not complicated.

That is the point.

A simple workflow you actually follow beats an advanced system you abandon after two weeks.

The AI Stack I Would Use If I Started Again

If I were starting a blog from scratch today, I would keep the stack lean.

I would not buy twenty tools.

I would use:

  • Hosting: Hostinger for WordPress
  • Research and drafting: ChatGPT or Claude
  • Search data: Google Search Console
  • Writing polish: Grammarly
  • Design: Canva
  • Email: MailerLite or Kit
  • Automation: Make.com
  • Outsourcing: Fiverr

That is enough to build a serious content system without drowning in subscriptions.

Most bloggers do not need more tools. They need a better process for using the tools they already have.

Build Your AI Blogging System on a Site You Control

AI workflows are more useful when your content, lead magnets, affiliate reviews and email opt-ins live on your own WordPress site.

Start your AI blog with Hostinger

If setup tasks keep slowing you down, outsource the specific bottleneck instead of trying to learn everything yourself.

Need Help Setting Up Your Blog Workflow?

A freelancer can help with WordPress setup, Pinterest templates, automation scenarios, email forms, content trackers or technical cleanup.

Find blog workflow experts on Fiverr

How These Workflows Save 10+ Hours Per Week

The exact time saved depends on your publishing schedule, but the math is realistic for active bloggers.

Workflow Estimated Weekly Time Saved
Topic planning from Search Console and AI clustering 1-2 hours
Research organization and outline creation 1-2 hours
Section-by-section drafting support 2-3 hours
SEO gap check while writing 1 hour
Repurposing one post into social and email assets 2 hours
Lead magnet creation from existing content 1-2 hours
Admin automation and tracking 1-2 hours

That is 9 to 14 hours per week for bloggers who publish consistently and promote their content.

If you only publish once a month, you may save less. If you publish multiple times a week, you may save more.

The point is not the exact number.

The point is that repetitive blogging tasks compound. Saving 10 hours a week means more than 500 hours a year that can go into better content, traffic, affiliate partnerships, product testing or rest.

Common Mistakes With AI Workflows

Using AI Before Understanding the Goal

If you do not know what the article should accomplish, AI will usually create polished confusion.

Define the reader, search intent and business goal first.

Publishing Raw AI Output

Raw AI output often sounds generic. Add examples, opinions, screenshots, testing notes and real judgment.

Automating Too Early

Automation helps after a workflow works manually. If the process is broken, automation only makes the mess faster.

Buying Too Many Tools

More tools do not equal more progress. Start with one workflow and one tool at a time.

Forgetting the Reader

The purpose of AI is not to make your life easier at the reader’s expense. The best workflows save time while making the content more helpful.

Downsides and Limits of AI Blogging Workflows

AI workflows are useful, but they have limits.

You still need to verify facts, check pricing, test tools where possible, add personal judgment and avoid making claims you cannot support.

AI can summarize the web, but it can also misunderstand context. It can draft a workflow, but it cannot know whether that workflow fits your audience. It can create a lead magnet, but it cannot guarantee subscribers. It can write an email, but it cannot create trust out of thin air.

There is also a risk of sameness.

If every blogger uses the same prompts, same templates, same examples, and same AI-generated phrases, the internet fills with content that looks fine but feels empty.

Your advantage is not that you use AI.

Your advantage is that you use AI around your own experience, research, taste and reader understanding.

Final Checklist Before You Build Your Own Workflow

Before adding more tools, answer these questions:

  • What task wastes the most time every week?
  • Is the task repetitive, creative, or judgment-based?
  • Can AI help with structure, drafting, editing, or repurposing?
  • Does the workflow still include human review?
  • Can the workflow be repeated every week?
  • Does it make the reader experience better?
  • Can you measure whether it saved time?

If the answer is yes, build the workflow.

If the answer is unclear, simplify it.

Frequently Asked Questions

What are AI workflows for bloggers?

AI workflows for bloggers are repeatable systems that use AI tools to speed up blogging tasks such as topic research, outlining, drafting, editing, SEO checks, content repurposing, lead magnet creation and automation.

Can AI workflows really save bloggers 10 hours per week?

Yes, for active bloggers who publish and promote content consistently, saving 10 hours per week is realistic. The biggest savings usually come from planning, outlining, repurposing and automating repetitive admin tasks.

Which AI tool should bloggers start with?

Start with ChatGPT or Claude for research, outlines, and drafting support. Add Grammarly for editing, Canva for design and Make.com only when you have a repeatable process worth automating.

Should bloggers let AI write full articles?

It is better to use AI section by section. Full AI drafts often feel generic and require heavy editing. Section-by-section drafting gives you more control over quality, examples and tone.

Are AI-written blog posts allowed by Google?

Google’s guidance focuses on helpful content rather than whether AI was used. AI-assisted content should be original, useful, accurate and created for people, not mainly to manipulate search rankings.

What is the easiest blogging task to automate?

Content tracking is one of the easiest tasks to automate. For example, when a new post is published, you can log the title, URL, category and publish date in a spreadsheet automatically.

What should bloggers not automate?

Do not fully automate final recommendations, affiliate verdicts, income claims, pricing accuracy or sensitive advice. Those require human judgment and fact-checking.

Conclusion

AI will not magically grow your blog.

It will not rank your articles by itself. It will not build trust with readers. It will not replace your judgment.

But the right AI workflows for bloggers can remove a large amount of repetitive work.

That is the real advantage.

The bloggers who succeed over the next few years probably will not be the ones using the most AI tools. They will be the ones using AI to build better systems.

Start with one workflow.

Use it consistently.

Improve it over time.

Saving 10 hours a week may not sound dramatic today. Over a year, it becomes more than 500 extra hours you can invest into better content, stronger traffic, affiliate marketing, email growth and building something that lasts.

That is why AI workflows for bloggers are worth taking seriously: small weekly savings become a real business advantage over time.

How We Checked This Guide

Before writing this guide, we checked official Google documentation about Search Console and AI-assisted content, Pinterest business resources, and Make.com automation information. The workflows are based on practical blogging use cases and should be adapted to your publishing schedule, niche and tool stack.

Affiliate Disclosure

Some links in this article are affiliate links, which means I may earn a commission at no extra cost to you if you purchase through them. I only recommend tools, books and services that may help beginners build better blogs, improve their affiliate content or grow their online work more effectively.
What Is an AI Agent? The Ultimate Beginner’s Guide (2026)

What Is an AI Agent

Imagine opening your laptop in the morning and finding that the boring parts of yesterday’s work are already handled.

Your email inbox is sorted. Your calendar is updated. A blog outline is waiting in Google Docs. Competitor notes are summarized. Pinterest pin ideas are ready. A weekly performance report is sitting in your inbox.

You did not hire a full-time assistant.

You did not stay awake all night.

An AI agent handled the workflow.

That is why so many people are asking the same question in 2026: what is an AI agent, and how is it different from ChatGPT, chatbots and normal AI tools?

The short answer is simple.

An AI agent is AI that can work toward a goal. It can understand a task, make a plan, use tools, take actions, check progress and return a finished result with less step-by-step prompting from you.


What Is an AI Agent


That does not mean AI agents are magic. They still make mistakes. They still need permissions, good instructions, safe data access and human review. But they represent an important shift from AI that only answers questions to AI that can help complete work.

This beginner guide explains what is an AI agent in plain language, how AI agents work, how they compare with chatbots, real-world examples, risks, beginner tools, and how bloggers, affiliate marketers, freelancers, and small businesses can start using them safely.

By the end, you should be able to explain what is an AI agent to a beginner without using technical jargon.

What Is an AI Agent?

An AI agent is a software system that can understand a goal, plan steps, use available tools, and take actions to complete a task or workflow for a user.

In simpler words, an AI agent is like a digital worker that does more than reply to a prompt.

A chatbot answers.

An AI agent works toward an outcome.

For example, if you ask a normal chatbot:

Write a blog post about AI automation.

It may generate a draft and wait for your next instruction.

An AI agent-style workflow could go further:

  • Research the topic
  • Analyze competing articles
  • Create an outline
  • Draft the article
  • Suggest internal links
  • Write SEO metadata
  • Create image prompts
  • Draft social posts
  • Save the output into your workspace

That is the key difference.

The agent is not only generating text. It is trying to complete a larger goal.

IBM describes AI agents as systems that autonomously perform tasks by designing workflows with available tools. AWS describes AI agents as software programs that can interact with an environment, collect data and perform self-directed tasks toward goals. Those definitions are useful, but for beginners the simplest explanation is this:

An AI agent is AI that can plan and act, not just chat.

A Simple Analogy

Imagine you are opening a small coffee shop.

A chatbot is like asking a friend for advice.

You ask:

How should I market my coffee shop?

The friend gives suggestions. Maybe they say to post on Instagram, offer a launch discount and create a loyalty card.

Helpful, but the conversation stops there.

An AI agent is more like assigning the task to a junior operations manager.

You say:

Help me launch the coffee shop marketing plan.

The manager might research competitors, create a launch calendar, draft promotional emails, prepare social posts, organize local partnership ideas, track responses and send you a summary.

That is the mental model.

A chatbot gives answers. An AI agent coordinates work.

Why AI Agents Are Becoming Popular in 2026

AI agents are becoming popular because modern work is full of repetitive digital tasks.

People spend hours every week:

  • Organizing emails
  • Researching information
  • Updating spreadsheets
  • Creating reports
  • Writing first drafts
  • Scheduling content
  • Answering common questions
  • Moving information between apps
  • Checking analytics
  • Creating similar documents again and again

Most of those tasks follow patterns.

AI agents are designed to handle those patterns so humans can spend more time on strategy, creativity, relationships and decisions.

This is especially important for solo creators, bloggers, affiliate marketers, freelancers and small businesses because they usually do not have large teams. A good AI agent workflow can feel like adding a small digital teammate without hiring a full employee.

If you want the practical blogging side of this idea, our guide to AI automation tools for bloggers explains the tools that help connect content, email, social and workflow systems.

How Do AI Agents Work?

AI agents can look complicated, but the basic workflow is easy to understand.

Most AI agents follow six stages.

1. Goal

Everything starts with a goal.

Instead of giving the AI every tiny instruction, you describe the outcome you want.

Examples:

  • Create a weekly content plan.
  • Research the best AI video tools.
  • Summarize customer feedback.
  • Prepare an email newsletter from my latest blog post.
  • Find broken affiliate links and create an update checklist.

The goal tells the agent what success should look like.

2. Context

The agent needs context to do useful work.

Context may include:

  • Your audience
  • Your brand voice
  • Previous documents
  • Project rules
  • Company data
  • Examples of good output
  • Tool permissions

Without context, an agent may still produce something, but it will often feel generic or misaligned.

3. Planning

A good AI agent does not jump straight to the final answer.

It breaks the goal into smaller steps.

For example, if the goal is to publish a blog post, the plan might be:

  1. Review the keyword and search intent.
  2. Collect research from trusted sources.
  3. Create a blog outline.
  4. Draft sections.
  5. Add examples and FAQs.
  6. Suggest internal links.
  7. Create a final publishing checklist.

This planning step is one reason AI agents feel more useful than basic chatbots.

4. Tool Use

Tool use is where agents become powerful.

An AI model alone can mostly generate text. An AI agent connected to tools can do work across software.

Tools may include:

  • Web search
  • Email
  • Calendars
  • Documents
  • Spreadsheets
  • CRMs
  • Databases
  • Automation platforms
  • Design tools
  • Code editors

Google Cloud describes enterprise agent platforms around building, deploying, governing, and optimizing AI agents and model-based solutions. That enterprise framing matters because serious agents need more than clever prompts. They need access control, testing, monitoring, and governance.

5. Action

After planning and choosing tools, the AI agent performs actions.

Examples:

  • Drafting a document
  • Updating a spreadsheet
  • Sending a summary
  • Creating a task
  • Running a search
  • Calling an API
  • Generating a report
  • Creating a workflow step

Action is what separates an agent from a passive assistant.

6. Review and Feedback

AI agents should check progress.

They may ask:

  • Did the output match the goal?
  • Is more information needed?
  • Did a tool fail?
  • Should the plan change?
  • Does this need human approval?

This feedback loop helps agents handle multi-step work. But it does not remove the need for human review.

Important content, customer messages, code, affiliate claims, pricing details, and business decisions should still be checked by a person.

AI Agent vs ChatGPT

Many beginners ask whether ChatGPT is an AI agent.

The answer is: sometimes, depending on how it is used.

ChatGPT is primarily an AI assistant and conversational interface. It can answer questions, generate ideas, explain concepts, write drafts, and help with reasoning.

But a basic chat conversation is not the same as a full AI agent.

The difference is workflow and action.

Feature ChatGPT-style assistant AI agent
Main job Respond to prompts Work toward goals
Workflow User guides each step Can plan multiple steps
Tool use May use tools if enabled Designed around tool use
Autonomy Usually waits for instructions Can continue through a task within limits
Best for Ideas, explanations, drafts Workflows, automation, multi-step tasks


Think of ChatGPT as a powerful conversation engine. Think of an AI agent as a workflow built around an AI model, tools, memory, permissions and a goal.

AI Agent vs Chatbot vs AI Assistant

These terms overlap, which creates confusion.

Here is the simple difference.

Chatbot

A chatbot usually answers questions or follows a conversation. Older chatbots often followed fixed rules. Modern chatbots use large language models and can be much smarter, but many still depend on user prompts.

AI Assistant

An AI assistant helps with individual tasks such as writing, summarizing, brainstorming, scheduling, or answering questions.

AI Agent

An AI agent is more goal-focused. It can plan, use tools, take actions, and continue through a multi-step workflow.

In simple terms:

  • A chatbot talks.
  • An AI assistant helps.
  • An AI agent works through a goal.

That is why the question what is an AI agent is not just a vocabulary question. It is about a shift from conversation to execution.

The Five Core Parts of an AI Agent

Most AI agents include five core parts.

1. Reasoning Engine

This is the “brain” of the agent. It understands the goal, processes information, compares options, and decides what to do next.

2. Memory

Memory helps the agent remember useful information such as your writing style, audience, brand rules, past tasks, or project details.

Memory can be useful, but it also creates privacy considerations. Do not connect sensitive data unless you trust the platform and understand its data policies.

3. Planning

Planning turns one big goal into smaller steps. This is what lets agents handle longer workflows instead of giving one quick answer.

4. Tools

Tools let the agent interact with the digital world. Without tools, the agent mostly writes. With tools, it can search, update, send, retrieve, create, or trigger actions.

5. Guardrails

Guardrails include permissions, approvals, limits, policies, logs, and human review steps.

Beginners often forget this part, but it is critical. The more power an agent has, the more important guardrails become.

Types of AI Agents

Not every AI agent is built for the same job.

Task Automation Agents

These agents handle repetitive work such as updating spreadsheets, moving data between apps, creating tasks or sending routine summaries.

Research Agents

Research agents gather information, summarize sources, compare competitors, monitor trends and organize notes.

Content Agents

Content agents support blog posts, scripts, newsletters, social captions, email sequences and SEO workflows.

Customer Support Agents

Support agents answer common questions, route tickets, summarize conversations and help human support teams respond faster.

Coding Agents

Coding agents can help developers write code, debug errors, review pull requests, generate tests and explain technical problems.

Sales and CRM Agents

These agents help organize leads, summarize calls, draft follow-ups, update CRM records, and prioritize outreach.

Multi-Agent Systems

A multi-agent system uses several agents together. One agent may research, another may write, another may check SEO, another may create social posts, and another may prepare reports.

This is powerful, but beginners should not start here. Multi-agent systems can become confusing quickly if the workflow is not clear.

Real-World AI Agent Examples

AI agents are easiest to understand through examples.

1. Blogging Agent

A blogging agent could help research keywords, analyze competitors, create outlines, draft sections, suggest internal links, write meta descriptions and create promotion ideas.

This does not replace the blogger’s judgment. It reduces repetitive preparation work.

For a practical content system, start with our guide to what AI automation tools are, then build one workflow around your current blogging process.

2. Affiliate Marketing Agent

An affiliate marketing agent could monitor product launches, organize review notes, draft comparison tables, suggest FAQs, check older posts for update opportunities and prepare email promotion drafts.

It should not invent personal experience, fake results or make unsupported income claims.

If you monetize with affiliate content, our AI affiliate review writing guide is the safer starting point.

3. Pinterest Marketing Agent

A Pinterest agent could turn a blog post into pin titles, descriptions, board suggestions, image prompt ideas and a weekly publishing plan.

4. Customer Support Agent

A customer support agent could answer common questions, summarize tickets, route requests and prepare draft replies for human review.

5. Research Agent

A research agent could monitor a niche, collect trusted sources, summarize changes, compare competitors and prepare a weekly briefing.

6. Coding Agent

A coding agent could inspect a codebase, suggest changes, write tests, fix bugs and explain what it changed.

7. Local Business Agent

A local business agent could help prepare appointment reminders, summarize customer messages, draft review responses and update task lists.

How Bloggers and Affiliate Marketers Can Use AI Agents

Blogging and affiliate marketing are strong use cases because they involve repeated workflows.

A blogger may repeat the same process every week:

  • Choose topic
  • Research search intent
  • Create outline
  • Draft article
  • Edit
  • Add images
  • Add internal links
  • Add affiliate disclosure
  • Create pins
  • Write newsletter
  • Update tracker

An AI agent can help coordinate parts of that process.

For example:

Goal: Prepare a complete publishing package for my article about AI video tools.

The agent-style workflow might create:

  • Article outline
  • FAQ ideas
  • Internal link suggestions
  • Featured image prompt
  • Pinterest titles
  • Newsletter draft
  • Social captions
  • Publishing checklist

That is the practical answer to what is an AI agent for bloggers: it is a workflow helper that reduces repeated steps while you keep control over final decisions.

If you are building affiliate income, this guide on AI tools for affiliate marketing shows the broader stack around writing, design, email, automation and conversion.

Benefits of AI Agents

They Save Time

AI agents can handle repetitive research, summarizing, drafting, organizing and reporting tasks faster than doing everything manually.

They Reduce Context Switching

Instead of jumping between many apps, an agent can coordinate several steps in one workflow.

They Help Small Teams Do More

Creators, freelancers and small businesses can use AI agents to reduce administrative load without hiring a full team immediately.

They Make Workflows More Consistent

A repeatable agent workflow can help ensure the same checklist is followed every time.

They Support Better Decisions

Agents can summarize data, compare information and surface patterns. Humans still make the final call.

Risks and Limitations of AI Agents

AI agents are useful, but they are not perfect.

This section is important because the hype around agents can make them sound more reliable than they are.

AI Agents Can Make Mistakes

They can misunderstand instructions, use outdated information, miss context or produce confident but wrong outputs.

Bad Inputs Create Bad Outputs

If your goal is vague, your data is messy or your instructions are unclear, the agent’s work may be weak.

Tool Access Creates Risk

An agent connected to email, files, payments, publishing tools or customer systems can do real damage if configured poorly.

Privacy Matters

Do not connect private documents, customer data, financial information or sensitive business systems without understanding how the platform handles data.

Not Every Task Should Be Automated

Do not fully automate legal advice, medical decisions, financial decisions, final hiring decisions, crisis communication, sensitive customer responses or public publishing without review.

NIST’s AI Risk Management Framework is useful here because it encourages organizations to manage AI risks intentionally rather than treating AI as a harmless toy.

Are AI Agents Safe?

AI agents can be safe when they are used with clear limits.

Use these beginner guardrails:

  • Start with low-risk tasks.
  • Keep human approval for publishing, payments, deletions, and customer messages.
  • Limit access to sensitive data.
  • Check facts before using outputs.
  • Use reputable platforms.
  • Review privacy and data policies.
  • Keep logs of important actions.
  • Test the workflow before using it in real business operations.

Safe AI agent use is not about fear. It is about giving the agent the right level of responsibility.

Best AI Agent Tools and Platforms to Know in 2026

The AI agent tool market changes quickly, so think in categories instead of chasing every new launch.

General AI Assistants

Tools like ChatGPT, Claude, Gemini and Perplexity are good starting points for research, writing, summarizing, planning and learning.

They are not always full agents by default, but they can support agent-like workflows.

Workflow Automation Platforms

Make.com, Zapier and n8n help connect apps and automate repeatable workflows. These are useful when you want AI to move information between tools.

Our Make.com review explains why visual automation can be a practical starting point for bloggers.

Enterprise Agent Platforms

Google Cloud, AWS, Microsoft, IBM and other enterprise providers offer platforms for building, deploying and governing AI agents at scale.

These are more technical and usually more relevant for developers or companies than beginner bloggers.

Customer Support Agents

Support tools use AI agents to answer FAQs, summarize conversations, route tickets and assist human support teams.

Coding Agents

Coding agents help with software development tasks such as editing files, debugging, writing tests and reviewing code.

Content and Marketing Agents

These tools help marketers generate content briefs, create social posts, refresh old articles, organize campaigns, and prepare reports.

For beginners, the best agent platform is usually not the most advanced one. It is the one that solves one real workflow without creating more complexity.

Beginner Roadmap: How to Start Using AI Agents

If you are new, do not try to automate your entire business in one weekend.

Start with this roadmap.

Step 1: Learn One AI Assistant Well

Use ChatGPT, Claude, Gemini, or Perplexity for research, outlines, summaries, and planning.

Step 2: Choose One Repetitive Task

Pick something low-risk:

  • Blog outlines
  • Meeting summaries
  • Email organization
  • Social post drafts
  • Weekly reports
  • Content tracker updates

Step 3: Write the Workflow Manually

Before automating, write the steps down.

If you cannot explain the workflow clearly, the AI agent will struggle too.

Step 4: Add AI Support

Use AI to draft, summarize, classify or suggest next steps.

Step 5: Add Automation Later

Once the workflow works manually, connect tools with Make.com, Zapier, n8n, or another automation platform.

Step 6: Keep Human Review

Review the output before publishing, sending, deleting, buying or making decisions.

This is the beginner-friendly path from simple AI assistance to real AI agent workflows.

Recommended Setup for Bloggers

If you want to use AI agents for blogging, affiliate marketing, or an AI-focused website, your own blog is still the foundation.

Social platforms are useful for distribution, but your website gives you control over SEO, internal links, lead magnets, affiliate disclosures and long-term content updates.

Build Your AI Agent Content Hub on WordPress

If you plan to publish AI tutorials, automation guides, reviews or affiliate content, start with a fast blog you control.

Start your AI blog with Hostinger

If setup feels technical, do not force yourself to learn everything at once. Hiring help for WordPress setup, automation workflows, email forms or technical cleanup can save a lot of time.

Need Help Building Your First AI Workflow?

A freelancer can help set up WordPress, connect automation tools, design content templates or build simple AI workflows so you can focus on strategy.

Find AI automation experts on Fiverr

Recommended Learning Resource

If you want a deeper technical understanding after this beginner guide, a book on AI agents, LLM apps, retrieval and knowledge graphs can help you understand how modern agent systems are built.

Want to Go Deeper Into AI Agents?

For readers who want more technical depth, a focused AI agents book can help explain LLM apps, RAG, memory and agent architecture beyond beginner definitions.

Explore an AI agents book on Amazon

Common Myths About AI Agents

Myth 1: AI Agents Replace Everyone

AI agents can automate repetitive tasks, but most serious work still needs human judgment, context, taste, ethics and accountability.

Myth 2: AI Agents Never Make Mistakes

They make mistakes. Sometimes they make them confidently. Review important output.

Myth 3: AI Agents Are Only for Big Companies

Large companies have advanced agent systems, but beginners can use simple agent-like workflows for research, writing, summaries and automation.

Myth 4: More Autonomy Is Always Better

More autonomy also means more risk. The right level of autonomy depends on the task.

Myth 5: AI Agents Are Just Chatbots With a New Name

Some products use the term loosely, but real AI agents involve goals, planning, tools, action and review loops.

Final Checklist Before Using an AI Agent

Before giving an AI agent a task, ask:

  • What exact goal do I want completed?
  • What information does the agent need?
  • Which tools should it access?
  • Which tools should it not access?
  • What can it do without approval?
  • What requires human review?
  • How will I check the result?
  • What happens if the agent makes a mistake?

If you cannot answer those questions, start with a smaller workflow.

Frequently Asked Questions

What is an AI agent in simple words?

An AI agent is software that can understand a goal, plan steps, use tools and help complete tasks with less step-by-step prompting from a human.

Is ChatGPT an AI agent?

ChatGPT is mainly an AI assistant, but it can be part of agent-like workflows when it uses tools, memory, instructions and automation. A normal chat conversation is not always a full AI agent.

What is the difference between an AI agent and a chatbot?

A chatbot usually answers questions. An AI agent works toward a goal and may plan steps, use tools, take actions and check progress.

Can beginners use AI agents?

Yes. Beginners can start with simple use cases such as blog outlines, email summaries, research organization, social content drafts and weekly reports.

Do AI agents need coding?

Not always. Some AI agent workflows can be built with no-code tools and automation platforms. More advanced custom agents may require APIs, coding, databases and security knowledge.

Are AI agents safe?

AI agents can be safe when used with good guardrails. Start with low-risk tasks, limit permissions, avoid sensitive data and keep human approval for important actions.

What are examples of AI agents?

Examples include research agents, coding agents, customer support agents, sales agents, content workflow agents, calendar agents and automation agents that connect apps together.

What should bloggers use AI agents for first?

Bloggers should start with research organization, content outlines, internal link suggestions, FAQ drafting, social repurposing and content tracker updates.

Will AI agents replace jobs?

AI agents are more likely to change tasks inside jobs than replace every job. People who learn to use AI agents may become more productive because they can delegate repetitive digital work.

Conclusion

What is an AI agent? It is one of the most important AI concepts beginners should understand in 2026.

An AI agent is not just a chatbot. It is a goal-focused AI system that can plan, use tools, take action and help complete workflows.

For bloggers, creators, affiliate marketers, freelancers, developers and small businesses, AI agents can save time and make work more consistent.

But they are not magic.

They need clear goals, good context, safe tool access, privacy awareness and human review.

The smartest way to start is simple: choose one repetitive workflow, use AI to improve it, review the output and only automate more once the process works.

That is how AI agents become useful digital teammates instead of another overhyped tool.

If someone asks you what is an AI agent, the honest answer is this: it is a useful system for turning goals into workflows, as long as humans stay responsible for the final judgment.

How We Checked This Guide

Before writing this guide, we checked official and primary sources from IBM, AWS, Google Cloud, Anthropic and NIST to ground the explanation of AI agents, tool use, agent platforms and responsible AI risk management. AI agent platforms change quickly, so verify official documentation before choosing a tool for business-critical workflows.

Affiliate Disclosure

Some links in this article are affiliate links, which means I may earn a commission at no extra cost to you if you purchase through them. I only recommend tools, books and services that may help beginners build better blogs, improve their affiliate content, or grow their online work more effectively.
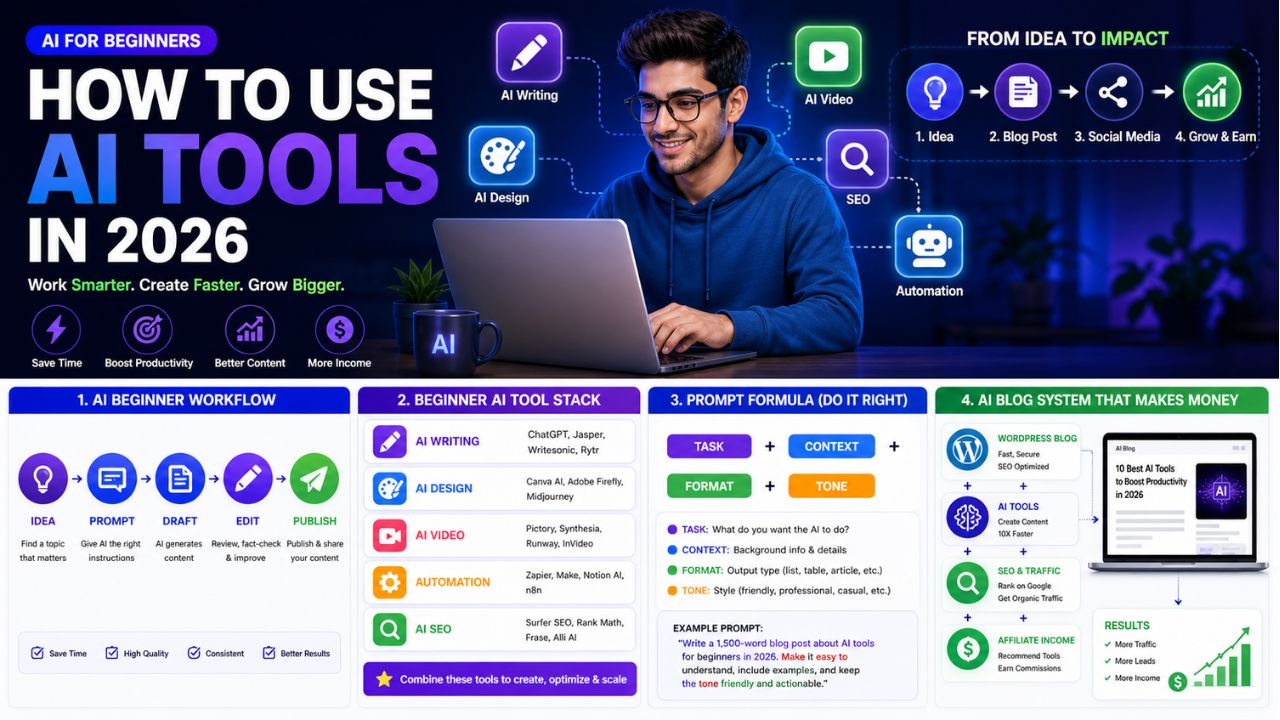
How to Use AI Tools in 2026: 9 Simple Steps for Beginners

How to Use AI Tools

Most beginners do not fail with AI because the tools are too hard. They fail because they try to use too many tools at once.

One day they test ChatGPT. The next day they open Canva. Then they hear about Pictory, Runway, Zapier, Make, SurferSEO, Frase, Claude, Gemini and ten more apps. After a week, they have many accounts but no clear workflow.

That is not a beginner problem. That is a system problem.

If you want to learn how to use AI tools in 2026, the first thing to understand is simple: AI is no longer only for technical people. Bloggers, creators, freelancers, students, small business owners and affiliate marketers now use AI tools every day to write faster, design better visuals, create videos, research topics, automate tasks and build online income systems.

But you do not need every AI tool. You need one clear goal, a small beginner stack and a repeatable workflow.


How to Use AI Tools


This guide will show you how to use AI tools in a practical way, even if you have zero technical experience. We will focus on the use cases that matter most for AI Sage Labs readers: blogging, content creation, design, video, SEO, automation, affiliate marketing and online business.

How to Use AI Tools Without Getting Overwhelmed

The best way to start with AI tools is to pick one clear goal first.

Do not begin by asking, “What is the best AI tool?”

Begin by asking, “What do I want AI to help me do this week?”

For most beginners, the answer is usually one of these:

  • Write blog posts faster
  • Create social media content
  • Design thumbnails or featured images
  • Edit videos
  • Research keywords
  • Automate repetitive tasks
  • Build a blog or online business

Once you know the task, choosing the tool becomes easier.

A beginner does not need a giant AI stack on day one. Start with one writing tool and one design tool. Add video, SEO and automation tools only when you have a real workflow that needs them.

Task Beginner Tool Type Example Tools
Writing and ideas AI writing assistant ChatGPT, Claude, Writesonic
Blog visuals AI design tool Canva AI
Video repurposing AI video tool InVideo AI, Pictory, Runway, Synthesia
Grammar and polish AI editing tool Grammarly
Automation Workflow automation tool Zapier, Make
SEO improvement AI SEO tool Rank Math, SurferSEO, Frase, NeuronWriter


Simple rule: one goal, one tool, one workflow.

What Are AI Tools?

AI tools are software applications that use artificial intelligence to help you complete tasks faster, better, or more automatically.

They can help with writing, editing, design, research, data analysis, video creation, audio editing, image generation, customer support, coding and workflow automation.

For beginners, the easiest way to understand AI tools is this:

AI tools take your instruction and produce an output.

Your instruction is called a prompt. The output could be a blog outline, article draft, image idea, video script, email, table, summary, social caption or workflow plan.

For example, you can write:

Write a beginner-friendly blog outline about AI tools for bloggers in 2026.

The AI tool may give you an organized article structure with headings, subheadings and key talking points.

That is the basic pattern. You give direction. AI gives a draft or suggestion. You review, improve and publish the final version.

The most important thing to understand is that AI tools are assistants, not replacements for your judgment. They can speed up the work, but you still need to decide what is accurate, useful and right for your audience.

Common Types of AI Tools Beginners Should Know

Before you learn how to use AI tools, it helps to understand the main categories. You do not need every category right away, but knowing the difference will save you from wasting time and money.

AI Writing Tools

AI writing tools help you create outlines, introductions, blog posts, emails, product descriptions, YouTube scripts, newsletters and social media captions.

For bloggers, this is usually the first category to learn because writing touches almost every online business workflow.

The best use case is turning ideas into structured drafts faster. The real limitation is that AI writing still needs editing, fact-checking, examples and human experience.

AI Design Tools

AI design tools help you create graphics, thumbnails, featured images, social media posts, Pinterest pins, logos and visual templates.

For bloggers, visuals matter because they affect trust, click-through rate and social sharing.

Canva AI is the easiest starting point for many beginners because it combines templates, text, images, and AI features in one simple design workspace.

AI Video Tools

AI video tools help you turn written content into videos, generate captions, edit footage, create voiceovers or produce short clips for social platforms.

For bloggers, this creates a strong repurposing opportunity. One blog post can become a YouTube video, a short Instagram Reel, a TikTok clip, a Pinterest idea pin or a LinkedIn video summary.

Examples include InVideo AI, Pictory, Runway and Synthesia.

AI Automation Tools

AI automation tools connect different apps and make tasks happen automatically.

For example:

New blog post published → create social media task → update Google Sheet → add task to content calendar.

Tools like Zapier and Make are useful because they save time on repetitive work.

If automation is new for you, this guide on what AI automation tools are explains the basics in a simple way.

AI SEO Tools

AI SEO tools help you plan and improve content for search engines.

They can help with keyword research, content briefs, heading suggestions, related terms, internal linking and on-page optimization.

For bloggers, SEO is where AI becomes more valuable because ranking content can generate traffic for months or years.

The limitation is that SEO tools give recommendations, but they cannot replace real expertise, helpful content, original examples and reader trust.

Why Beginners Should Use AI Tools in 2026

AI is no longer optional for online creators.

That does not mean every piece of content should be generated by AI. It means every serious blogger should understand how AI fits into the workflow.

The biggest benefit is speed.

A beginner who used to spend three hours brainstorming blog ideas can now create a draft topic map in minutes. A blogger who struggled with featured images can create a professional-looking design in Canva. A creator who avoided video can turn articles into short video drafts with AI video tools.

But the real benefit is not only speed. The real benefit is consistency.

Most blogs fail because the owner stops publishing. AI tools make it easier to keep going because they reduce friction at every step.

If you can create outlines faster, write first drafts faster, design thumbnails faster and repurpose content faster, your chances of staying consistent improve.

That is where AI becomes valuable for bloggers.

Step 1: Pick One Clear Goal

The first step in learning how to use AI tools is choosing one goal.

This is where most beginners make the first mistake. They start with tools instead of outcomes.

Do not ask, “Which AI tool should I use?”

Ask, “What do I want AI to help me achieve this week?

Good beginner goals include writing one blog post, creating five Pinterest pins, turning one blog post into a YouTube script, building a list of blog topic ideas, creating a content calendar, improving an old article, automating social sharing, or writing better email subject lines.

Once the goal is clear, the right tool becomes easier to choose.

If your goal is writing a blog post, start with ChatGPT, Claude, or Writesonic. If your goal is creating visuals, start with Canva AI. If your goal is turning articles into videos, start with InVideo AI or Pictory. If your goal is saving time on repetitive tasks, start with Zapier or Make.

Step 2: Start With a Beginner AI Stack

Do not try 15 tools in your first week.

That creates confusion, subscription waste, and half-finished workflows.

Start with a small beginner stack that covers the basics.

Writing: ChatGPT, Claude or Writesonic

Use an AI writing assistant for idea generation, outlines, drafts, FAQs, intros, meta descriptions and social captions.

Create a beginner-friendly blog outline for a 3000-word article about [topic]. Include SEO headings, FAQs and a practical conclusion.

Design: Canva AI

Use Canva AI for blog featured images, Pinterest pins, Instagram posts, YouTube thumbnails, and simple brand graphics.

Create a blog featured image concept for an article titled [title]. Use a clean tech-blog style with AI icons and readable headline text.

Editing: Grammarly

Use Grammarly or another editing tool to improve clarity, grammar and tone before publishing.

A simple workflow is:

Draft with AI → edit manually → polish with Grammarly → publish.

Automation: Zapier or Make

Use automation only after you already have a repeatable task.

A beginner workflow could be:

New WordPress post → add row to Google Sheet → create social media task → notify yourself by email.

Blogging Foundation: WordPress and Hosting

If you want to turn AI tools into a real online business, you need somewhere to publish. A WordPress blog on reliable hosting is still one of the best foundations for SEO and affiliate marketing.

For beginners, Hostinger is a practical starting point because it is WordPress-friendly and easy to set up.

Build Your AI Blog Foundation

If you want to use AI tools for blogging, affiliate reviews, or online income, start with a real WordPress site where your content can rank and convert.

Start your AI blog with Hostinger

Step 3: Learn Prompting

Prompting is the most important beginner AI skill.

A prompt is simply the instruction you give to an AI tool.

Bad prompts produce weak results. Clear prompts produce useful drafts.

The easiest prompt formula is:

Task + Context + Format + Tone

Here is what that means:

  • Task: What do you want the AI to do?
  • Context: Who is it for and why?
  • Format: What should the output look like?
  • Tone: How should it sound?

Bad prompt:

Write about AI tools.

Better prompt:

Write a 300-word beginner-friendly introduction for a blog post about how AI tools help bloggers in 2026. Use simple English, short paragraphs, and a practical tone.

Even better prompt:

Write a 300-word introduction for AI Sage Labs readers. The audience is beginner bloggers and creators who feel overwhelmed by AI tools. Explain the problem, promise a step-by-step solution, and avoid hype.

The better prompt gives the AI a role, audience, purpose, structure, and style. That is why the output will usually be stronger.

Step 4: Create Your First Blog Outline

The safest way to use AI tools for blogging is to begin with outlines.

Do not ask AI to write a full article immediately. Start by asking it to organize your ideas.

Create a detailed SEO outline for a 3000-word blog post titled “How to Use AI Tools in 2026.” The audience is beginner bloggers and creators. Include step-by-step guidance, tool examples, common mistakes, FAQs, and a final checklist.

Then review the outline yourself.

Ask these questions:

  • Does this answer the reader’s real problem?
  • Are the headings clear?
  • Is anything missing?
  • Is the order logical?
  • Can I add personal examples or tool experience?

This is where human judgment matters. AI can organize quickly, but you decide what belongs in the final post.

If you want tool ideas for your stack, read this guide on trending AI tools in 2026.

Step 5: Turn the Outline Into a Draft

Once you have a strong outline, write section by section.

This is important because long AI outputs often become repetitive, generic, or shallow.

Instead of asking for one long article, use a section-by-section workflow.

Write the section “Step 3: Learn Prompting” for this blog post. Keep it beginner-friendly, practical, and around 350 words. Include one bad prompt, one better prompt, and one improved prompt.

This gives you better control.

After each section, edit manually. Add examples, remove weak sentences, and check accuracy.

AI should help you create a first draft, not replace the editing process.

The best AI-assisted blog posts usually follow this workflow:

Outline → section draft → manual edit → SEO check → final polish → publish.

Step 6: Use AI for Blog Images and Graphics

Images make your blog feel more professional.

For AI blogs, you should create at least one featured image for every post. You can also create simple comparison graphics, workflow diagrams, and Pinterest pins.

Good blog visuals can help with click-through rate, social sharing, brand trust, Pinterest traffic, and reader engagement.

A beginner visual workflow looks like this:

  1. Write your blog title.
  2. Ask AI for a featured image concept.
  3. Create the image in Canva AI or another design tool.
  4. Add your brand colors and title overlay.
  5. Compress the image before uploading to WordPress.

You do not need perfect design skills. You need clean, readable visuals that match the article and help the reader understand the topic.

Step 7: Use AI for Video Creation

Video is one of the easiest ways to repurpose blog content in 2026.

If you already wrote a blog post, you have the raw material for a video.

You can ask AI to turn your article into a YouTube script, short video script, list of talking points, voiceover script, storyboard, or social media video caption.

Turn this blog post section into a 60-second YouTube Shorts script. Keep it beginner-friendly, include a strong hook, and end with a simple call to action.

Tools like InVideo AI and Pictory can help turn written content into video drafts with visuals, captions, and voiceover.

This is useful because it helps bloggers reach audiences beyond Google Search.

One article can become several content assets:

  • Blog post for SEO
  • YouTube video for discovery
  • Short clip for Instagram or TikTok
  • Pinterest pin for visual traffic
  • LinkedIn post for authority

That is how AI tools multiply the value of one piece of content.

Step 8: Automate the Repetitive Parts

Automation is powerful, but beginners should use it carefully.

Do not automate before you understand the task manually. First, repeat the task a few times. Then automate the parts that are boring and predictable.

Good beginner automations include saving new blog post ideas into Google Sheets, creating social media tasks after publishing, tracking affiliate content updates, sending reminders, or organizing lead information.

Example workflow:

New WordPress post published → add post title and URL to Google Sheets → create task to make Pinterest pins → send reminder to create social captions.

This kind of automation does not replace strategy. It removes repetitive admin work.

Need Help With AI Automation?

If you do not want to set up workflows yourself, you can hire help for WordPress, Zapier, Make, AI automation, or content systems.

Find AI automation and WordPress experts on Fiverr

Step 9: Combine AI Tools Into a Blogging System

The real power of AI tools comes when you combine them into a simple system.

Here is a beginner AI blogging workflow:

  1. Use ChatGPT, Claude or Writesonic to brainstorm topics.
  2. Use an SEO tool to choose one target keyword.
  3. Use AI to create a blog outline.
  4. Write the draft section by section.
  5. Edit manually and polish with Grammarly.
  6. Create a featured image in Canva AI.
  7. Publish on WordPress.
  8. Use AI to create social posts from the article.
  9. Use Zapier or Make to track and distribute the content.
  10. Update the article after 60 to 90 days based on performance.

This workflow is simple, but it covers the full content cycle.

Most beginners fail because they use AI randomly. They ask for one caption, one outline or one idea, then move on.

A system is different. A system helps you repeat the process every week.

That is how AI tools become useful for blogging and online business.

Best Beginner AI Workflow for Bloggers

If you are not sure where to begin, use this simple workflow for your first few posts.

Stage Tool Type Beginner Action
Idea AI writing assistant Generate 10 topic ideas
SEO Keyword or SEO tool Pick one target keyword
Outline AI writing assistant Create article structure
Draft AI writing assistant Write section by section
Edit Manual editing or Grammarly Improve clarity and accuracy
Visual Canva AI Create featured image
Publish WordPress Add post, links, and images
Promote AI and automation Create captions and tasks
Track Search Console or spreadsheet Review performance


If you are just starting, use this workflow for one post per week. Once it feels easy, increase publishing frequency.

Common Mistakes Beginners Make With AI Tools

Using Too Many Tools

More tools do not automatically mean better results.

Start with one writing tool, one design tool, and one editing tool. Add more only when you feel a real bottleneck.

Copying AI Content Without Editing

AI drafts often sound clear but generic.

Always edit before publishing. Add examples, opinions, screenshots, comparisons, and real experience wherever possible.

Ignoring SEO

AI can write content quickly, but fast content without search intent does not automatically get traffic.

Before writing, understand the keyword, reader problem, and competing pages.

Trusting AI Facts Without Checking

AI can make mistakes. It can also give outdated pricing, wrong feature lists, or invented statistics.

Always verify pricing, tool features, and important claims from official sources before publishing.

Automating Too Early

Automation works best when the workflow is already clear.

If you automate a messy process, you create faster confusion.

How to Use AI Tools for Online Income

AI tools can support online income, but they do not create income by themselves.

This is important.

You do not make money because you opened an AI tool. You make money when AI helps you support a real business model.

For bloggers and affiliate marketers, AI tools can help you create review posts, comparison articles, tutorials, email content, social posts, video scripts, digital product ideas and content updates.

For freelancers, AI tools can help with proposals, client research, service delivery, design drafts, content writing, SEO reports and workflow automation.

For creators, AI tools can help repurpose one idea into multiple formats.

The income comes from the system around the tool: audience, content, offer, trust, traffic and consistency.

Recommended AI Tools to Start With

If you want to test tools without overthinking, start with a small stack.

Try a Simple Beginner AI Stack

Start with one writing tool, one design tool, and one automation tool. Once your workflow is working, add video and SEO tools only when needed.

Try ChatGPT for writing and planning

Try Canva for blog visuals

Try Zapier for simple automation

Recommended Resource Before You Finish

Want a Faster AI Tools Starter Path?

If you feel overwhelmed by too many AI tools, start with a simple checklist instead of buying random subscriptions. Your first goal should be one blog post, one featured image, one social caption and one basic automation.

Access the AI Tools Beginner Starter Checklist

Recommended Book for AI Beginners

If you want to understand the business side of using AI and digital tools, a useful book to explore is Co-Intelligence: Living and Working with AI. It is a helpful read for understanding how AI can fit into real work instead of treating it like a shortcut.

Learn Practical AI Thinking

If you want to understand how to work better with AI tools, this book is a strong next step for bloggers, creators and online business owners.

Check Co-Intelligence on Amazon

The Honest Truth About AI Tools for Beginners

AI tools can save time, but they do not remove the need to think.

This is the biggest truth beginners need to understand.

AI can help you write faster. It can suggest ideas. It can create images. It can turn articles into videos. It can automate repetitive tasks.

But it cannot decide your real audience for you. It cannot build trust automatically. It cannot replace personal experience. It cannot guarantee traffic or income just because you publish more content.

The bloggers who win with AI in 2026 are not the ones blindly copy-pasting AI articles.

They are the ones using AI to do more of the right work: better research, better outlines, faster drafts, cleaner visuals, more consistent publishing, smarter repurposing, and stronger updates.

AI is not the business. AI is the productivity layer on top of the business.

If you use it that way, it becomes extremely powerful.

Final Beginner Checklist

Before you start using AI tools seriously, follow this checklist:

  • Pick one clear goal.
  • Choose one writing tool.
  • Choose one design tool.
  • Learn the basic prompt formula.
  • Create one blog outline.
  • Draft one post section by section.
  • Edit manually before publishing.
  • Create one featured image.
  • Publish on WordPress.
  • Repurpose the post into social content.
  • Track what works.

Do not make the process complicated.

One finished post is more valuable than ten unfinished tool experiments.

Final Words:

Yes, beginners should absolutely learn how to use AI tools in 2026.

AI tools can help you save time, create better content, design visuals, repurpose posts, automate workflows and build a stronger online business foundation.

But the smartest approach is simple: start small.

Pick one goal. Choose one or two tools. Learn prompting. Create your first workflow. Improve it over time.

If your goal is blogging, the best beginner path is:

WordPress blog → AI writing tool → Canva AI → Grammarly → SEO basics → automation later.

That is enough to begin.

Once your workflow is working, you can add advanced tools like SurferSEO, Zapier, Make, Pictory and InVideo AI.

The goal is not to collect AI tools. The goal is to build a system that helps you create useful content consistently.

That is how beginners turn AI from a confusing trend into a practical advantage.

Frequently Asked Questions

Are AI tools free to use?

Many AI tools offer free plans, but advanced features usually require paid plans. Beginners can start with free versions of writing, design and editing tools, then upgrade only when a limitation slows down their workflow.

Do I need coding skills to use AI tools?

No. Most beginner AI tools do not require coding skills. Writing tools, design tools, video tools and automation platforms are built for regular users. Coding knowledge can help with advanced workflows, but it is not required to start.

Which AI tool should I start with?

Start with an AI writing assistant because writing and planning are useful in almost every workflow. After that, add Canva AI for visuals and Grammarly for editing. Bloggers can later add SEO, video and automation tools.

Can AI tools replace human writers?

AI tools can assist writers, but they should not replace human judgment. The best content still needs real experience, editing, examples, fact-checking and a clear understanding of the reader.

Are AI tools good for blogging?

Yes. AI tools are useful for blogging when used properly. They can help with topic ideas, outlines, drafts, editing, images, SEO, social captions and content repurposing. The key is to use AI as an assistant, not as a copy-paste content machine.

How long does it take to learn AI tools?

Basic AI tool usage can be learned in a few days. Building a complete workflow for blogging, design, video and automation may take a few weeks of practice. The fastest way to learn is to use AI on one real project from start to finish.

Can I make money with AI tools?

Yes, but not just by using AI tools randomly. AI tools can help you create content faster, build affiliate blogs, design digital products, automate services and repurpose content. Income comes from a real business model, not the tool itself.

Conclusion

Learning how to use AI tools is one of the most useful skills a beginner can build in 2026.

You do not need to become technical. You do not need to subscribe to every tool. You do not need to automate your entire business in one week.

Start with one problem. Choose one tool. Create one workflow. Finish one real project.

That is how AI becomes useful.

For bloggers, the goal is not to publish more generic content. The goal is to create helpful articles faster, design better visuals, repurpose content smarter, and stay consistent long enough for your work to compound.

Use AI as a helper, not a shortcut. Keep the strategy human. Keep the editing human. Keep the final judgment human.

That is the best way to use AI tools without losing quality, trust, or direction.

How We Checked This Guide

Before updating this guide, we checked Google’s publishing guidance for helpful AI-assisted content and Google’s beginner AI learning resource. This helps keep the article practical, safe, and useful for readers who are learning how to use AI tools for real work.

Affiliate Disclosure

As an Amazon Associate, I earn from qualifying purchases. Some links in this article are affiliate links, which means I may earn a commission at no extra cost to you if you buy through them. I only recommend tools, books and services that may help beginners build better blogs, create useful content, or grow their online work more effectively.

Stable Diffusion Guide 2026: How to Create Free AI Images Like a Pro

stable-diffusion-guide-2026

AI images are easy to generate now, but good AI images still take skill.

That is where many beginners get disappointed. They type one short prompt, get a strange result, and assume the tool is not useful. Or they use a paid image generator for a few weeks and realize credits disappear quickly when they need blog thumbnails, Pinterest graphics, YouTube backgrounds, social posts, and product visuals.

Stable Diffusion is different because it gives creators more control.

You can use it through local tools, hosted platforms, open-source interfaces, and advanced workflows. For bloggers and creators, that means you can create custom visuals instead of depending only on stock images or expensive credit-based tools.

But Stable Diffusion is not always beginner-simple. You need to understand prompts, models, settings, image cleanup, and licensing basics if you want professional results.


stable-diffusion-guide-2026


In this Stable Diffusion guide 2026, you will learn what Stable Diffusion is, how it works, whether it is really free, how to use it like a pro, which tools beginners should know, how bloggers can use it, how to make money with it, and which mistakes to avoid.

Stable Diffusion Guide 2026: What Is Stable Diffusion?

Stable Diffusion is a family of AI image generation models that can create images from text prompts.

In simple words, you describe the image you want, and Stable Diffusion generates a visual based on that description.

For example, you could write:

Modern AI workspace, laptop on desk, glowing automation dashboard, clean blue and white color palette, realistic lighting, professional blog thumbnail style.

Stable Diffusion can then create an image that matches that idea.

The reason Stable Diffusion became important is that it gives users more control than many closed AI image tools. You can use different models, run local interfaces, adjust settings, install workflows, create variations, and experiment deeply.

That flexibility is powerful.

It is also the reason beginners can feel overwhelmed.

Tools like Canva AI or Midjourney may feel easier at first. Stable Diffusion gives you more control, but you need to learn more of the workflow.

The simplest explanation is this: Stable Diffusion is a powerful AI image generation ecosystem for people who want more control over image creation.

Why Stable Diffusion Matters in 2026

Stable Diffusion matters because creators need original visuals.

Stock images are everywhere. Many blog thumbnails look the same. Social media graphics feel repetitive. Premium AI image tools can become expensive if you generate a lot of images every month.

Stable Diffusion gives creators another path.

If you run it locally, you can generate images without paying per image after setup. If you use a hosted platform, the workflow is usually easier, but the platform may charge credits or subscription fees.

This flexibility is why Stable Diffusion remains important for bloggers, affiliate marketers, designers, developers, and digital creators.

Bloggers can create unique featured images. Affiliate marketers can create visual concepts for buying guides. Designers can test styles. Developers can build custom apps. Print-on-demand sellers can experiment with design ideas, while still checking licensing and platform rules.

The biggest advantage is creative control.

Instead of using the same stock photo as everyone else, you can create visuals that match your article, brand colors, niche, and audience.

If you want a more guided AI image platform, you may also like this Leonardo AI review. If you want fast design layouts after generating images, read this Canva AI review.

Is Stable Diffusion Really Free?

This is one of the most important questions in any Stable Diffusion guide 2026.

The honest answer is: Stable Diffusion can be free, but it depends on how you use it.

If you run Stable Diffusion locally on your own computer, you may be able to generate images without paying for each image. But you still need suitable hardware, storage, setup time, and technical patience.

If you use an online platform, the tool may charge credits or subscription fees because the platform is paying for servers, storage, convenience, and a simpler interface.

There is also licensing to understand.

Stability AI’s license page currently says its Community License is for researchers, developers, small businesses, and creators with less than $1M in annual revenue. Its FAQ also explains that commercial use of core models is free unless the user or organization exceeds that revenue threshold, with enterprise licensing for larger businesses.

Hugging Face model cards for Stable Diffusion 3.5 models also point users to the Stability AI Community License and tell larger organizations to contact Stability AI for enterprise licensing.

For beginners, the practical rule is simple:

  • Local generation can be free after setup.
  • Hosted tools are easier but may cost money.
  • Commercial use depends on the exact model, license, platform, and business situation.
  • Do not assume every checkpoint, LoRA, model, or hosted app has the same usage rights.

This does not make Stable Diffusion bad. It just means you should use it responsibly.

That is why this Stable Diffusion guide 2026 treats “free” as a workflow question, not a marketing promise.

How Stable Diffusion Works

You do not need to understand deep machine learning to use Stable Diffusion.

At a beginner level, the workflow looks like this:

  1. Choose where you want to use Stable Diffusion.
  2. Write a prompt describing the image.
  3. Choose or load a model.
  4. Adjust settings such as size, steps, guidance, and seed.
  5. Generate the image.
  6. Review the result.
  7. Refine the prompt or settings.
  8. Save, edit, upscale, or publish the final image.

Stable Diffusion starts from noise and gradually turns that noise into an image based on your prompt, model, and settings.

That is why the same prompt can produce different results depending on the model, seed, steps, sampler, size, and guidance scale.

This is also why Stable Diffusion can feel more technical than beginner AI image tools. More control means more choices.

As you follow this Stable Diffusion guide 2026, start with one interface and one image goal before exploring advanced workflows.

10 Ways to Use Stable Diffusion Like a Pro

The difference between random AI images and useful AI images is workflow. These practical steps will help you get stronger results.

1. Write Clear Prompts

Your prompt is the main instruction you give to Stable Diffusion.

A weak prompt might be:

AI workspace.

A stronger prompt would be:

Modern AI workspace, laptop on desk, glowing automation dashboard, clean blue and white color palette, realistic lighting, professional blog thumbnail style, high detail.

The stronger prompt explains the subject, setting, style, colors, mood, and purpose.

For blog images, include the use case in the prompt. If you need a thumbnail, say thumbnail. If you need a hero image, say hero image. If you need a product-style visual, say that clearly.

2. Use Negative Prompts Carefully

Negative prompts tell Stable Diffusion what you do not want.

A simple negative prompt could be:

blurry, distorted, low quality, messy text, extra fingers, bad anatomy, watermark, logo

Negative prompts can help reduce common issues, but do not rely on them too much. A strong positive prompt and a good model are usually more important.

3. Choose the Right Model or Checkpoint

Different Stable Diffusion models create different styles.

Some are better for realistic images. Some are better for illustration, anime, architecture, fantasy, portraits, product-style visuals, or design concepts.

This is one of the biggest reasons Stable Diffusion is powerful.

For bloggers, this matters because a tech blog thumbnail should not look like fantasy art unless that is the goal. A business article may need a clean professional style. A gaming article may need something more dramatic.

4. Learn Basic Settings

Stable Diffusion settings can look intimidating, but beginners only need to understand a few at first.

  • Image size: controls the output dimensions.
  • Steps: controls how many denoising steps the model uses.
  • Guidance scale: controls how strongly the image follows the prompt.
  • Seed: helps reproduce or vary results.
  • Sampler: affects how the image is generated.

You do not need perfect settings immediately. Start simple, generate a few images, then adjust one setting at a time.

5. Use Image-to-Image

Text-to-image starts from a written prompt. Image-to-image starts from an existing image.

This is useful when you already have a rough design, sketch, screenshot, or image idea and want Stable Diffusion to transform it.

For example, a blogger could create a rough thumbnail layout in Canva, then use image-to-image to generate a more polished visual style.

This gives you more control than starting from text alone.

6. Create Blog Thumbnails

Stable Diffusion can be useful for blog thumbnails and featured images.

For AI Sage Labs-style posts, you can create visuals for:

  • AI tool reviews
  • Blogging tutorials
  • Affiliate marketing guides
  • Automation workflows
  • AI agent explainers
  • Software comparison posts

A good thumbnail prompt should include topic, visual style, color palette, layout, and space for text.

Example:

16:9 blog thumbnail, futuristic AI design workspace, laptop with image-generation dashboard, clean blue and white tech style, professional lighting, empty space for title text, no logos, no readable text.

One important tip: do not rely on AI-generated text inside images. Add text later in Canva or another design tool for cleaner results.

7. Generate Multiple Variations

One generation is rarely enough.

Stable Diffusion becomes more useful when you generate several variations, compare them, and choose the best direction.

For example, you can generate 8 versions of a blog thumbnail concept, choose the best two, then refine the prompt around the strongest one.

This is similar to working with a designer. The first idea is not always the final design.

8. Use Upscaling and Editing

AI images often need upscaling or cleanup before publishing.

Upscaling helps improve size and clarity. Editing helps fix small issues, crop the image, adjust color, add text, or remove artifacts.

For blog use, the final workflow may look like this:

Stable Diffusion image -> upscale -> edit in Canva -> add title text -> compress -> upload to WordPress.

This creates a cleaner final image than uploading the raw output directly.

9. Build Repeatable Prompt Templates

If you create many blog images, do not write every prompt from scratch.

Create prompt templates.

Example:

16:9 blog thumbnail for an article titled [TITLE], showing [MAIN SUBJECT], clean modern tech style, blue and white color palette, professional lighting, simple composition, empty space for title text, no logos, no readable text.

This helps keep your brand consistent.

10. Combine Stable Diffusion With Other Tools

Stable Diffusion is powerful, but it does not need to do everything alone.

For bloggers, the best workflow often combines multiple tools.

Use Stable Diffusion for custom visuals. Use Canva for layout and text. Use WordPress for publishing. Use compression tools for speed. Use SEO tools to optimize the post.

This is how creators turn AI images into real publishing assets.

Best Stable Diffusion Tools and Interfaces

Stable Diffusion is a model ecosystem, not just one simple app. The tool you choose affects how easy or advanced the workflow feels.

AUTOMATIC1111 Web UI

AUTOMATIC1111 Stable Diffusion Web UI is one of the most well-known open-source interfaces for Stable Diffusion.

It gives users a browser-based interface for text-to-image, image-to-image, upscaling, extensions, and many advanced options.

It is powerful, but beginners may find setup and settings confusing at first.

ComfyUI

ComfyUI is a node-based interface for Stable Diffusion workflows.

It is popular with advanced users because it gives detailed workflow control. You can build complex image-generation pipelines and reuse workflows.

For complete beginners, it may feel more technical than AUTOMATIC1111. For advanced creators, it can be extremely powerful.

DreamStudio

DreamStudio is Stability AI’s hosted creative platform for using image-generation models without installing everything locally.

This can be easier for beginners because you do not need to manage local models, dependencies, or GPU setup.

The tradeoff is that hosted tools may use credits or paid access.

Hugging Face

Hugging Face hosts official Stability AI model pages for Stable Diffusion 3.5 models.

This is useful for developers and advanced users who want to inspect model cards, understand license notes, download models, or integrate them into workflows.

Stability Matrix and Other Launchers

Some users prefer launcher tools that make it easier to install and manage different Stable Diffusion interfaces.

This can reduce setup friction, but you should still download software carefully and use trusted sources.

Stable Diffusion vs Other AI Image Tools

Stable Diffusion is powerful, but it is not always the best choice for every creator.

Stable Diffusion vs Midjourney

Midjourney is often easier for beautiful artistic results with less technical setup.

Stable Diffusion gives more control, local options, model flexibility, and customization.

If you want quick premium-looking art, Midjourney may feel easier. If you want control and customization, Stable Diffusion is stronger.

Stable Diffusion vs DALL-E

DALL-E is beginner-friendly and easy to use through supported apps.

Stable Diffusion is more flexible for local workflows, model selection, and advanced customization.

For beginners, DALL-E may be simpler. For advanced creators, Stable Diffusion offers more control.

Stable Diffusion vs Leonardo AI

Leonardo AI gives a more guided creative platform with image-generation workflows, presets, and user-friendly tools.

Stable Diffusion is more open and customizable, especially when run locally or through advanced interfaces.

Stable Diffusion vs Canva AI

Canva AI is better for fast beginner-friendly graphics, layouts, and social designs.

Stable Diffusion is better for custom image generation and deeper creative control.

Many bloggers can use both. Generate visuals with Stable Diffusion, then finish the layout in Canva.

Best Use Cases for Stable Diffusion

Stable Diffusion is useful when you need custom visuals and creative control.

Bloggers

Bloggers can use Stable Diffusion for featured images, thumbnails, tutorial visuals, comparison graphics, and article illustrations.

Affiliate Marketers

Affiliate marketers can create custom visuals for review posts, buying guides, social posts, and Pinterest content.

Designers

Designers can use Stable Diffusion for concept art, style exploration, mood boards, and rough creative directions.

Developers

Developers can use Stable Diffusion in custom apps, workflows, and creative automation systems, depending on the license and model terms.

Print-on-Demand Sellers

Print-on-demand sellers can use AI images as idea starters for designs, but they should carefully check licensing, originality, trademark issues, and platform rules before selling.

How Bloggers Can Use Stable Diffusion

Stable Diffusion can be especially useful for bloggers who want original visuals without relying on stock image libraries.

For example, a blogger can use it to create:

  • Featured images for blog posts
  • AI tool review thumbnails
  • Pinterest pins
  • YouTube thumbnail backgrounds
  • Concept images for tutorials
  • Visuals for social media posts
  • Digital product mockups

The best workflow is to generate the visual background with Stable Diffusion, then add readable text and branding in Canva or another design tool.

For example:

Stable Diffusion -> Canva layout -> title text -> brand colors -> compression -> WordPress upload.

This gives you a cleaner final result than using raw AI output alone.

Build Your AI Image Blog

If you want to publish AI image tutorials, tool reviews, prompt guides, and affiliate content, start with a reliable website where your content can rank over time.

Start your AI image blog with Hostinger

How to Make Money With Stable Diffusion

Stable Diffusion does not automatically make money for you. But it can support several creative and online business models.

Freelance AI Design Services

You can offer AI image generation, thumbnail backgrounds, social media visuals, concept art, or creative direction services.

Clients may need help because Stable Diffusion setup and prompt writing can be confusing.

Blogging and Affiliate Marketing

You can use Stable Diffusion to create better blog visuals for tool reviews, tutorials, comparisons, and social promotions.

Better visuals can improve trust and click-through rates when used properly.

Digital Products

You can use AI-generated visuals as part of digital products such as templates, planners, graphics packs, or educational resources, as long as the license and platform rules allow it.

Print-on-Demand

Stable Diffusion can help generate design ideas for shirts, posters, stickers, and other products.

Be careful with copyrighted characters, brand names, celebrity likenesses, trademarks, and model licensing. Do not assume every generated image is safe to sell.

Content Creation Services

Creators can offer AI-assisted visual content for bloggers, YouTubers, affiliate marketers, and small businesses.

Need Stable Diffusion Setup Help?

If Stable Diffusion setup feels too technical, you can hire freelancers to help with installation, prompt workflows, image generation, or blog visual systems.

Get Stable Diffusion setup help on Fiverr

Who Should Use Stable Diffusion?

Stable Diffusion is best for users who want creative control.

It is a good fit for:

  • Bloggers who need original visuals
  • AI creators who want free or low-cost image generation
  • Designers who want more control over styles
  • Developers building custom image workflows
  • Print-on-demand sellers testing design ideas
  • Affiliate marketers creating unique thumbnails
  • Advanced users who enjoy experimenting

If you like control and customization, Stable Diffusion is worth learning.

Who Should Skip Stable Diffusion?

Stable Diffusion is not the easiest tool for everyone.

You may want to skip it if:

  • You want the simplest possible AI image tool
  • You do not want to learn settings or models
  • Your computer cannot handle local generation
  • You dislike technical setup
  • You need instant polished graphics with templates
  • You do not want to check licensing rules

For simple social graphics, Canva AI may be easier. For quick polished art, Midjourney may feel easier. For full control, Stable Diffusion is stronger.

The goal of this Stable Diffusion guide 2026 is not to make the tool sound effortless. The goal is to help you use it in a cleaner, safer, and more practical way.

Common Stable Diffusion Mistakes Beginners Make

Using Prompts That Are Too Short

Short prompts can work, but they often create random results. Add style, subject, lighting, composition, color palette, and purpose.

Trying Too Many Models Too Soon

Start with one good model and learn how it behaves. Switching models constantly makes it harder to understand what works.

Ignoring Image Cleanup

Raw AI images often need cropping, upscaling, color adjustment, or text added manually.

Using AI Text Inside Images

AI-generated text inside images is often messy. Add titles and readable text later in Canva or another design tool.

Forgetting Licensing

Always check the license for the model, checkpoint, LoRA, or platform you use, especially for commercial projects.

Expecting Perfect Results Instantly

Stable Diffusion rewards experimentation. Generate variations, compare results, and refine the prompt.

Recommended Resource Before the Verdict

Want Stable Diffusion Prompt Templates?

If you want to create blog thumbnails faster, build a small prompt template pack for featured images, Pinterest pins, YouTube backgrounds, product visuals, and comparison post graphics.

Access the Stable Diffusion Blog Visual Prompt Pack

Recommended Book for AI Image Creators

If you want to understand AI creativity more deeply, a useful book to explore is Co-Intelligence: Living and Working with AI by Ethan Mollick.

It is not only about image generation, but it helps creators understand how to work with AI as a creative partner instead of treating it like a magic button.

This mindset is useful when learning Stable Diffusion because the best results come from human direction, testing and editing.

Recommended Reading

If you are learning AI creativity, this book can help you think more clearly about using AI as part of real work.

Check Co-Intelligence on Amazon

Stable Diffusion Guide 2026 Verdict: Is It Worth Learning?

After researching this Stable Diffusion guide 2026, my honest verdict is that Stable Diffusion is worth learning if you want creative control and low-cost image generation.

It is not the easiest AI image tool. It is not always beginner-friendly. It may require setup, hardware, model management and patience.

But if you are a blogger, creator, designer, affiliate marketer or developer who wants original visuals, Stable Diffusion is one of the most powerful options available.

It is best for people who want more than basic templates. It is especially useful if you plan to create many images and want control over style, workflow and output.

If you want the easiest option, start with Canva AI or a hosted tool. If you want full control, learn Stable Diffusion.

Build a Better AI Visual Workflow

Use Stable Diffusion for custom visuals, Canva for final layout, and WordPress for publishing content that can rank and convert.

Hire Stable Diffusion experts on Fiverr

Frequently Asked Questions

Is Stable Diffusion free?

Stable Diffusion can be free if you run it locally on your own computer, but hosted platforms may charge credits or subscription fees. Commercial usage should be checked against the current model license.

Do I need a powerful computer for Stable Diffusion?

Local Stable Diffusion works best with capable hardware, especially a good GPU. If your computer is not powerful enough, you can use hosted tools instead.

Is Stable Diffusion better than Midjourney?

Stable Diffusion is better for control, customization and local workflows. Midjourney is often easier for quickly creating polished artistic images.

Can bloggers use Stable Diffusion?

Yes. Bloggers can use Stable Diffusion to create featured images, thumbnails, Pinterest graphics, YouTube backgrounds and custom visuals for articles.

Can I use Stable Diffusion images commercially?

Commercial use depends on the model, license, checkpoint, platform, and your business situation. Always check the current license terms before using Stable Diffusion images commercially.

What is the best Stable Diffusion interface for beginners?

AUTOMATIC1111 is popular and powerful, but setup can be technical. Hosted tools such as DreamStudio may be easier for beginners. ComfyUI is better for advanced workflow control.

Can Stable Diffusion create blog thumbnails?

Yes. Stable Diffusion can create strong visual backgrounds for blog thumbnails. For best results, add readable title text later in Canva or another design tool.

Can I make money with Stable Diffusion?

Yes, Stable Diffusion can support freelancing, blogging, affiliate marketing, digital products, print-on-demand, and content creation services. Income depends on your skills, niche, licensing, platform rules, and consistency.

Conclusion

This Stable Diffusion guide 2026 shows why Stable Diffusion remains one of the most powerful AI image generation options for creators.

It can help you create blog visuals, thumbnails, social graphics, digital art, product concepts, and custom creative assets with much more control than many closed tools.

But Stable Diffusion is not the easiest path. You need to learn prompts, settings, models, image cleanup, and licensing basics. Beginners should start simple and improve over time.

If you want fast beginner graphics, use Canva AI. If you want beautiful guided art, try Midjourney. If you want maximum control and free local generation, Stable Diffusion is worth learning.

The best approach is to use Stable Diffusion as part of a practical content workflow. Generate custom visuals, polish them in Canva, publish them on your blog and use them to make your content more original and useful.

How We Checked This Guide

Before updating this guide, we checked Stability AI’s official license page, Stable Diffusion 3.5 announcement, and official Hugging Face model cards for Stable Diffusion 3.5 Large, Large Turbo and Medium. This helps keep the guide practical and safer for creators who may use images commercially.

Affiliate Disclosure

As an Amazon Associate, I earn from qualifying purchases. Some links in this article are affiliate links, which means I may earn a commission at no extra cost to you if you buy through them. I only recommend tools, books, and services that may help beginners, creators, and online business owners create better content or grow their work more effectively.