AI images are easy to generate now, but good AI images still take skill.
That is where many beginners get disappointed. They type one short prompt, get a strange result, and assume the tool is not useful. Or they use a paid image generator for a few weeks and realize credits disappear quickly when they need blog thumbnails, Pinterest graphics, YouTube backgrounds, social posts, and product visuals.
Stable Diffusion is different because it gives creators more control.
You can use it through local tools, hosted platforms, open-source interfaces, and advanced workflows. For bloggers and creators, that means you can create custom visuals instead of depending only on stock images or expensive credit-based tools.
But Stable Diffusion is not always beginner-simple. You need to understand prompts, models, settings, image cleanup, and licensing basics if you want professional results.
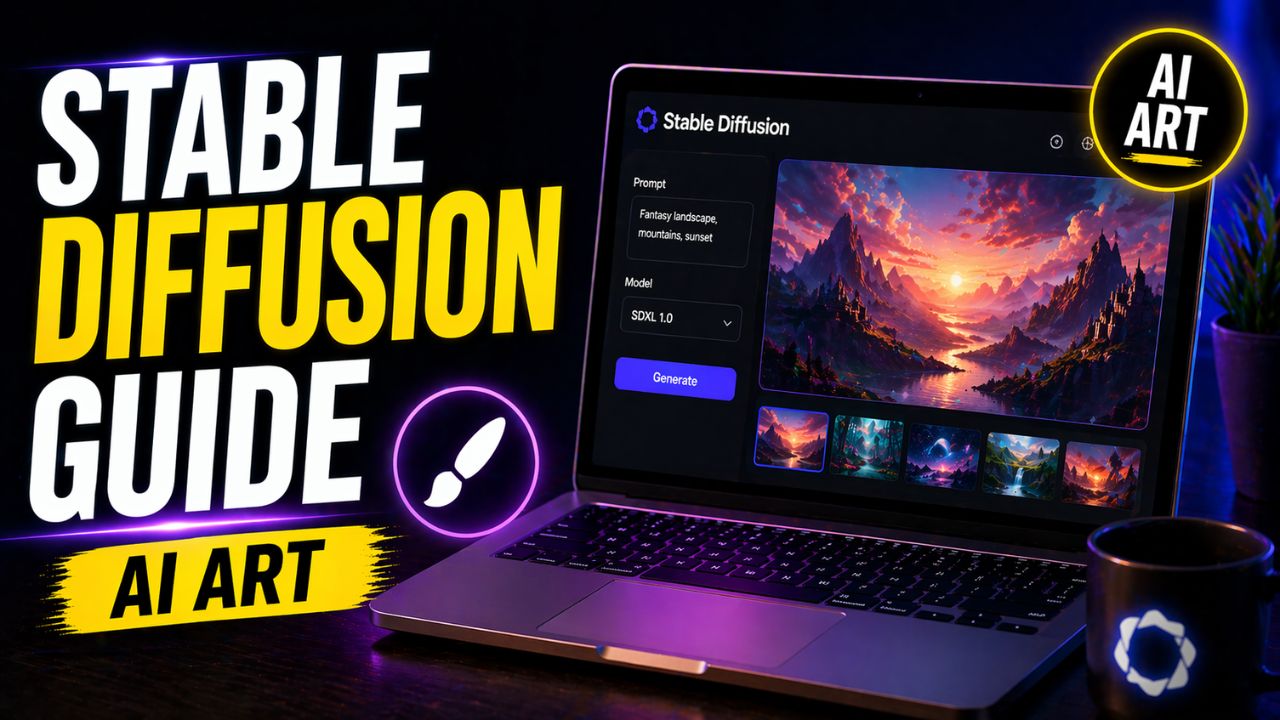
In this Stable Diffusion guide 2026, you will learn what Stable Diffusion is, how it works, whether it is really free, how to use it like a pro, which tools beginners should know, how bloggers can use it, how to make money with it, and which mistakes to avoid.
Stable Diffusion Guide 2026: What Is Stable Diffusion?
Stable Diffusion is a family of AI image generation models that can create images from text prompts.
In simple words, you describe the image you want, and Stable Diffusion generates a visual based on that description.
For example, you could write:
Modern AI workspace, laptop on desk, glowing automation dashboard, clean blue and white color palette, realistic lighting, professional blog thumbnail style.
Stable Diffusion can then create an image that matches that idea.
The reason Stable Diffusion became important is that it gives users more control than many closed AI image tools. You can use different models, run local interfaces, adjust settings, install workflows, create variations, and experiment deeply.
That flexibility is powerful.
It is also the reason beginners can feel overwhelmed.
Tools like Canva AI or Midjourney may feel easier at first. Stable Diffusion gives you more control, but you need to learn more of the workflow.
The simplest explanation is this: Stable Diffusion is a powerful AI image generation ecosystem for people who want more control over image creation.
Why Stable Diffusion Matters in 2026
Stable Diffusion matters because creators need original visuals.
Stock images are everywhere. Many blog thumbnails look the same. Social media graphics feel repetitive. Premium AI image tools can become expensive if you generate a lot of images every month.
Stable Diffusion gives creators another path.
If you run it locally, you can generate images without paying per image after setup. If you use a hosted platform, the workflow is usually easier, but the platform may charge credits or subscription fees.
This flexibility is why Stable Diffusion remains important for bloggers, affiliate marketers, designers, developers, and digital creators.
Bloggers can create unique featured images. Affiliate marketers can create visual concepts for buying guides. Designers can test styles. Developers can build custom apps. Print-on-demand sellers can experiment with design ideas, while still checking licensing and platform rules.
The biggest advantage is creative control.
Instead of using the same stock photo as everyone else, you can create visuals that match your article, brand colors, niche, and audience.
If you want a more guided AI image platform, you may also like this Leonardo AI review. If you want fast design layouts after generating images, read this Canva AI review.
Is Stable Diffusion Really Free?
This is one of the most important questions in any Stable Diffusion guide 2026.
The honest answer is: Stable Diffusion can be free, but it depends on how you use it.
If you run Stable Diffusion locally on your own computer, you may be able to generate images without paying for each image. But you still need suitable hardware, storage, setup time, and technical patience.
If you use an online platform, the tool may charge credits or subscription fees because the platform is paying for servers, storage, convenience, and a simpler interface.
There is also licensing to understand.
Stability AI’s license page currently says its Community License is for researchers, developers, small businesses, and creators with less than $1M in annual revenue. Its FAQ also explains that commercial use of core models is free unless the user or organization exceeds that revenue threshold, with enterprise licensing for larger businesses.
Hugging Face model cards for Stable Diffusion 3.5 models also point users to the Stability AI Community License and tell larger organizations to contact Stability AI for enterprise licensing.
For beginners, the practical rule is simple:
- Local generation can be free after setup.
- Hosted tools are easier but may cost money.
- Commercial use depends on the exact model, license, platform, and business situation.
- Do not assume every checkpoint, LoRA, model, or hosted app has the same usage rights.
This does not make Stable Diffusion bad. It just means you should use it responsibly.
That is why this Stable Diffusion guide 2026 treats “free” as a workflow question, not a marketing promise.
How Stable Diffusion Works
You do not need to understand deep machine learning to use Stable Diffusion.
At a beginner level, the workflow looks like this:
- Choose where you want to use Stable Diffusion.
- Write a prompt describing the image.
- Choose or load a model.
- Adjust settings such as size, steps, guidance, and seed.
- Generate the image.
- Review the result.
- Refine the prompt or settings.
- Save, edit, upscale, or publish the final image.
Stable Diffusion starts from noise and gradually turns that noise into an image based on your prompt, model, and settings.
That is why the same prompt can produce different results depending on the model, seed, steps, sampler, size, and guidance scale.
This is also why Stable Diffusion can feel more technical than beginner AI image tools. More control means more choices.
As you follow this Stable Diffusion guide 2026, start with one interface and one image goal before exploring advanced workflows.
10 Ways to Use Stable Diffusion Like a Pro
The difference between random AI images and useful AI images is workflow. These practical steps will help you get stronger results.
1. Write Clear Prompts
Your prompt is the main instruction you give to Stable Diffusion.
A weak prompt might be:
AI workspace.
A stronger prompt would be:
Modern AI workspace, laptop on desk, glowing automation dashboard, clean blue and white color palette, realistic lighting, professional blog thumbnail style, high detail.
The stronger prompt explains the subject, setting, style, colors, mood, and purpose.
For blog images, include the use case in the prompt. If you need a thumbnail, say thumbnail. If you need a hero image, say hero image. If you need a product-style visual, say that clearly.
2. Use Negative Prompts Carefully
Negative prompts tell Stable Diffusion what you do not want.
A simple negative prompt could be:
blurry, distorted, low quality, messy text, extra fingers, bad anatomy, watermark, logo
Negative prompts can help reduce common issues, but do not rely on them too much. A strong positive prompt and a good model are usually more important.
3. Choose the Right Model or Checkpoint
Different Stable Diffusion models create different styles.
Some are better for realistic images. Some are better for illustration, anime, architecture, fantasy, portraits, product-style visuals, or design concepts.
This is one of the biggest reasons Stable Diffusion is powerful.
For bloggers, this matters because a tech blog thumbnail should not look like fantasy art unless that is the goal. A business article may need a clean professional style. A gaming article may need something more dramatic.
4. Learn Basic Settings
Stable Diffusion settings can look intimidating, but beginners only need to understand a few at first.
- Image size: controls the output dimensions.
- Steps: controls how many denoising steps the model uses.
- Guidance scale: controls how strongly the image follows the prompt.
- Seed: helps reproduce or vary results.
- Sampler: affects how the image is generated.
You do not need perfect settings immediately. Start simple, generate a few images, then adjust one setting at a time.
5. Use Image-to-Image
Text-to-image starts from a written prompt. Image-to-image starts from an existing image.
This is useful when you already have a rough design, sketch, screenshot, or image idea and want Stable Diffusion to transform it.
For example, a blogger could create a rough thumbnail layout in Canva, then use image-to-image to generate a more polished visual style.
This gives you more control than starting from text alone.
6. Create Blog Thumbnails
Stable Diffusion can be useful for blog thumbnails and featured images.
For AI Sage Labs-style posts, you can create visuals for:
- AI tool reviews
- Blogging tutorials
- Affiliate marketing guides
- Automation workflows
- AI agent explainers
- Software comparison posts
A good thumbnail prompt should include topic, visual style, color palette, layout, and space for text.
Example:
16:9 blog thumbnail, futuristic AI design workspace, laptop with image-generation dashboard, clean blue and white tech style, professional lighting, empty space for title text, no logos, no readable text.
One important tip: do not rely on AI-generated text inside images. Add text later in Canva or another design tool for cleaner results.
7. Generate Multiple Variations
One generation is rarely enough.
Stable Diffusion becomes more useful when you generate several variations, compare them, and choose the best direction.
For example, you can generate 8 versions of a blog thumbnail concept, choose the best two, then refine the prompt around the strongest one.
This is similar to working with a designer. The first idea is not always the final design.
8. Use Upscaling and Editing
AI images often need upscaling or cleanup before publishing.
Upscaling helps improve size and clarity. Editing helps fix small issues, crop the image, adjust color, add text, or remove artifacts.
For blog use, the final workflow may look like this:
Stable Diffusion image -> upscale -> edit in Canva -> add title text -> compress -> upload to WordPress.
This creates a cleaner final image than uploading the raw output directly.
9. Build Repeatable Prompt Templates
If you create many blog images, do not write every prompt from scratch.
Create prompt templates.
Example:
16:9 blog thumbnail for an article titled [TITLE], showing [MAIN SUBJECT], clean modern tech style, blue and white color palette, professional lighting, simple composition, empty space for title text, no logos, no readable text.
This helps keep your brand consistent.
10. Combine Stable Diffusion With Other Tools
Stable Diffusion is powerful, but it does not need to do everything alone.
For bloggers, the best workflow often combines multiple tools.
Use Stable Diffusion for custom visuals. Use Canva for layout and text. Use WordPress for publishing. Use compression tools for speed. Use SEO tools to optimize the post.
This is how creators turn AI images into real publishing assets.
Best Stable Diffusion Tools and Interfaces
Stable Diffusion is a model ecosystem, not just one simple app. The tool you choose affects how easy or advanced the workflow feels.
AUTOMATIC1111 Web UI
AUTOMATIC1111 Stable Diffusion Web UI is one of the most well-known open-source interfaces for Stable Diffusion.
It gives users a browser-based interface for text-to-image, image-to-image, upscaling, extensions, and many advanced options.
It is powerful, but beginners may find setup and settings confusing at first.
ComfyUI
ComfyUI is a node-based interface for Stable Diffusion workflows.
It is popular with advanced users because it gives detailed workflow control. You can build complex image-generation pipelines and reuse workflows.
For complete beginners, it may feel more technical than AUTOMATIC1111. For advanced creators, it can be extremely powerful.
DreamStudio
DreamStudio is Stability AI’s hosted creative platform for using image-generation models without installing everything locally.
This can be easier for beginners because you do not need to manage local models, dependencies, or GPU setup.
The tradeoff is that hosted tools may use credits or paid access.
Hugging Face
Hugging Face hosts official Stability AI model pages for Stable Diffusion 3.5 models.
This is useful for developers and advanced users who want to inspect model cards, understand license notes, download models, or integrate them into workflows.
Stability Matrix and Other Launchers
Some users prefer launcher tools that make it easier to install and manage different Stable Diffusion interfaces.
This can reduce setup friction, but you should still download software carefully and use trusted sources.
Stable Diffusion vs Other AI Image Tools
Stable Diffusion is powerful, but it is not always the best choice for every creator.
Stable Diffusion vs Midjourney
Midjourney is often easier for beautiful artistic results with less technical setup.
Stable Diffusion gives more control, local options, model flexibility, and customization.
If you want quick premium-looking art, Midjourney may feel easier. If you want control and customization, Stable Diffusion is stronger.
Stable Diffusion vs DALL-E
DALL-E is beginner-friendly and easy to use through supported apps.
Stable Diffusion is more flexible for local workflows, model selection, and advanced customization.
For beginners, DALL-E may be simpler. For advanced creators, Stable Diffusion offers more control.
Stable Diffusion vs Leonardo AI
Leonardo AI gives a more guided creative platform with image-generation workflows, presets, and user-friendly tools.
Stable Diffusion is more open and customizable, especially when run locally or through advanced interfaces.
Stable Diffusion vs Canva AI
Canva AI is better for fast beginner-friendly graphics, layouts, and social designs.
Stable Diffusion is better for custom image generation and deeper creative control.
Many bloggers can use both. Generate visuals with Stable Diffusion, then finish the layout in Canva.
Best Use Cases for Stable Diffusion
Stable Diffusion is useful when you need custom visuals and creative control.
Bloggers
Bloggers can use Stable Diffusion for featured images, thumbnails, tutorial visuals, comparison graphics, and article illustrations.
Affiliate Marketers
Affiliate marketers can create custom visuals for review posts, buying guides, social posts, and Pinterest content.
Designers
Designers can use Stable Diffusion for concept art, style exploration, mood boards, and rough creative directions.
Developers
Developers can use Stable Diffusion in custom apps, workflows, and creative automation systems, depending on the license and model terms.
Print-on-Demand Sellers
Print-on-demand sellers can use AI images as idea starters for designs, but they should carefully check licensing, originality, trademark issues, and platform rules before selling.
How Bloggers Can Use Stable Diffusion
Stable Diffusion can be especially useful for bloggers who want original visuals without relying on stock image libraries.
For example, a blogger can use it to create:
- Featured images for blog posts
- AI tool review thumbnails
- Pinterest pins
- YouTube thumbnail backgrounds
- Concept images for tutorials
- Visuals for social media posts
- Digital product mockups
The best workflow is to generate the visual background with Stable Diffusion, then add readable text and branding in Canva or another design tool.
For example:
Stable Diffusion -> Canva layout -> title text -> brand colors -> compression -> WordPress upload.
This gives you a cleaner final result than using raw AI output alone.
Build Your AI Image Blog
If you want to publish AI image tutorials, tool reviews, prompt guides, and affiliate content, start with a reliable website where your content can rank over time.
How to Make Money With Stable Diffusion
Stable Diffusion does not automatically make money for you. But it can support several creative and online business models.
Freelance AI Design Services
You can offer AI image generation, thumbnail backgrounds, social media visuals, concept art, or creative direction services.
Clients may need help because Stable Diffusion setup and prompt writing can be confusing.
Blogging and Affiliate Marketing
You can use Stable Diffusion to create better blog visuals for tool reviews, tutorials, comparisons, and social promotions.
Better visuals can improve trust and click-through rates when used properly.
Digital Products
You can use AI-generated visuals as part of digital products such as templates, planners, graphics packs, or educational resources, as long as the license and platform rules allow it.
Print-on-Demand
Stable Diffusion can help generate design ideas for shirts, posters, stickers, and other products.
Be careful with copyrighted characters, brand names, celebrity likenesses, trademarks, and model licensing. Do not assume every generated image is safe to sell.
Content Creation Services
Creators can offer AI-assisted visual content for bloggers, YouTubers, affiliate marketers, and small businesses.
Need Stable Diffusion Setup Help?
If Stable Diffusion setup feels too technical, you can hire freelancers to help with installation, prompt workflows, image generation, or blog visual systems.
Who Should Use Stable Diffusion?
Stable Diffusion is best for users who want creative control.
It is a good fit for:
- Bloggers who need original visuals
- AI creators who want free or low-cost image generation
- Designers who want more control over styles
- Developers building custom image workflows
- Print-on-demand sellers testing design ideas
- Affiliate marketers creating unique thumbnails
- Advanced users who enjoy experimenting
If you like control and customization, Stable Diffusion is worth learning.
Who Should Skip Stable Diffusion?
Stable Diffusion is not the easiest tool for everyone.
You may want to skip it if:
- You want the simplest possible AI image tool
- You do not want to learn settings or models
- Your computer cannot handle local generation
- You dislike technical setup
- You need instant polished graphics with templates
- You do not want to check licensing rules
For simple social graphics, Canva AI may be easier. For quick polished art, Midjourney may feel easier. For full control, Stable Diffusion is stronger.
The goal of this Stable Diffusion guide 2026 is not to make the tool sound effortless. The goal is to help you use it in a cleaner, safer, and more practical way.
Common Stable Diffusion Mistakes Beginners Make
Using Prompts That Are Too Short
Short prompts can work, but they often create random results. Add style, subject, lighting, composition, color palette, and purpose.
Trying Too Many Models Too Soon
Start with one good model and learn how it behaves. Switching models constantly makes it harder to understand what works.
Ignoring Image Cleanup
Raw AI images often need cropping, upscaling, color adjustment, or text added manually.
Using AI Text Inside Images
AI-generated text inside images is often messy. Add titles and readable text later in Canva or another design tool.
Forgetting Licensing
Always check the license for the model, checkpoint, LoRA, or platform you use, especially for commercial projects.
Expecting Perfect Results Instantly
Stable Diffusion rewards experimentation. Generate variations, compare results, and refine the prompt.
Recommended Resource Before the Verdict
Want Stable Diffusion Prompt Templates?
If you want to create blog thumbnails faster, build a small prompt template pack for featured images, Pinterest pins, YouTube backgrounds, product visuals, and comparison post graphics.
Access the Stable Diffusion Blog Visual Prompt Pack
Recommended Book for AI Image Creators
If you want to understand AI creativity more deeply, a useful book to explore is Co-Intelligence: Living and Working with AI by Ethan Mollick.
It is not only about image generation, but it helps creators understand how to work with AI as a creative partner instead of treating it like a magic button.
This mindset is useful when learning Stable Diffusion because the best results come from human direction, testing and editing.
Recommended Reading
If you are learning AI creativity, this book can help you think more clearly about using AI as part of real work.
Stable Diffusion Guide 2026 Verdict: Is It Worth Learning?
After researching this Stable Diffusion guide 2026, my honest verdict is that Stable Diffusion is worth learning if you want creative control and low-cost image generation.
It is not the easiest AI image tool. It is not always beginner-friendly. It may require setup, hardware, model management and patience.
But if you are a blogger, creator, designer, affiliate marketer or developer who wants original visuals, Stable Diffusion is one of the most powerful options available.
It is best for people who want more than basic templates. It is especially useful if you plan to create many images and want control over style, workflow and output.
If you want the easiest option, start with Canva AI or a hosted tool. If you want full control, learn Stable Diffusion.
Build a Better AI Visual Workflow
Use Stable Diffusion for custom visuals, Canva for final layout, and WordPress for publishing content that can rank and convert.
Frequently Asked Questions
Is Stable Diffusion free?
Stable Diffusion can be free if you run it locally on your own computer, but hosted platforms may charge credits or subscription fees. Commercial usage should be checked against the current model license.
Do I need a powerful computer for Stable Diffusion?
Local Stable Diffusion works best with capable hardware, especially a good GPU. If your computer is not powerful enough, you can use hosted tools instead.
Is Stable Diffusion better than Midjourney?
Stable Diffusion is better for control, customization and local workflows. Midjourney is often easier for quickly creating polished artistic images.
Can bloggers use Stable Diffusion?
Yes. Bloggers can use Stable Diffusion to create featured images, thumbnails, Pinterest graphics, YouTube backgrounds and custom visuals for articles.
Can I use Stable Diffusion images commercially?
Commercial use depends on the model, license, checkpoint, platform, and your business situation. Always check the current license terms before using Stable Diffusion images commercially.
What is the best Stable Diffusion interface for beginners?
AUTOMATIC1111 is popular and powerful, but setup can be technical. Hosted tools such as DreamStudio may be easier for beginners. ComfyUI is better for advanced workflow control.
Can Stable Diffusion create blog thumbnails?
Yes. Stable Diffusion can create strong visual backgrounds for blog thumbnails. For best results, add readable title text later in Canva or another design tool.
Can I make money with Stable Diffusion?
Yes, Stable Diffusion can support freelancing, blogging, affiliate marketing, digital products, print-on-demand, and content creation services. Income depends on your skills, niche, licensing, platform rules, and consistency.
Conclusion
This Stable Diffusion guide 2026 shows why Stable Diffusion remains one of the most powerful AI image generation options for creators.
It can help you create blog visuals, thumbnails, social graphics, digital art, product concepts, and custom creative assets with much more control than many closed tools.
But Stable Diffusion is not the easiest path. You need to learn prompts, settings, models, image cleanup, and licensing basics. Beginners should start simple and improve over time.
If you want fast beginner graphics, use Canva AI. If you want beautiful guided art, try Midjourney. If you want maximum control and free local generation, Stable Diffusion is worth learning.
The best approach is to use Stable Diffusion as part of a practical content workflow. Generate custom visuals, polish them in Canva, publish them on your blog and use them to make your content more original and useful.
How We Checked This Guide
Before updating this guide, we checked Stability AI’s official license page, Stable Diffusion 3.5 announcement, and official Hugging Face model cards for Stable Diffusion 3.5 Large, Large Turbo and Medium. This helps keep the guide practical and safer for creators who may use images commercially.
- Stability AI License
- Stability AI: Introducing Stable Diffusion 3.5
- Stable Diffusion 3.5 Large on Hugging Face
- Stable Diffusion 3.5 Large Turbo on Hugging Face
- Stable Diffusion 3.5 Medium on Hugging Face
Affiliate Disclosure
As an Amazon Associate, I earn from qualifying purchases. Some links in this article are affiliate links, which means I may earn a commission at no extra cost to you if you buy through them. I only recommend tools, books, and services that may help beginners, creators, and online business owners create better content or grow their work more effectively.